
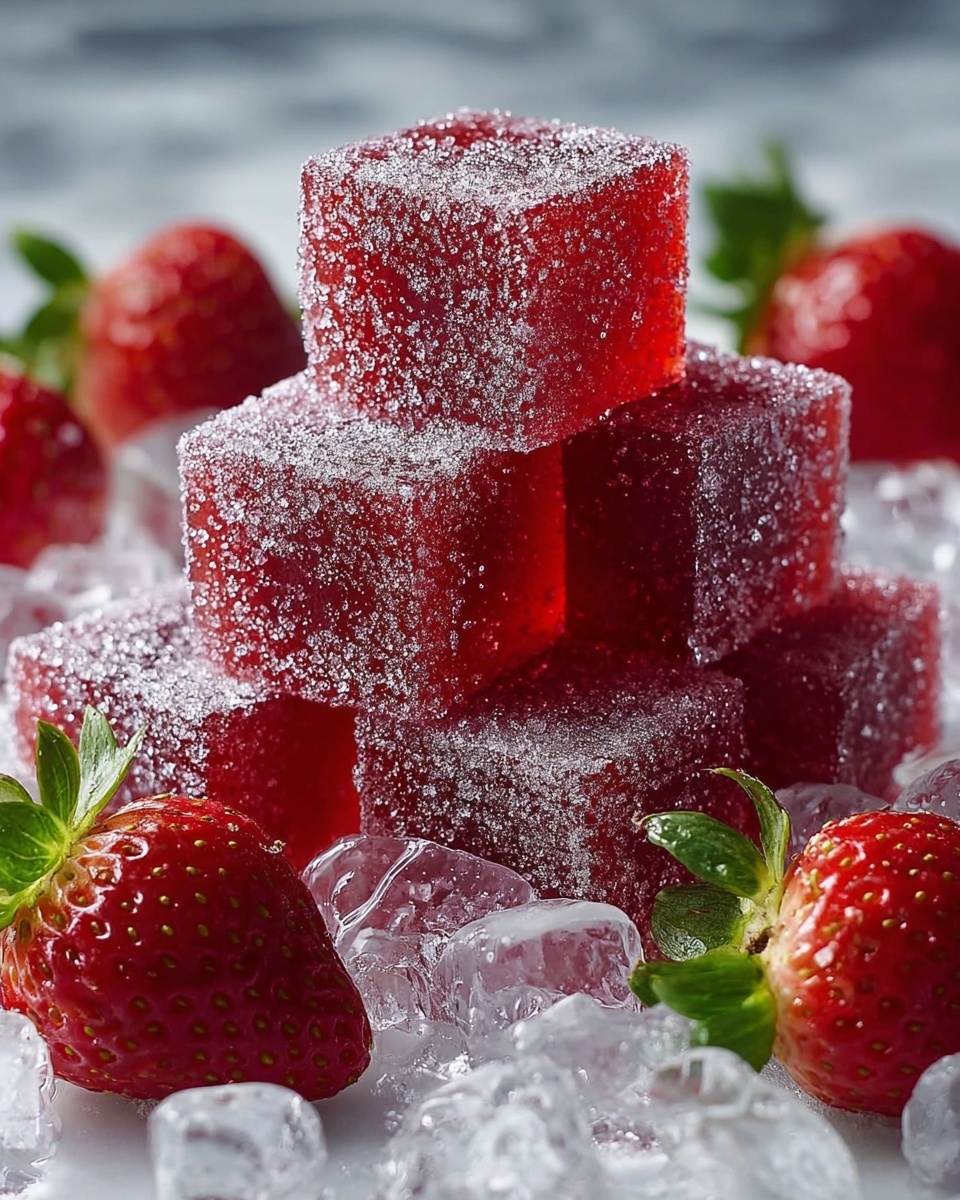
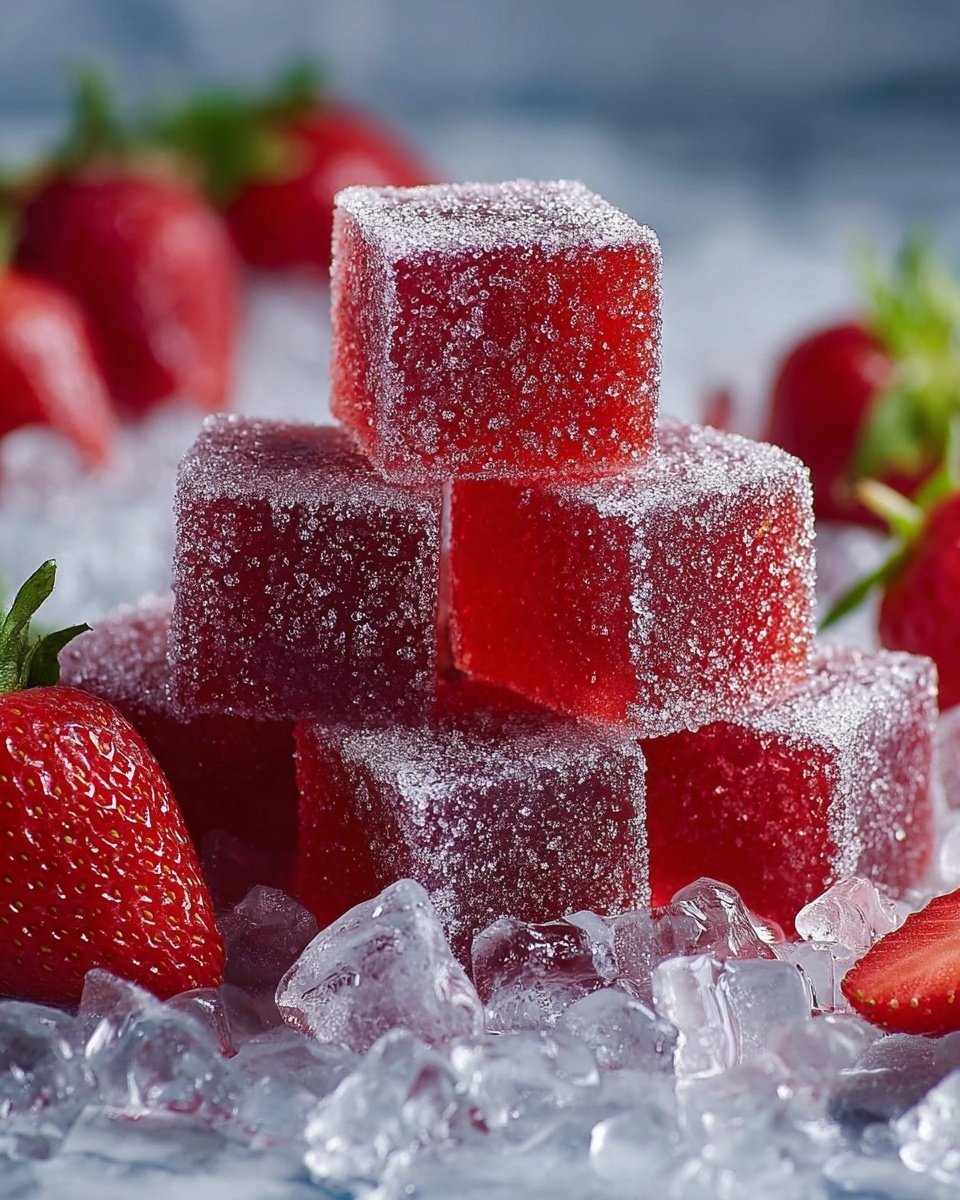
If you are on the hunt for a delightful treat that combines the perfect balance of sweet and tart, look no further than this Tangy Homemade Sour Strawberry Gummies Recipe. Bursting with vibrant strawberry flavor and a tantalizing sour kick, these gummies offer a wholesome, fun alternative to store-bought candy. Whether you’re craving a nostalgic snack or a healthy candy option, this recipe will have you hooked from the very first chewy bite. Plus, making these gummies at home means you control every ingredient, ensuring freshness and unbeatable flavor.
Ingredients You’ll Need
Gathering these simple, yet essential ingredients is the first joyful step toward creating your own batch of Tangy Homemade Sour Strawberry Gummies Recipe. Each ingredient plays a crucial role in delivering the perfect texture, natural sweetness, and that iconic tangy zing we love in these gummies.
- Fresh or frozen strawberries (1 cup, hulled): The star of the show, strawberries bring vibrant color and natural sweetness.
- Water (1/2 cup): Helps soften the strawberries for blending and creates the right consistency.
- Lemon juice (2 tablespoons): Adds a fresh, zesty brightness that amplifies the tangy flavor.
- Honey or maple syrup (2–3 tablespoons): Adjusts sweetness naturally without overpowering the fruit’s essence.
- Unflavored gelatin (3 tablespoons): Essential for that perfect gummy texture and chewiness.
- Granulated sugar (1/4 cup): Used for the sour coating to add sweetness and crunch.
- Citric acid (1 tablespoon): The secret ingredient that delivers that irresistible sour punch on the outside.
How to Make Tangy Homemade Sour Strawberry Gummies Recipe
Step 1: Cook and Puree the Strawberries
Start by combining your strawberries and water in a small saucepan. Cooking them over medium heat for about 5 to 7 minutes softens the fruit perfectly. This process unlocks the natural juices and sweet essence of the strawberries, making it easier to blend into a silky puree.
Step 2: Blend Into a Smooth Puree
Once softened, puree the strawberries using an immersion blender right in the pot, or carefully transfer the mixture to a standard blender. Achieving a smooth consistency is key to perfect gummies with no lumps.
Step 3: Add Flavor Enhancements
Return the puree to the saucepan and gently mix in the fresh lemon juice and your choice of honey or maple syrup. The lemon juice adds brightness, while the sweetener balances the sour notes beautifully. Taste the mixture and adjust the sweetness to your liking.
Step 4: Bloom and Dissolve the Gelatin
Sprinkle the unflavored gelatin evenly over the warm strawberry mixture and let it sit for 1 to 2 minutes. This blooming step allows the gelatin granules to absorb liquid and dissolve smoothly. Then, stir constantly over low heat until the gelatin is completely melted—be sure not to let it boil, as that can ruin the texture.
Step 5: Mold and Chill the Gummies
Pour the luscious strawberry mixture into silicone molds for gummy shapes or a parchment-lined baking dish if you prefer cutting them later. Refrigerate for a minimum of 2 hours until fully set, giving your gummies that firm, chewy delight.
Step 6: Coat with the Tangy Sugar Mix
After your gummies have set, remove them from molds or cut into bite-sized pieces. In a small bowl, combine granulated sugar and citric acid. Toss the gummies gently in this sour sugar coating just before serving to add an irresistible tangy exterior.
How to Serve Tangy Homemade Sour Strawberry Gummies Recipe
Garnishes
For an extra touch of fun, dust your gummies lightly with powdered sugar or a pinch of extra citric acid to boost that pucker factor. You can also sprinkle finely chopped freeze-dried strawberries on top as a crunchy, colorful garnish that doubles the strawberry appeal.
Side Dishes
While gummies shine best as a standalone snack, pairing them with a cool glass of sparkling water or a fruity iced tea elevates the experience. If serving to kids, try alongside fresh fruit cups or yogurt for a wholesome snack platter.
Creative Ways to Present
Try layering different fruit purees in molds to create rainbow gummies with multiple tangy flavors. Or package them in cute jars adorned with cellophane and ribbon for thoughtful homemade gifts that friends and family will rave about. The chewy texture and bright color also make these gummy bites perfect for dessert tables at parties.
Make Ahead and Storage
Storing Leftovers
If you happen to have any gummies left (which might be rare!), keep them in an airtight container in the refrigerator for up to one week. This helps maintain their chewy texture and fresh strawberry flavor.
Freezing
Freezing gummies is not recommended as it can alter their texture and make them less enjoyable to eat. Instead, focus on making small batches to ensure maximum freshness.
Reheating
There’s no need to reheat these delightful treats. The Tangy Homemade Sour Strawberry Gummies Recipe is best enjoyed cold or at room temperature to preserve their satisfying chew and tang.
FAQs
Can I use frozen strawberries instead of fresh?
Absolutely! Frozen strawberries work just as well; just be sure to thaw them and drain any excess liquid before cooking.
Is there a vegan alternative for the gelatin?
Yes, agar agar powder can be used as a plant-based substitute. Follow the package instructions carefully since agar sets differently and requires boiling.
How sour will these gummies be?
The tangy flavor is adjustable; the citric acid in the coating adds a sharp sourness, but you can tweak the amount to suit your taste.
Can I use other fruit flavors?
Definitely! Try swapping strawberries for raspberries or cherries to create your own twist on the Tangy Homemade Sour Strawberry Gummies Recipe.
How long do homemade gummies last?
Stored properly in the fridge, they stay fresh for about one week, making them perfect for a week’s worth of snacking.
Final Thoughts
There is something truly special about making your own candy at home, especially with a recipe as joyful and flavorful as the Tangy Homemade Sour Strawberry Gummies Recipe. Easy to prepare and endlessly satisfying, these gummies make snack time exciting for both kids and adults. Once you try them, you’ll see why they quickly become a favorite sweet treat in our household. So roll up your sleeves, grab those strawberries, and get ready to enjoy a burst of tangy, fruity bliss in every bite!
Print
Tangy Homemade Sour Strawberry Gummies Recipe
- Prep Time: 10 minutes
- Cook Time: 10 minutes
- Total Time: 2 hours 20 minutes
- Yield: 30 small gummies
- Category: Snack
- Method: No-Cook
- Cuisine: American
- Diet: Gluten Free
Description
These Tangy Homemade Sour Strawberry Gummies are a delicious and healthy fruit snack made with fresh strawberries, natural sweeteners, and a sour sugar coating. Perfect for a guilt-free treat, they are easy to prepare using simple ingredients and require no baking.
Ingredients
Main Ingredients
- 1 cup fresh or frozen strawberries (hulled)
- 1/2 cup water
- 2 tablespoons lemon juice
- 2–3 tablespoons honey or maple syrup (to taste)
- 3 tablespoons unflavored gelatin
Sour Sugar Coating
- 1/4 cup granulated sugar
- 1 tablespoon citric acid
Instructions
- Cook Strawberries: In a small saucepan, combine the strawberries and water. Cook over medium heat for 5–7 minutes until the strawberries soften, making them easier to puree.
- Puree Mixture: Use an immersion blender or transfer the mixture to a blender and puree until smooth. Return the puree to the pan for the next steps.
- Add Flavorings: Stir in the lemon juice and your choice of honey or maple syrup to add tartness and sweetness to the mixture.
- Bloom Gelatin: Sprinkle the gelatin evenly over the warm strawberry mixture and let it sit for 1–2 minutes to absorb moisture and soften.
- Dissolve Gelatin: Stir continuously over low heat until the gelatin is fully dissolved and the mixture is smooth. Be careful not to let it boil to preserve gelatin’s setting properties.
- Pour Into Molds: Pour the smooth mixture into silicone molds or a parchment-lined baking dish to form the gummy shape.
- Chill to Set: Refrigerate for at least 2 hours or until the gummies are fully set and firm to the touch.
- Coat Gummies: Once firm, remove the gummies from the molds or cut into bite-sized pieces. In a small bowl, mix granulated sugar and citric acid, then toss the gummies in this sour sugar coating right before serving for an extra tangy bite.
Notes
- Adjust the amount of honey or maple syrup to customize sweetness to your preference.
- For a vegan alternative, substitute gelatin with agar agar and follow the package instructions for setting.
- Store the gummies in an airtight container in the refrigerator to keep them fresh for up to one week.


