
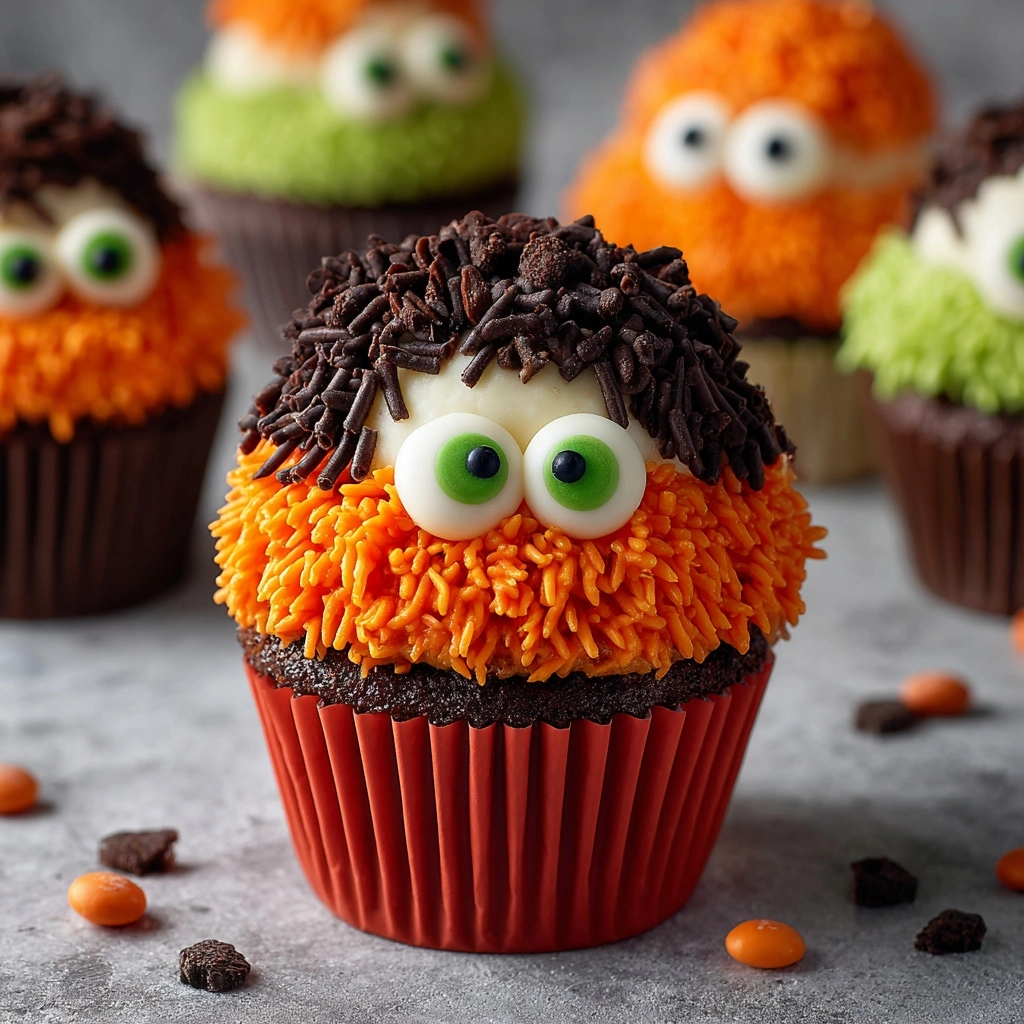
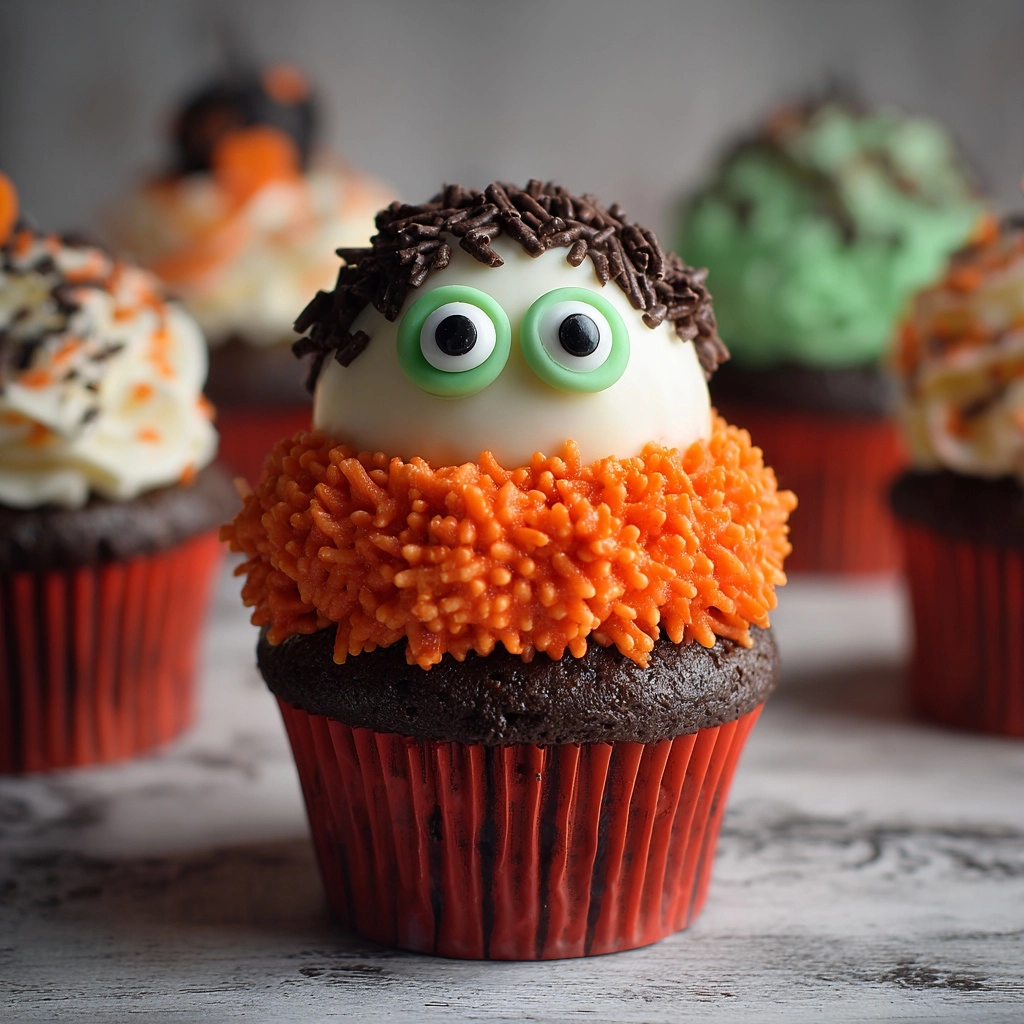
If ever there was a show-stopping centerpiece for your Halloween party, look no further than these Stamped Halloween Cupcakes – A Spooky Treat with Four Fun Designs. Imagine moist chocolate cupcakes topped with fluffy, vibrantly colored buttercream, each one stamped with ghosts, bats, spiderwebs, or grinning pumpkins. Not only do they taste incredible, but stamping them is frightfully fun for both kids and adults. Whether you’re hosting a spooky bash or simply want to add a touch of magic to your Halloween night, these cupcakes bring delight, flavor, and just the right amount of mischief.
Ingredients You’ll Need
Getting ready to make Stamped Halloween Cupcakes – A Spooky Treat with Four Fun Designs is a breeze with just a handful of pantry staples, plus a few special details for that unmistakable spooky charm. Each ingredient serves a unique purpose, contributing to the rich flavor, playful colors, and the striking stamped effect.
- Chocolate Cake Mix: The base for foolproof, moist chocolate cupcakes, serving as your delicious blank canvas.
- Eggs, Oil, and Water: Listed on your cake mix box, these bring it all together for a perfectly tender crumb.
- Sour Cream: Adds a surprising level of moistness and a subtle tang, making every bite extra luscious.
- Vanilla Extract: Rounds out the chocolate flavors and elevates the cupcake’s overall aroma.
- Unsalted Butter (softened): The backbone of creamy, dreamy homemade buttercream frosting.
- Powdered Sugar: Sweetens and thickens the frosting for reliable, pipeable swirls.
- Milk or Heavy Cream: Loosens the frosting to the perfect, scoopable consistency.
- Black Gel Food Coloring: Ghoulishly dark frosting that really pops underneath your stamped designs.
- Orange Gel Food Coloring: Instantly transforms some of your frosting into that classic Halloween hue.
- Halloween-Themed Cookie Stamps or Stencils: The secret to all those creepy-cute designs—get creative with bats, skulls, pumpkins, or spiderwebs.
- Cocoa Powder or Black Edible Dust: For dusting your stamps or stencils, giving each cupcake its defined, dramatic effect.
- Optional Sprinkles or Candy Eyes: The finishing touch for adding playful, extra-spooky personality to each treat.
How to Make Stamped Halloween Cupcakes – A Spooky Treat with Four Fun Designs
Step 1: Prep Your Cupcake Liners and Oven
Get things started by preheating your oven to 350°F (175°C), and line your cupcake pan with festive, Halloween-themed paper liners. This not only prevents sticking but adds a dash of color and excitement before you even begin baking.
Step 2: Mix the Cupcake Batter
In a large mixing bowl, whip up your chocolate cake mix according to the instructions on the box, but here’s where you up the ante: stir in the sour cream and vanilla extract. These two simple additions boost richness and moisture, making your cupcakes stand head and shoulders above the rest. Mix until smooth and evenly combined.
Step 3: Fill and Bake
Scoop the batter into your lined cupcake pan, filling each liner about two-thirds full. Bake for 18–22 minutes, or until a toothpick inserted into the center of a cupcake comes out clean. Patience is key—let the cupcakes cool completely on a wire rack before decorating, so your frosting stays picture-perfect.
Step 4: Make the Buttercream and Color It
For a fluffy, melt-in-your-mouth buttercream, beat softened butter until it’s light and creamy. Gradually sift in the powdered sugar, mixing between additions until combined. Add milk or cream one tablespoon at a time to reach your ideal texture. Divide the frosting and tint portions with orange and black gel food coloring for that Halloween wow-factor.
Step 5: Frost the Cupcakes
Using your favorite piping tip or just a sturdy offset spatula, swirl or spread the colorful buttercream onto your cooled cupcakes. For the cleanest stamped designs, you want nice, even tops—smooth them out as needed and then, for best results, chill the frosted cupcakes in the fridge for 10 minutes (this helps the buttercream hold that stamped impression like a dream).
Step 6: Stamp or Stencil Your Spooky Designs
Here’s the most fun part! Dust your Halloween cookie stamps or stencils lightly with cocoa powder or edible dust. Press gently onto the surface of the buttercream—just enough to leave a crisp, spooky image behind. Mix up the designs: go classic with bats and pumpkins, or get a little wild with skulls and spiderwebs. Each cupcake becomes its own little masterpiece.
Step 7: Add Extra Decorations
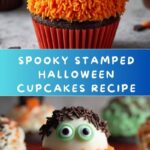
Finish off your Stamped Halloween Cupcakes – A Spooky Treat with Four Fun Designs by sprinkling on some Halloween-themed sprinkles or tucking in a few candy eyes. Every little flourish brings extra spooky delight (and who can resist a cupcake looking back at you?).
How to Serve Stamped Halloween Cupcakes – A Spooky Treat with Four Fun Designs
Garnishes
Top each cupcake with your favorite Halloween sprinkles, a dusting of edible glitter, or a single candy eye to give your creatures a gaze that’ll startle and charm. For an extra pop, press a small Halloween pick or toothpick into each one—it’s these tiny finishing touches that make your Stamped Halloween Cupcakes – A Spooky Treat with Four Fun Designs unforgettably eye-catching on any dessert table.
Side Dishes
Pair these cupcakes with a cauldron of orange punch, mugs of hot cocoa, or striped bowls of popcorn. If you really want to go all-in on the Halloween theme, serve alongside chocolate-dipped pretzel “witches’ fingers” or a platter of pumpkin-shaped fruit slices for a mix of sweet and salty.
Creative Ways to Present
Arrange your Stamped Halloween Cupcakes – A Spooky Treat with Four Fun Designs on a gloomy slate board or a bed of artificial spiderwebs for maximum impact. You could even group them into little scenes—pumpkins in a “patch,” bats circling the “moon,” or a web woven with candy spiders. Extra points for flickering LED candles or dim lights to really set the scene!
Make Ahead and Storage
Storing Leftovers
If you’re lucky enough to have cupcakes left at the end of the night, simply store them in an airtight container at room temperature for up to two days. If your kitchen is warm, pop the container into the fridge to help the buttercream hold its shape and keep the stamped designs crisp.
Freezing
Stamped Halloween Cupcakes – A Spooky Treat with Four Fun Designs actually freeze beautifully. Place completely cooled and decorated cupcakes in a single layer on a baking sheet to freeze, then transfer to a freezer-safe container. When ready to enjoy, thaw in the fridge overnight—this keeps the buttercream looking fresh and prevents condensation from wrecking those intricate decorations.
Reheating
These cupcakes are best enjoyed at room temperature, so if you’ve stored them in the fridge or freezer, let them sit out for about 30 minutes before serving. There’s no need to heat them in the oven or microwave; the buttercream will soften on its own, bringing back all the creamy texture you love.
FAQs
Can I use homemade chocolate cake instead of a mix?
Absolutely! A homemade chocolate cake batter works just as well—just make sure it’s not too dense, so your cupcakes bake up light and tender. The added sour cream and vanilla will bring out the flavor, no matter which route you choose.
How can I get really bold orange and black colors in my frosting?
Gel food coloring is your best friend here; it’s super concentrated and won’t water down your buttercream. Start with a few drops and add more as needed, mixing well between additions to achieve those rich, Halloween hues.
What if I don’t have cookie stamps or stencils?
No problem! You can use the bottom of a small, clean toy, the rim of a shot glass for circles, or even make your own stencil out of parchment paper. Get creative—anything with a fun Halloween shape can work as a stamp in a pinch.
Can I make these cupcakes gluten-free?
Definitely. Swap in your favorite gluten-free chocolate cake mix and check that your other ingredients are gluten-free as well. The taste and texture will still be wickedly delicious!
Do I have to chill the cupcakes before stamping?
While it’s not strictly required, chilling the frosted cupcakes for ten minutes gives the buttercream just enough firmness to hold sharp, clean stamped designs. It’s a little trick that makes a big difference for presentation, especially if your kitchen is warm.
Final Thoughts
Gather your stamps, your sprinkles, and your sense of Halloween adventure—it’s time to make Stamped Halloween Cupcakes – A Spooky Treat with Four Fun Designs. Each bite is a perfect mix of festivity, flavor, and fun, sure to bring a smile (or a playful fright) to anyone’s face. Don’t be surprised if these become your new October tradition—share them with friends, family, or little trick-or-treaters, and let the spooky baking magic begin!
Print
Stamped Halloween Cupcakes – A Spooky Treat with Four Fun Designs Recipe
- Prep Time: 30 minutes
- Cook Time: 20 minutes
- Total Time: 50 minutes
- Yield: 24 cupcakes
- Category: Dessert
- Method: Baking
- Cuisine: American
- Diet: Vegetarian
Description
Learn how to make Stamped Halloween Cupcakes – a fun and spooky treat featuring four unique designs. These delicious cupcakes are perfect for Halloween parties and events.
Ingredients
Cupcakes:
- 1 box chocolate cake mix (plus ingredients listed on the box: typically eggs, oil, and water)
- 1/2 cup sour cream
- 1 teaspoon vanilla extract
Buttercream Frosting:
- 1 cup unsalted butter (softened)
- 3–4 cups powdered sugar
- 2–3 tablespoons milk or heavy cream
- Black gel food coloring
- Orange gel food coloring
Decorations:
- Halloween-themed cookie stamps or stencils
- Cocoa powder or black edible dust
- Optional sprinkles or candy eyes for decoration
Instructions
- Preheat the oven: Preheat the oven to 350°F (175°C) and line a cupcake pan with Halloween-themed paper liners.
- Prepare the Cupcake Batter: In a large bowl, prepare the cake mix according to the package instructions, adding sour cream and vanilla extract. Fill cupcake liners 2/3 full.
- Bake: Bake for 18–22 minutes until a toothpick comes out clean. Cool on a wire rack.
- Make Buttercream: Beat butter, add powdered sugar, and milk/cream until desired consistency. Divide and color with food gels.
- Frost Cupcakes: Pipe or spread frosting onto cooled cupcakes.
- Stamp Designs: Dust cookie stamps with cocoa powder, press gently onto frosted cupcakes.
- Decorate: Add sprinkles or candy eyes if desired.
Notes
- Chilling frosted cupcakes for 10 minutes before stamping helps maintain the design.
- Use a mix of designs like bats, skulls, pumpkins, and spiderwebs for variety.
Nutrition
- Serving Size: 1 cupcake
- Calories: 310
- Sugar: 31g
- Sodium: 210mg
- Fat: 16g
- Saturated Fat: 9g
- Unsaturated Fat: 6g
- Trans Fat: 0g
- Carbohydrates: 40g
- Fiber: 1g
- Protein: 2g
- Cholesterol: 45mg