
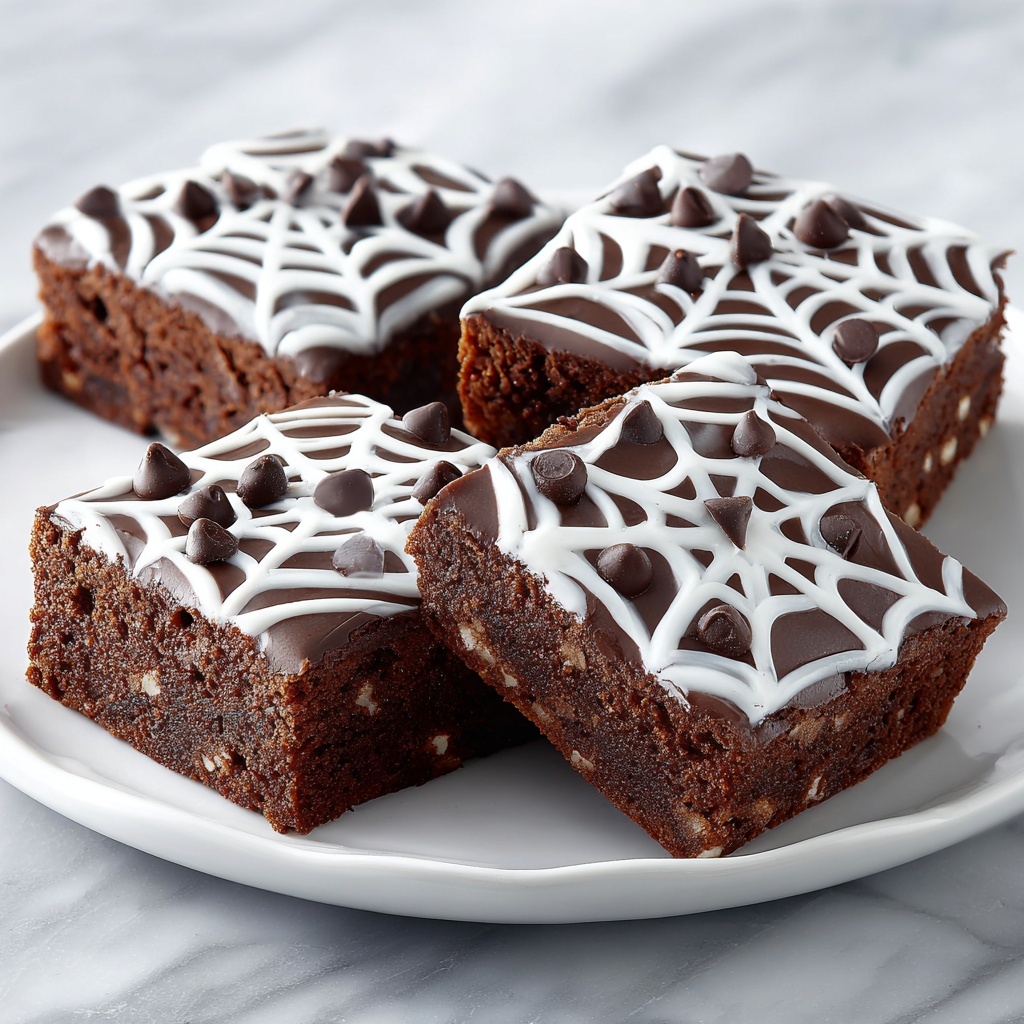
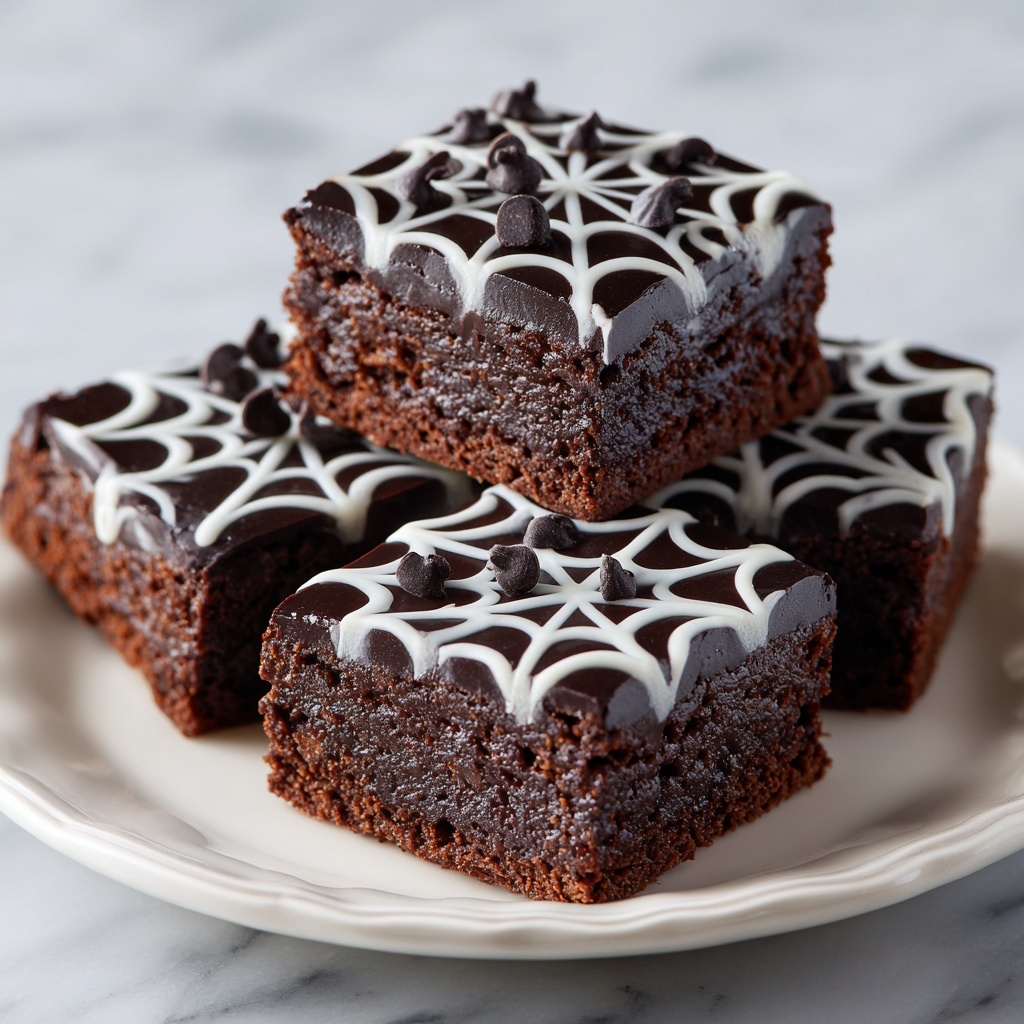
If you’re looking for a fun, festive, and utterly delicious way to celebrate the spooky season, then this Spider Web Halloween Brownies Recipe is going to become your new favorite go-to treat. Rich, fudgy brownies get a playful twist with a striking white chocolate spider web pattern on top that’s as impressive as it is tasty. Whether you’re hosting a Halloween party, baking with the kids, or just craving a festive dessert, these brownies combine simple ingredients and easy decorating tricks to create a show-stopping dessert everyone will love.
Ingredients You’ll Need
The beauty of this recipe lies in its simplicity—just a handful of pantry staples come together to create moist, chocolaty brownies with a festive flair. Each ingredient plays a key role, from the rich cocoa adding deep flavor to the delicate swirl of white chocolate that transforms these brownies into Halloween art.
- 1/2 cup melted butter (or coconut oil for dairy-free): Adds moistness and richness that make the brownies so fudgy.
- 1 cup granulated sugar: Sweetens and balances the cocoa’s natural bitterness perfectly.
- 2 large eggs: Bind everything together and give structure to the brownies.
- 1 teaspoon vanilla extract: Infuses a warm, enticing aroma and depth of flavor.
- 1/3 cup cocoa powder: Gives the brownies their deep chocolate flavor and dark color.
- 1/2 cup all-purpose flour (or gluten-free flour): Provides the necessary structure while keeping the texture tender.
- 1/4 teaspoon salt: Enhances all the other flavors, making each bite more balanced.
- 1/4 teaspoon baking powder: Helps the brownies rise just enough for a soft edge.
- 1/3 cup chocolate chips (optional): Adds gooey pockets of melted chocolate for extra indulgence.
- 1/4 cup white chocolate or vanilla icing: Essential for creating that spooky spider web on top.
- 1-2 drops black food coloring (optional): For intensifying the contrast in your spider web design if desired.
How to Make Spider Web Halloween Brownies Recipe
Step 1: Prep the Oven and Pan
Start by preheating your oven to 350°F (175°C) and lining an 8×8-inch baking pan with parchment paper. This step ensures your brownies bake evenly and come out of the pan easily, making cleanup a breeze. The parchment paper also prevents sticking, so you’ll get perfectly clean squares every time.
Step 2: Mix the Wet Ingredients
In a medium bowl, whisk together the melted butter and sugar until silky smooth. Then add the eggs and vanilla extract, mixing everything thoroughly. This mixture is the foundation for your brownies’ moist, tender crumb, so take a moment to get it nice and even before moving on.
Step 3: Combine Dry Ingredients and Fold In
Sift together the cocoa powder, flour, salt, and baking powder to avoid lumps and create an even batter. Gently stir these dry ingredients into the wet mixture, being careful not to overmix — the key here is a tender crumb, so once just combined, you’re good. If you love extra chocolatey treats, here’s your chance to fold in those chocolate chips for delightful melty bites throughout.
Step 4: Bake the Brownies
Pour the batter into your prepared pan and smooth the surface with a spatula. Pop the pan into the oven and bake for 20 to 25 minutes. You want a toothpick inserted into the center to come out mostly clean with just a few moist crumbs attached. Don’t overbake—these brownies are best when fudgy and rich.
Step 5: Cool Before Decorating
Patience pays off here! Let your brownies cool completely right in the pan. This is important because the spider web decoration needs a firm, stable surface to look its best and not melt or smear.
Step 6: Create the Spider Web Design
Melt your white chocolate or vanilla icing gently until smooth, and transfer it into a piping bag or small squeeze bottle for precision. Starting from the center of the brownies, pipe concentric circles of white chocolate. Then, use a toothpick to drag lines from the middle outward to the edges, creating that perfect spider web effect. If you want to add an extra spooky touch, a drop or two of black food coloring in the white chocolate can help sharpen the contrast and detail.
Step 7: Cut and Serve
Once decorated, carefully slice the brownies into squares along the web pattern. These spooky, delicious squares are ready to wow your guests or satisfy your seasonal sweet tooth.
How to Serve Spider Web Halloween Brownies Recipe
Garnishes
While the white chocolate web is a fantastic visual, you can amp up the Halloween vibe with a few creative garnishes. Think candy eyeballs perched in the center of the webs, a sprinkle of edible glitter for a magical shimmer, or even a light dusting of orange-colored sugar for that classic Halloween color pop. These simple touches can turn each brownie into a creepy little edible work of art.
Side Dishes
Serve these brownies alongside a scoop of creamy vanilla ice cream or a dollop of whipped cream for a perfect temperature contrast that feels indulgent. For a truly themed dessert table, consider offering mulled cider or a rich hot chocolate, which pairs beautifully with the deep chocolate flavor of the brownies.
Creative Ways to Present
Presentation can be so fun with the Spider Web Halloween Brownies Recipe. Arrange your brownies on a rustic wooden board surrounded by miniature pumpkins and autumn leaves for a cozy feel. You can also stack a few in a glass cake stand with orange fairy lights underneath to make your dessert table glow. For parties, consider wrapping each brownie square in cellophane tied with black and orange ribbon—a festive treat perfect for guests to take home.
Make Ahead and Storage
Storing Leftovers
If you have any brownies left over (which might be rare!), store them in an airtight container at room temperature for up to 3 days. Keeping them sealed maintains their moist texture and prevents the white chocolate decoration from drying out or cracking.
Freezing
These brownies also freeze beautifully. Wrap individual squares tightly in plastic wrap, then place them in a freezer bag or container. Frozen Spider Web Halloween Brownies Recipe treats keep well for up to 2 months. Thaw overnight in the fridge before serving to preserve that perfect fudgy texture.
Reheating
To enjoy the brownies warm, pop a square in the microwave for about 15 seconds. The chocolate melts slightly, making each bite decadent. Just be gentle to avoid melting the delicate spider web icing too much—serve immediately for best effect.
FAQs
Can I use regular butter if I don’t want dairy-free?
Absolutely! This recipe works perfectly with regular melted butter, giving the brownies their classic rich flavor and moist texture. If you prefer dairy-free, coconut oil is a fantastic alternative.
How can I make the spider web look more defined?
Using a piping bag or squeeze bottle with a fine tip helps create thin, even lines. Adding a drop of black food coloring to white chocolate icing enhances contrast, making the web design really pop against the dark brownie background.
Can I make these brownies gluten-free?
Yes! Swap the all-purpose flour for your favorite gluten-free flour blend, and the rest of the recipe remains the same. You’ll still get that dense, fudgy texture perfect for Halloween celebrations.
Is it okay to use store-bought vanilla icing instead of melting white chocolate?
Definitely! Store-bought vanilla icing can be a quicker option. Just make sure it’s not too thick—if needed, thin it slightly with a tiny bit of milk or water for smooth piping.
How long will brownies stay fresh after decorating?
The brownies are best enjoyed within a couple of days for optimal freshness and appearance. If stored properly in an airtight container, they can last up to 3 days without drying out or losing the charm of the spider web design.
Final Thoughts
There’s something truly special about making treats that look as delightful as they taste, and this Spider Web Halloween Brownies Recipe brings both to the table with ease and fun. Perfect for sharing with friends and family during spooky celebrations, these brownies combine classic chocolate indulgence with creative flair. So why wait? Grab your ingredients, get cozy in the kitchen, and bake these charming spiders webs that will surely be the hit of your Halloween festivities!
Print
Spider Web Halloween Brownies Recipe
- Prep Time: 10 minutes
- Cook Time: 25 minutes
- Total Time: 40 minutes
- Yield: 9 servings
- Category: Dessert
- Method: Baking
- Cuisine: American
- Diet: Gluten Free
Description
These Spider Web Halloween Brownies are a festive and delicious treat perfect for celebrating the spooky season. Rich, fudgy chocolate brownies are topped with a creative spider web design made from white chocolate, adding a fun and eerie touch to your Halloween dessert table.
Ingredients
Brownie Batter
- 1/2 cup melted butter (or coconut oil for dairy-free)
- 1 cup granulated sugar
- 2 large eggs
- 1 teaspoon vanilla extract
- 1/3 cup cocoa powder
- 1/2 cup all-purpose flour (or gluten-free flour for gluten-free version)
- 1/4 teaspoon salt
- 1/4 teaspoon baking powder
- 1/3 cup chocolate chips (optional)
Spider Web Decoration
- 1/4 cup white chocolate or vanilla icing
- 1–2 drops black food coloring (optional)
Instructions
- Preheat oven: Preheat your oven to 350°F (175°C) and line an 8×8-inch baking pan with parchment paper for easy removal and cleanup.
- Mix wet ingredients: In a medium bowl, whisk together the melted butter and granulated sugar until smooth. Add the eggs and vanilla extract, mixing thoroughly until fully incorporated.
- Add dry ingredients: Sift in the cocoa powder, all-purpose flour, salt, and baking powder. Gently stir the mixture until just combined. Fold in the chocolate chips if using, to add extra chocolatey goodness.
- Bake the brownies: Pour the batter evenly into the prepared baking pan. Bake for 20-25 minutes or until a toothpick inserted into the center comes out mostly clean, indicating the brownies are perfectly baked.
- Cool the brownies: Allow the brownies to cool completely in the pan. This step is important to ensure the spider web decoration holds its shape.
- Decorate with spider web: Melt the white chocolate or vanilla icing and transfer it into a piping bag or squeeze bottle. Starting from the center of the cooled brownies, pipe thin concentric circles. Using a toothpick, drag lines from the center outwards to the edges to create a spider web effect. Optionally, add a drop or two of black food coloring to accentuate the web design.
- Serve and enjoy: Once decorated, cut the brownies into squares and serve your spooky Halloween treat to delight family and friends.
Notes
- For dairy-free or vegan brownies, substitute butter with coconut oil and use dairy-free chocolate chips and icing.
- To make gluten-free, replace all-purpose flour with a gluten-free flour blend.
- Be careful not to overbake to keep the brownies fudgy and moist.
- The spider web design works best when the brownies are completely cooled to prevent melting of the decoration.
- Use a toothpick dipped in black food coloring to add small “spiders” for an extra creepy effect.

