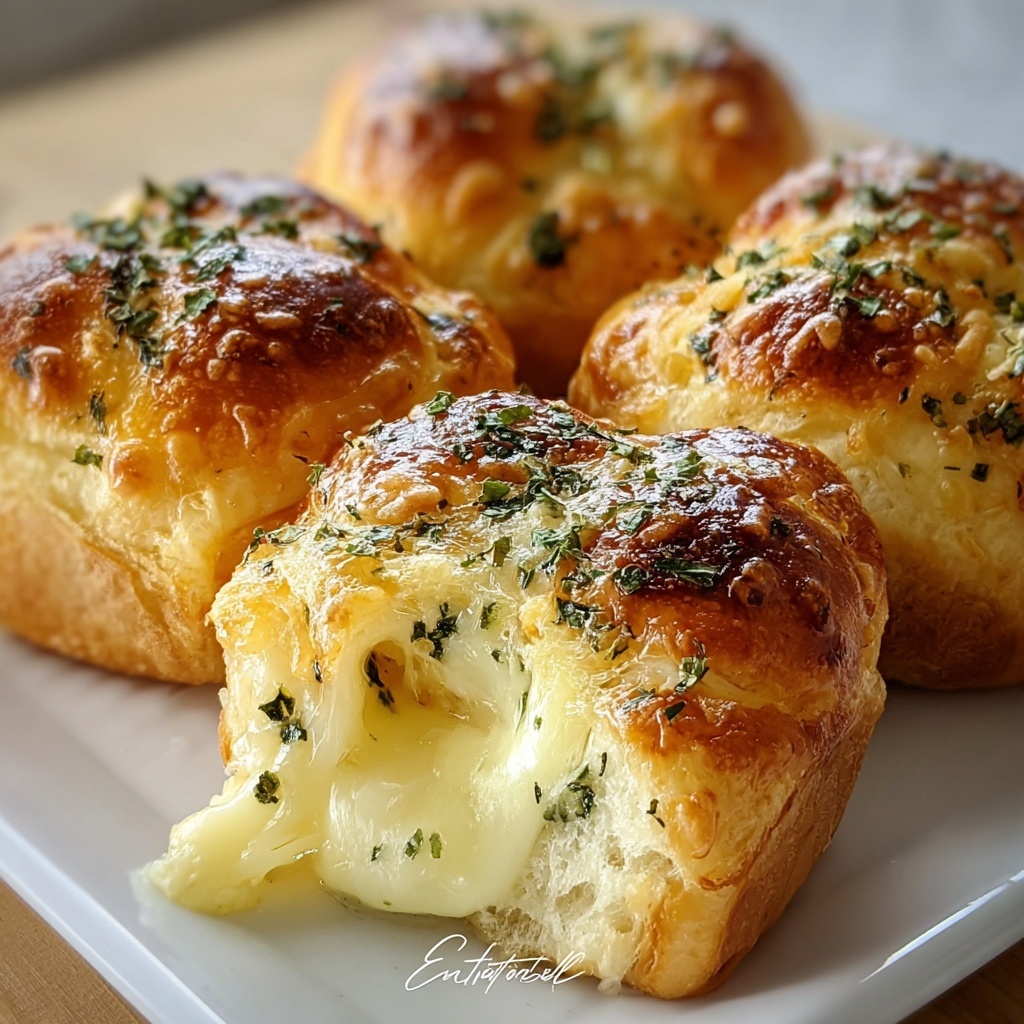
If you are craving a warm, cheesy, and buttery snack that’s easy to whip up yet absolutely satisfying, the Pillsbury Biscuit Garlic Butter Cheese Bombs Recipe is exactly what you need. These golden little pockets of joy combine the fluffy texture of Pillsbury biscuits with gooey mozzarella and cheddar cheese, all enveloped in a garlic-infused buttery crust. Whether you are serving them for a casual get-together, a game night, or just because you deserve a delicious treat, this recipe promises a mouthwatering experience that everyone will rave about.
Ingredients You’ll Need
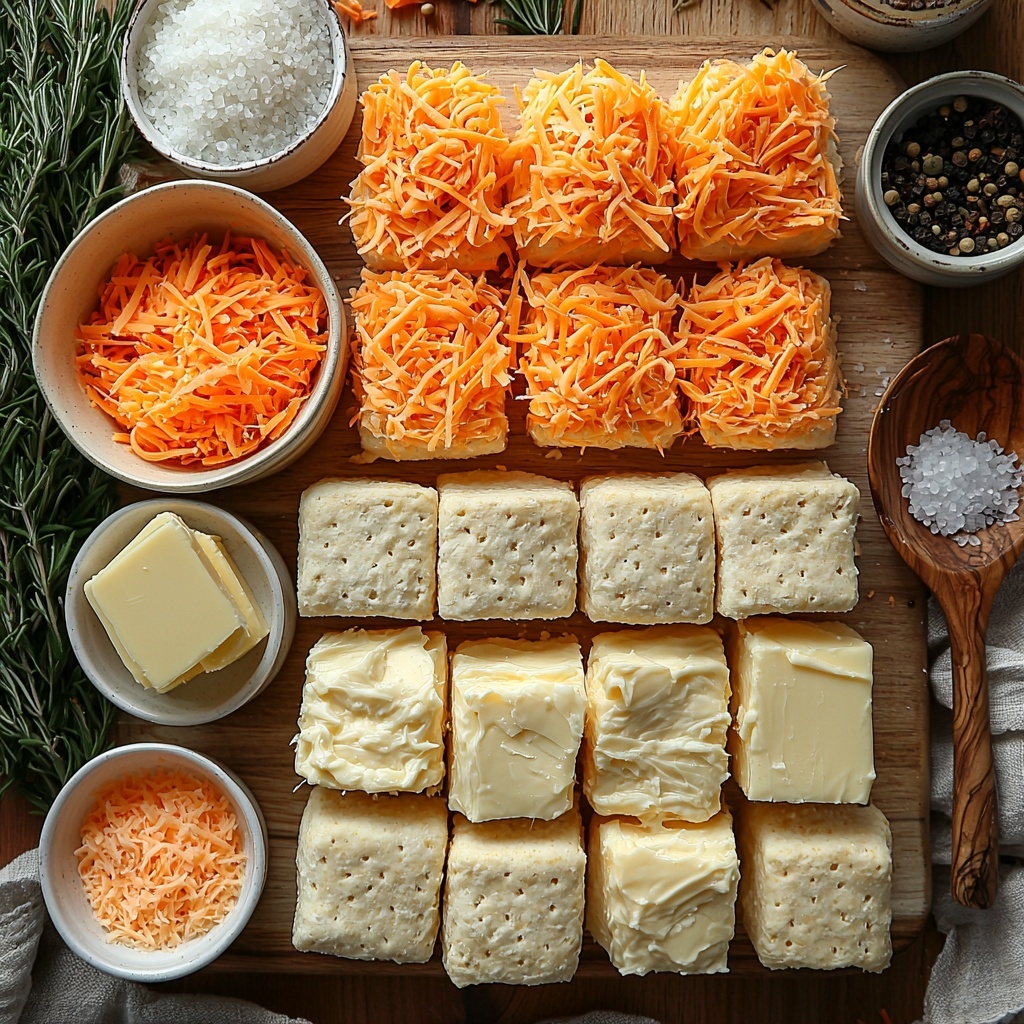
Gathering a handful of simple but key ingredients makes this recipe so approachable. Each one plays a special role, from the buttery richness coating the outside to the melty cheeses that fill the center with irresistible gooeyness.
- Pillsbury refrigerated biscuits (1 can, 8 count): The perfect soft and fluffy base that bakes into golden pockets.
- Mozzarella cheese (½ cup shredded): Adds smooth meltiness and mild flavor to the filling.
- Cheddar cheese (½ cup shredded): Brings sharpness and depth to contrast the mozzarella.
- Butter (2 tablespoons, melted): Essential for that glossy, flavorful coating brushed on top.
- Garlic powder (1 teaspoon): Infuses the butter with aromatic garlic goodness without overpowering the palate.
- Salt and pepper (to taste): Simple seasoning that balances and enhances all the flavors.
How to Make Pillsbury Biscuit Garlic Butter Cheese Bombs Recipe
Step 1: Preheat and Prepare
Begin by preheating your oven to 375 degrees Fahrenheit. This temperature ensures your biscuits cook evenly, creating a beautifully golden exterior while melting the cheese inside. Preheating also helps you get the biscuits into the oven as soon as preparation is done, locking in freshness.
Step 2: Shape the Biscuits
Carefully separate each biscuit from the can and flatten them slightly with your hands. The gentle pressing makes a perfect base to hold the cheese filling while allowing enough dough to wrap securely around it. This step ensures the cheese won’t leak during baking.
Step 3: Add the Cheese Filling
Place a pinch of shredded mozzarella and cheddar cheese right in the center of each flattened biscuit. The blend of cheeses creates a deliciously melty core, striking the perfect balance between creaminess and sharp flavor.
Step 4: Seal the Cheese Bombs
Fold the edges of each biscuit over the cheese and pinch them tightly to seal. This step is crucial to keep your cheesy filling inside while baking, preventing any ooze and giving you that neat, bomb-like shape.
Step 5: Brush with Garlic Butter
Mix the melted butter with garlic powder, salt, and pepper until well combined. Then, generously brush this savory butter all over the surface of each sealed biscuit. This coating not only enhances taste but also bakes into a golden, flavorful crust that’s hard to resist.
Step 6: Bake to Perfection
Place the prepared cheese bombs on a lined baking sheet and bake them for about 20 minutes. You’ll know they’re ready once they turn a beautiful golden brown on top and give off that tantalizing garlic butter aroma filling your kitchen.
Step 7: Cool and Enjoy
Let your Pillsbury Biscuit Garlic Butter Cheese Bombs cool slightly before serving. This brief resting time lets the cheese settle inside so you can enjoy each bite without burning your mouth, all while savoring that crisp outer crust.
How to Serve Pillsbury Biscuit Garlic Butter Cheese Bombs Recipe
Garnishes
A sprinkle of freshly chopped parsley or a dash of grated Parmesan can add a beautiful pop of color and an extra hint of flavor, making your cheese bombs even more irresistible. A light drizzle of marinara sauce on the side can also enhance their rich garlic and cheesy taste.
Side Dishes
Serve these cheese bombs alongside fresh salads, especially crisp Caesar or mixed greens, to balance their rich and buttery nature. They also pair wonderfully with steaming bowls of soup, like tomato basil or creamy broccoli cheddar, transforming any meal into a comforting feast.
Creative Ways to Present
For parties, arrange your cheese bombs on a wooden board surrounded by small bowls of dipping sauces such as ranch, marinara, or spicy sriracha mayo. You can also stack them in a pyramid shape to create an eye-catching centerpiece that invites everyone to dive in.
Make Ahead and Storage
Storing Leftovers
Once cooled, store any leftover cheese bombs in an airtight container in the refrigerator. They will stay fresh and delicious for up to 3 days, making for great next-day snacks or quick appetizers.
Freezing
You can freeze unbaked cheese bombs by placing them on a baking sheet to freeze individually, then transferring them to a sealed freezer bag. When ready to bake, pop them directly in the oven (add a few extra minutes to baking time) or thaw overnight in the fridge. This is a game-changer for quick, future cravings!
Reheating
For the best texture and flavor, reheat your cheese bombs in the oven at 350 degrees Fahrenheit for about 10 minutes until warmed through and crisp on the outside. Avoid microwaving as it can make the biscuit soggy and the cheese rubbery.
FAQs
Can I use different types of cheese in this recipe?
Absolutely! While mozzarella and cheddar offer a perfect balance of meltiness and flavor, feel free to experiment with cheeses like Monterey Jack, pepper jack, or even feta for a unique twist.
Is it necessary to use garlic powder in the butter coating?
Garlic powder adds that signature flavor kick that makes these cheese bombs irresistible, but if you prefer, you can omit it or substitute with fresh minced garlic for an extra punch.
Can I make these vegan or dairy-free?
Yes! Use plant-based biscuits, vegan butter, and dairy-free cheese alternatives to create a vegan-friendly version without sacrificing the deliciousness.
How do I prevent the cheese from leaking out during baking?
Pinch the biscuit edges tightly to seal the cheese inside completely. Also, avoid overfilling, as too much cheese can cause oozing during baking.
What is the best way to serve these for a crowd?
Prepare them in advance, reheat just before guests arrive, and serve with a variety of dipping sauces and sides. Display on a platter so everyone can grab and enjoy easily.
Final Thoughts
The Pillsbury Biscuit Garlic Butter Cheese Bombs Recipe is pure comfort food magic in a bite-sized form. It brings together simple ingredients and quick steps to deliver a result that feels indulgent and special every time. I can’t wait for you to try making these scrumptious cheese bombs yourself and watch them disappear at your next gathering or cozy night in!
Print
Pillsbury Biscuit Garlic Butter Cheese Bombs Recipe
- Prep Time: 10 minutes
- Cook Time: 20 minutes
- Total Time: 30 minutes
- Yield: 8 servings
- Category: Appetizer
- Method: Baking
- Cuisine: American
Description
Delicious and easy-to-make Pillsbury Biscuit Garlic Butter Cheese Bombs featuring a gooey blend of mozzarella and cheddar cheeses encased in buttery, flaky biscuits with a flavorful garlic seasoning, perfect as a savory appetizer or snack.
Ingredients
Cheese Bombs
- 1 can (8 count) Pillsbury refrigerated biscuits
- ½ cup shredded mozzarella cheese
- ½ cup shredded cheddar cheese
Garlic Butter Brush
- 2 tablespoons butter (melted)
- 1 teaspoon garlic powder
- Salt and pepper to taste
Instructions
- Preheat Oven: Preheat your oven to 375°F (190°C) to prepare for baking the cheese bombs to a perfect golden brown.
- Prepare Biscuits: Separate the refrigerated biscuits from the can and slightly flatten each one to create room for the cheese filling.
- Add Cheese Filling: Place a portion of shredded mozzarella and cheddar cheese in the center of each flattened biscuit, ensuring an even distribution for gooey melted centers.
- Seal Cheese Inside: Fold the biscuit edges over the cheese, pinching tightly to seal the filling inside and prevent leakage during baking.
- Apply Garlic Butter: Mix the melted butter with garlic powder, salt, and pepper, then brush this flavorful mixture over the sealed biscuit bombs for a savory crust.
- Bake: Place the prepared cheese bombs onto a lined baking sheet and bake in the preheated oven for approximately 20 minutes, or until golden brown and cooked through.
- Cool and Serve: Allow the cheese bombs to cool slightly after baking to avoid burns, then serve warm as a delicious appetizer or snack.
Notes
- Ensure the biscuits are sealed well to prevent cheese from leaking out during baking.
- Use a mixture of mozzarella and cheddar for balanced flavor and excellent melting quality.
- For extra flavor, consider adding chopped herbs like parsley or chives to the garlic butter mixture.
- Serve with marinara sauce or ranch dressing for dipping, if desired.
- Store leftovers in an airtight container and reheat in the oven to maintain crispness.


