
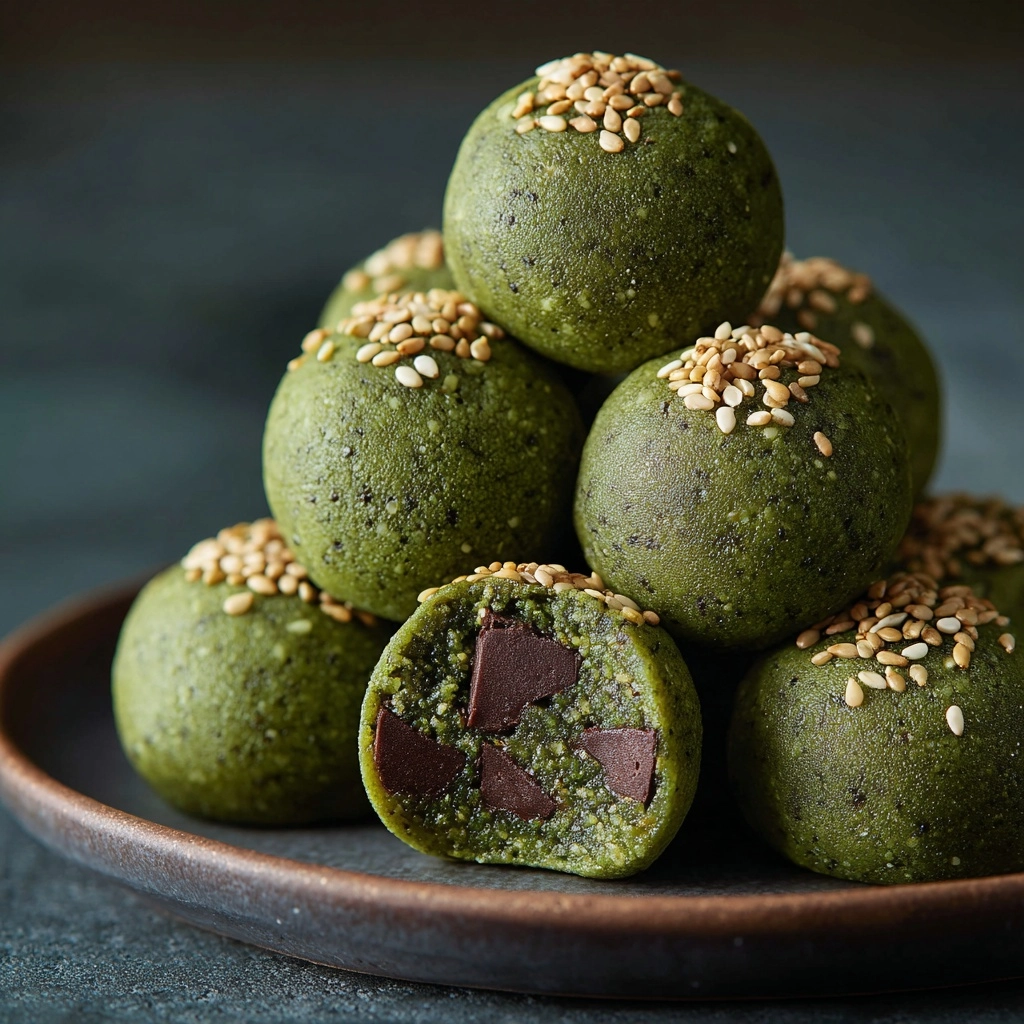
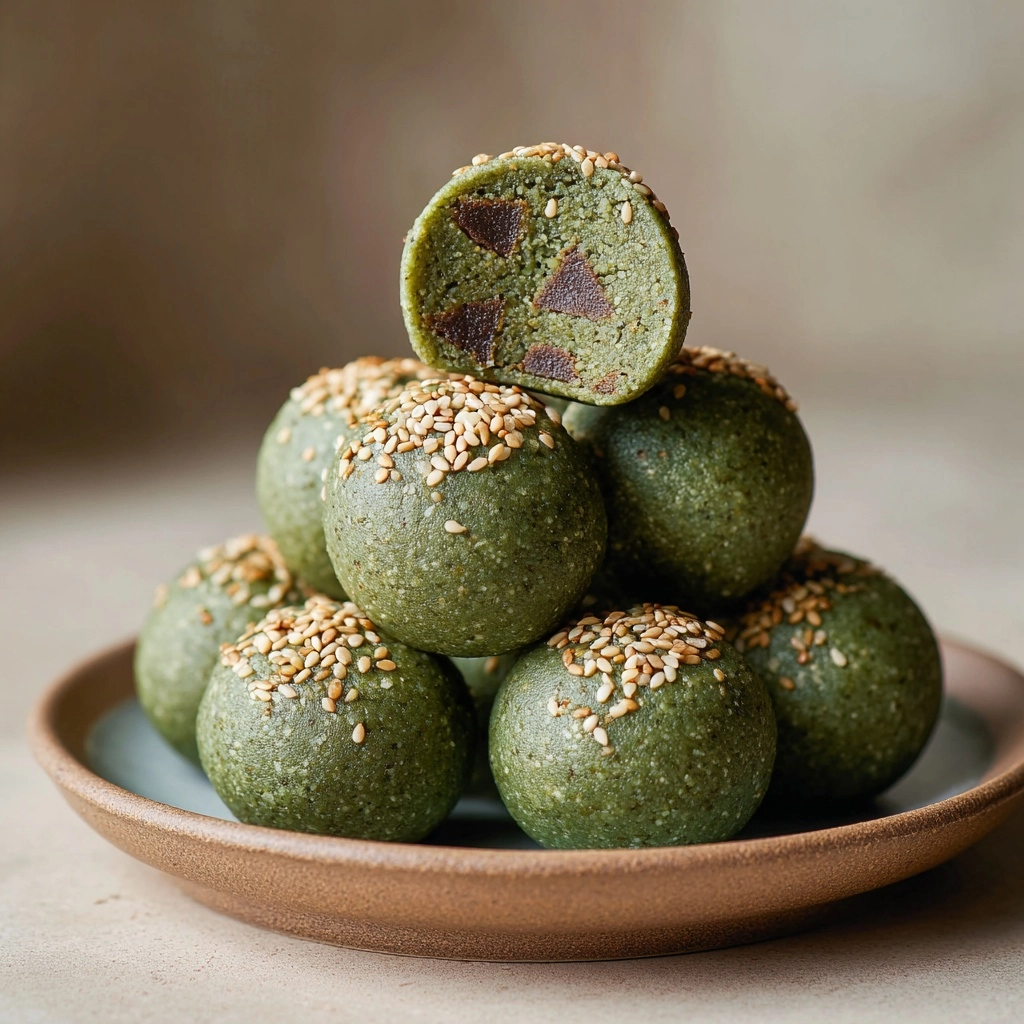
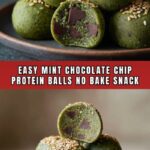
If you’re craving a delightful treat that’s both energizing and delicious, look no further than the Mint Chocolate Chip Protein Balls Recipe. These no-bake snacks perfectly combine the refreshing zing of peppermint with the rich indulgence of chocolate, all packed into a nourishing bite-sized ball. Whether you need a quick morning boost or a post-workout nibble, this recipe offers a fantastic balance of taste, texture, and wholesome goodness. Trust me, once you try these, they’ll quickly become a staple in your snack rotation!
Ingredients You’ll Need
The beauty of this recipe lies in its simplicity. Each ingredient plays a vital role, from creating the chewy texture to delivering that unmistakable minty chocolate flavor and providing a protein punch that keeps you satisfied.
- 1 cup rolled oats: Provides a hearty, chewy base that’s full of fiber and keeps the balls together.
- 1/2 cup chocolate protein powder: Adds rich chocolate flavor and an essential protein boost to support your energy.
- 1/4 cup mini dark chocolate chips: Little bursts of chocolate that add sweetness and texture.
- 1/4 cup almond butter: Brings creaminess and healthy fats for a satisfying bite.
- 2 tablespoons honey: Natural sweetness that helps bind the mixture smoothly.
- 1/4 teaspoon peppermint extract: The secret to that fresh, cool mint flavor that makes these balls unique.
- 2 tablespoons milk of choice: Helps blend everything together perfectly—you can adjust to your preferred consistency.
- Pinch of salt: Enhances all the flavors and balances the sweetness.
How to Make Mint Chocolate Chip Protein Balls Recipe
Step 1: Combine the Dry Ingredients
Start by grabbing a large bowl and mixing together your rolled oats, chocolate protein powder, mini dark chocolate chips, and a pinch of salt. This step helps evenly distribute the flavors and textures before the wet ingredients join the party.
Step 2: Mix the Wet Ingredients
In a separate bowl, stir together the almond butter, honey, peppermint extract, and milk until the mixture is smooth and slightly runny. This blend adds moisture and that irresistible mint-chocolate essence that will shine throughout the protein balls.
Step 3: Combine Wet and Dry Mixtures
Pour your wet mixture into the dry ingredients bowl and stir well until everything is fully incorporated. If you notice the mixture is too dry to form balls, feel free to add a splash more milk until it reaches a pliable, scoopable consistency.
Step 4: Roll into Balls
Once combined, scoop out about one-inch portions and roll them gently between your hands to form smooth, uniform balls. This is the fun part where your soon-to-be snack comes to life!
Step 5: Chill to Firm Up
Place the formed balls on a baking sheet or plate and pop them in the refrigerator for at least 30 minutes. Chilling helps them firm up nicely, making them perfectly easy to grab and snack on anytime.
How to Serve Mint Chocolate Chip Protein Balls Recipe
Garnishes
A sprinkle of crushed peppermint candies or a few extra mini chocolate chips on top after chilling adds a delightful touch of festivity and texture. You can also lightly dust them with cocoa powder for a more decadent look.
Side Dishes
These protein balls are great on their own but pair amazingly with a cup of hot herbal tea or a refreshing glass of homemade mint lemonade to complement their minty note. For a heartier snack, serve alongside fresh fruit slices like apples or berries.
Creative Ways to Present
Try arranging the balls in mini cupcake liners or stacking them in a glass jar with layers of crushed nuts for an eye-catching gift or party platter centerpiece. Adding a small tag with the recipe name makes them a charming homemade treat for friends and family.
Make Ahead and Storage
Storing Leftovers
Keep your Mint Chocolate Chip Protein Balls in an airtight container in the refrigerator to maintain freshness and texture for up to one week. This makes them an excellent grab-and-go snack for busy days.
Freezing
For longer storage, freeze the balls in a single layer on a baking sheet, then transfer them to a sealed freezer bag. They’ll stay fresh for up to 3 months and thaw quickly at room temperature when you’re ready for a treat.
Reheating
Since these are no-bake protein balls, reheating isn’t necessary. If you prefer them softer, simply allow them to sit at room temperature for 10 minutes before enjoying.
FAQs
Can I use peanut butter instead of almond butter?
Absolutely! Peanut butter works just as well and adds its own rich flavor, making your Mint Chocolate Chip Protein Balls Recipe just as tasty.
Is there a way to make these vegan?
Yes, substitute honey with maple syrup and use a plant-based protein powder and milk to keep it vegan-friendly without sacrificing flavor.
How do I get a stronger mint flavor?
Simply add an extra drop of peppermint extract when mixing the wet ingredients—just be cautious as it’s quite potent!
Are these suitable for a gluten-free diet?
Yes, provided you use certified gluten-free oats and protein powder, this recipe works wonderfully for gluten-free diets.
Can I add nuts or seeds for extra texture?
Definitely! Chopped nuts or seeds like chia or flax add a nice crunch and extra nutrition, just fold them in during the dry ingredient mixing step.
Final Thoughts
There’s something truly satisfying about whipping up a batch of Mint Chocolate Chip Protein Balls Recipe—a delightful snack that’s as nourishing as it is delicious. Perfect for busy days, post-workout boosts, or whenever you need a sweet pick-me-up, these no-bake gems are easy, fun, and sure to become a favorite. So why not give them a try today? Your taste buds and body will thank you!
Print
Mint Chocolate Chip Protein Balls Recipe
- Prep Time: 10 minutes
- Cook Time: 0 minutes
- Total Time: 10 minutes
- Yield: 12 balls
- Category: Snack
- Method: No-Cook
- Cuisine: American
- Diet: Gluten Free, Vegetarian
Description
These Mint Chocolate Chip Protein Balls are a delicious and nutritious no-bake snack, combining the refreshing taste of peppermint with rich chocolate and protein-packed ingredients. Perfect for a quick energy boost or a healthy treat, these balls are easy to prepare, gluten-free, and vegetarian-friendly.
Ingredients
Dry Ingredients
- 1 cup rolled oats
- 1/2 cup chocolate protein powder
- 1/4 cup mini dark chocolate chips
- pinch of salt
Wet Ingredients
- 1/4 cup almond butter
- 2 tablespoons honey
- 1/4 teaspoon peppermint extract
- 2 tablespoons milk of choice (add more if needed)
Instructions
- Combine Dry Ingredients: In a large bowl, mix together the rolled oats, chocolate protein powder, mini dark chocolate chips, and a pinch of salt until evenly combined.
- Mix Wet Ingredients: In a separate bowl, stir together the almond butter, honey, peppermint extract, and milk until the mixture is smooth and well blended.
- Combine Wet and Dry Mixtures: Pour the wet ingredients into the bowl with the dry ingredients. Mix thoroughly until all ingredients are fully incorporated. If the mixture feels too dry, add a splash more milk to reach a workable consistency.
- Form the Balls: Using your hands, roll the mixture into 1-inch diameter balls. Place each ball onto a baking sheet or plate lined with parchment paper or a clean surface.
- Chill to Set: Refrigerate the protein balls for at least 30 minutes to allow them to firm up and develop their flavors before serving.
Notes
- You can substitute almond butter with peanut butter or sunflower seed butter for a nut-free option.
- For a stronger mint flavor, add an extra drop of peppermint extract.
- Store in an airtight container in the refrigerator for up to one week to maintain freshness.

