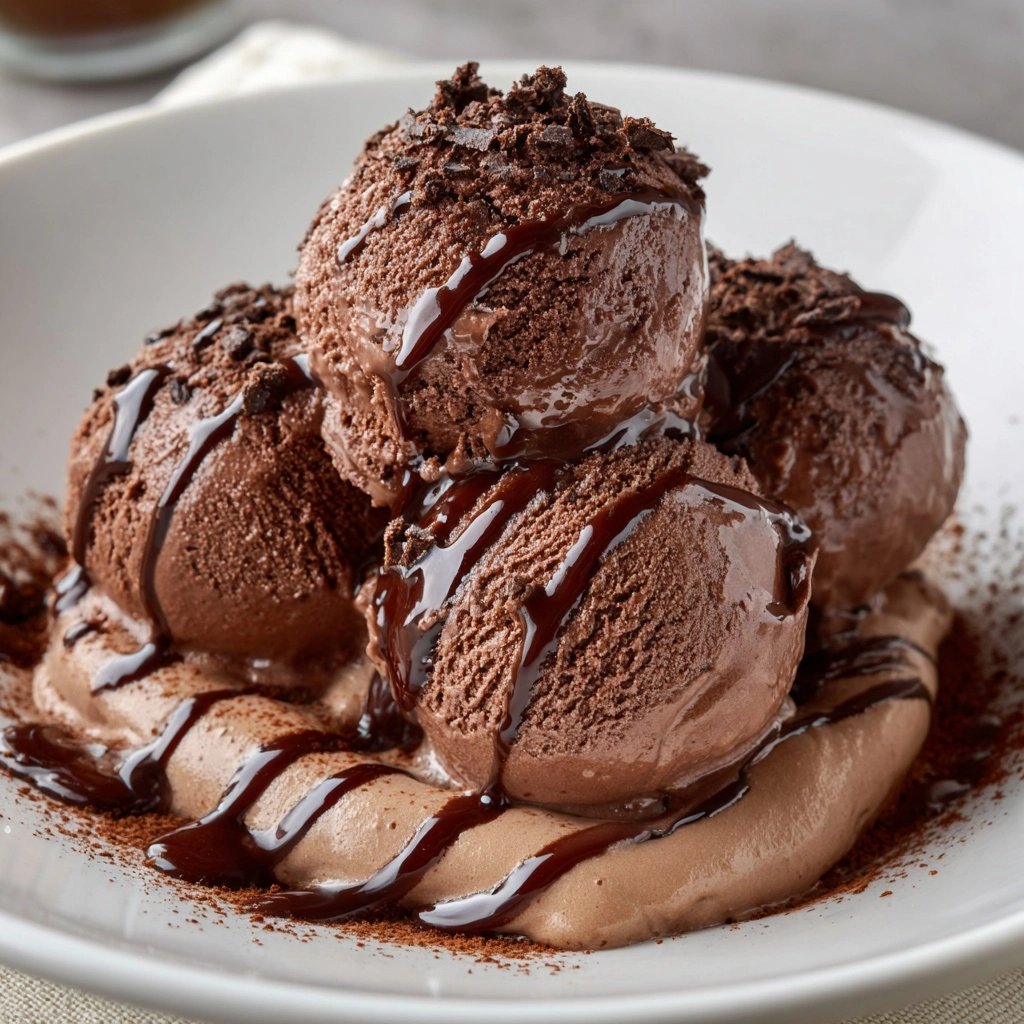
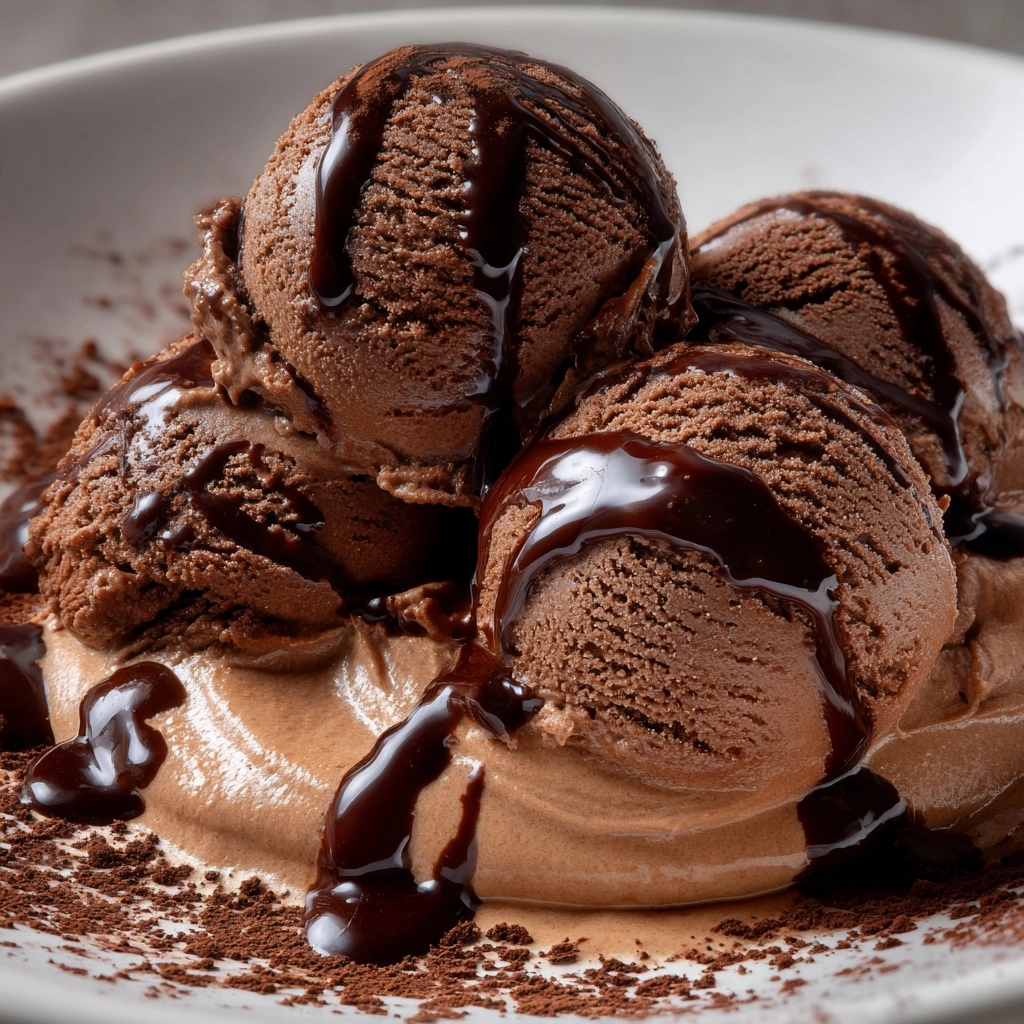
If you have a serious sweet tooth and a love for all things chocolate, this Homemade Chocolate Ice Cream Recipe is going to feel like a warm hug on a cold day or a cool refreshment in the summer sun. Imagine the silky smooth texture and intensely rich cocoa flavor that only homemade ice cream can deliver, crafted right in your kitchen with simple, wholesome ingredients. This recipe balances the perfect blend of creamy custard and deep chocolate notes, creating a luscious dessert that’s both classic and irresistibly comforting. Whether you’re treating yourself or impressing guests, this Homemade Chocolate Ice Cream Recipe will quickly become your go-to indulgence.
Ingredients You’ll Need
Getting started with this Homemade Chocolate Ice Cream Recipe is a breeze thanks to a handful of essential ingredients. Each component works together to build the luscious texture, rich chocolatey taste, and creamy body that make this ice cream a standout.
- 2 cups heavy cream: Gives the ice cream its creamy, luxurious texture and richness.
- 1 cup whole milk: Adds smoothness and balances the richness of the cream.
- 3/4 cup granulated sugar: Sweetens the ice cream without overpowering the chocolate flavor.
- 1/2 cup unsweetened cocoa powder: Provides that deep, intense chocolate taste and beautiful color.
- 4 oz semisweet chocolate, chopped: Melts into the custard base for an extra punch of chocolate bliss.
- 4 large egg yolks: Essential for the creamy custard texture and adds a rich body to the ice cream.
- 1 teaspoon vanilla extract: Enhances the chocolate flavor and adds subtle warmth.
- Pinch of salt: Balances the sweetness and intensifies all other flavors.
How to Make Homemade Chocolate Ice Cream Recipe
Step 1: Warm the Milk and Cocoa Mix
Start by combining the whole milk, sugar, unsweetened cocoa powder, and a pinch of salt in a medium saucepan. Heat this mixture slowly over medium heat, stirring gently until it’s warm and the sugar dissolves—be careful not to let it boil. This step draws out the rich cocoa flavor and creates the perfect base for melting your chocolate.
Step 2: Melt the Semisweet Chocolate
Next, stir in the chopped semisweet chocolate and whisk continuously until it melts completely and the mixture turns smooth and glossy. This melted chocolate adds a velvety texture and deep complexity that truly elevates the ice cream.
Step 3: Temper the Egg Yolks
In a separate bowl, whisk the egg yolks until they are smooth. Slowly pour about half a cup of the warm chocolate mixture into the yolks while whisking vigorously—this tempering technique prevents the eggs from scrambling when combined with the hot liquid.
Step 4: Combine and Thicken the Custard
Pour the tempered yolks back into the saucepan with the rest of the chocolate mixture. Cook over low heat, stirring constantly, until the custard thickens enough to coat the back of a spoon—this should take about 5 to 7 minutes. Patience here pays off, as it ensures a silky texture that will freeze beautifully.
Step 5: Finish and Chill
Remove the saucepan from heat and stir in the heavy cream and vanilla extract. For the smoothest ice cream, strain the custard through a fine mesh sieve into a clean bowl to catch any bits of cooked egg. Cover and refrigerate for at least 4 hours, or overnight if you can wait that long; chilling is key to developing flavor and texture.
Step 6: Churn and Freeze
Once your custard is thoroughly chilled, churn it in your ice cream maker according to the manufacturer’s instructions. After churning, transfer the ice cream to a freezer-safe container and freeze for at least 2 hours so it firms up to a scoopable consistency. Then the magic of homemade frozen delight is yours to enjoy!
How to Serve Homemade Chocolate Ice Cream Recipe

Garnishes
Elevate your Homemade Chocolate Ice Cream Recipe by adding a few thoughtful garnishes. Fresh raspberries, a sprinkle of shaved dark chocolate, or a handful of toasted nuts can add brightness, texture, or crunch. A drizzle of warm chocolate sauce or caramel elevates every bite to another level of decadence.
Side Dishes
Pair this rich chocolate ice cream with simple sides like a warm brownie, a buttery chocolate chip cookie, or classic waffle cones for an unforgettable dessert experience. The contrast between warm and cold, soft and crunchy, amplifies every delicious moment.
Creative Ways to Present
Want to impress guests? Serve your Homemade Chocolate Ice Cream Recipe in elegant martini glasses topped with a mint leaf for a fresh pop of color, or layer it with crushed cookies and whipped cream in a parfait glass for a restaurant-worthy treat. Even scooped atop a warm chocolate lava cake, this ice cream steals the show.
Make Ahead and Storage
Storing Leftovers
Keep your Homemade Chocolate Ice Cream Recipe fresh by storing any leftovers in an airtight container to prevent freezer burn. Press a piece of parchment paper on the surface before sealing to maintain that creamy texture.
Freezing
Homemade ice cream freezes best when kept at a consistent temperature below 0°F. Avoiding frequent thaw-and-refreeze cycles preserves its silky smoothness. For best results, consume within two weeks.
Reheating
Unlike baked foods, reheating isn’t really a thing for ice cream! Instead, simply let it soften at room temperature for 5 to 10 minutes before scooping. This brief wait brings out the full richness and makes serving a breeze.
FAQs
Can I make this ice cream without an ice cream maker?
Yes, but the texture won’t be quite as smooth. You can periodically stir the mixture every 30 minutes while freezing to break up ice crystals, though using an ice cream maker yields the creamiest results.
Is this Homemade Chocolate Ice Cream Recipe gluten-free?
Absolutely! All the ingredients used here are naturally gluten-free, making it safe for anyone avoiding gluten.
Can I substitute milk alternatives in this recipe?
While you could try using almond or oat milk, the traditional creaminess comes from dairy’s higher fat content, so the texture may be less rich and smooth when substituting.
What’s the best way to add mix-ins like nuts or chocolate chips?
Fold in your favorite extras right after churning but before the final freezing step. This ensures they stay evenly distributed and don’t sink to the bottom.
Can I prepare the custard base ahead of time?
Definitely! The custard can be made and chilled up to 2 days in advance, making this Homemade Chocolate Ice Cream Recipe perfect for planning ahead.
Final Thoughts
There’s nothing quite like the satisfaction of enjoying a scoop of your very own Homemade Chocolate Ice Cream Recipe. It’s an experience that combines creativity, patience, and comfort all in one luscious bite. I encourage you to give this recipe a try—you might find it becomes a beloved treat that you want to make again and again, sharing joy with family and friends along the way.
Print
Homemade Chocolate Ice Cream Recipe
- Prep Time: 20 minutes
- Cook Time: 10 minutes
- Total Time: 30 minutes (plus 4+ hours chilling and 2 hours freezing)
- Yield: 1 quart (about 8 servings)
- Category: Dessert
- Method: Churning
- Cuisine: American
- Diet: Vegetarian, Gluten Free
Description
Creamy and rich homemade chocolate ice cream made with a smooth custard base, combining intense cocoa flavor, semisweet chocolate, and vanilla. This classic churned dessert is perfect for chocolate lovers craving a luscious, satisfying treat made from scratch.
Ingredients
Ice Cream Base
- 2 cups heavy cream
- 1 cup whole milk
- 3/4 cup granulated sugar
- 1/2 cup unsweetened cocoa powder
- 4 oz semisweet chocolate, chopped
- 4 large egg yolks
- 1 teaspoon vanilla extract
- Pinch of salt
Instructions
- Heat the milk mixture: In a medium saucepan, combine the milk, sugar, cocoa powder, and salt. Heat over medium heat until warm but not boiling. Stir in the chopped chocolate and whisk until melted and smooth.
- Temper the egg yolks: In a separate bowl, whisk the egg yolks. Slowly pour about 1/2 cup of the hot chocolate mixture into the yolks, whisking constantly to temper the eggs and prevent scrambling.
- Combine and thicken: Gradually whisk the yolk mixture back into the saucepan with the remaining chocolate mixture. Cook over low heat, stirring constantly, until the mixture thickens slightly and coats the back of a spoon, about 5 to 7 minutes.
- Finish the custard base: Remove from heat and stir in the heavy cream and vanilla extract. Then strain the mixture through a fine mesh sieve into a clean bowl to remove any bits of cooked egg.
- Chill the mixture: Cover and refrigerate the custard for at least 4 hours or overnight until thoroughly chilled. This ensures a smooth texture when churned.
- Churn the ice cream: Pour the chilled custard into an ice cream maker and churn according to the manufacturer’s instructions until it reaches a soft-serve consistency.
- Freeze before serving: Transfer the churned ice cream to a freezer-safe container and freeze for at least 2 hours to firm up before serving.
Notes
- For an extra rich flavor, add a splash of espresso or coffee liqueur to the custard base.
- Fold in chocolate chips, brownie chunks, or nuts before freezing for delightful mix-ins.
- Ensure the custard is well chilled before churning to achieve the best texture.


