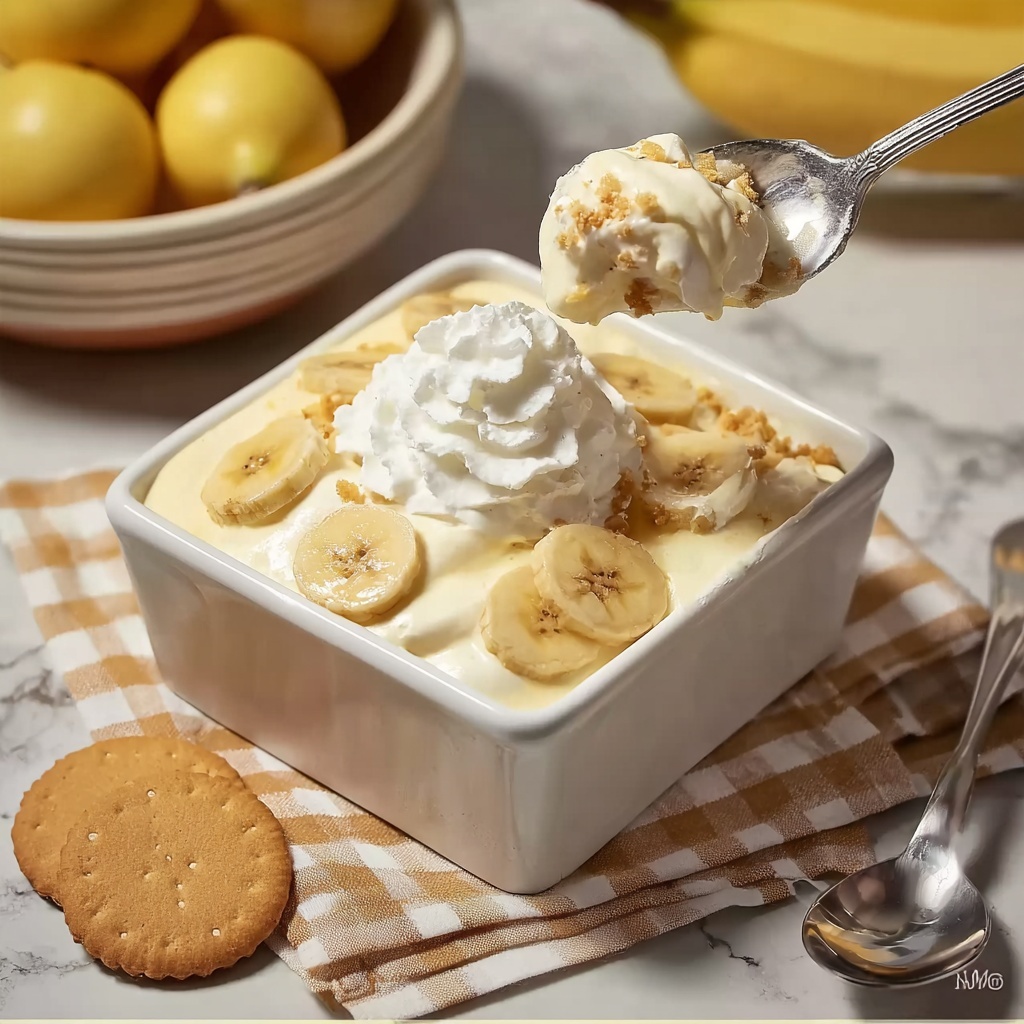
If you have a sweet tooth and a hankering for comfort food, let me introduce you to the ultimate nostalgia hit: the Creamy Banana Pudding with Vanilla Wafers Recipe. This classic dessert marries silky, luscious banana pudding with the crunchy sweetness of vanilla wafers. Every spoonful bursts with layers of smooth vanilla custard, fresh bananas, and crunchy cookies, creating a harmony of textures and flavors that feels both indulgent and homey. It’s the kind of treat that makes you slow down, savor, and smile from the very first bite, perfect for sharing or savoring all on your own.
Ingredients You’ll Need
This Creamy Banana Pudding with Vanilla Wafers Recipe keeps things simple yet absolutely delightful. With just a handful of pantry staples and fresh bananas, each ingredient plays a crucial role in creating that silky texture, sweet flavor, and irresistible creaminess you’re craving.
- Whole milk: Provides the rich, creamy base essential for smooth pudding.
- Granulated sugar: Sweetens the pudding perfectly without overpowering.
- Cornstarch: Acts as the thickening agent to give your pudding that lovely custard consistency.
- Salt: Enhances all the flavors.
- Large egg yolks: Add richness and help set the pudding for the right texture.
- Pure vanilla extract: Infuses the pudding with warm, fragrant vanilla notes.
- Ripe bananas: Bring natural sweetness and a fresh fruity layer.
- Vanilla wafers: Add that iconic crunch and subtle vanilla flavor.
- Whipped cream (optional): For that extra creamy, dreamy finish.
How to Make Creamy Banana Pudding with Vanilla Wafers Recipe
Step 1: Make the Pudding Base
Start by whisking sugar, cornstarch, and salt in a saucepan. Gradually add in the milk, mixing until smooth to avoid lumps. This base is your canvas for creamy goodness, so take your time to get it just right.
Step 2: Cook Until Thickened
Heat the mixture over medium heat while stirring constantly. After about 6 to 8 minutes, you’ll notice the mixture thickens and starts to bubble gently—this means your pudding is coming together beautifully.
Step 3: Temper the Egg Yolks
To keep the eggs from scrambling, whisk them lightly in a bowl. Then, slowly mix in half a cup of the hot pudding mixture, stirring constantly. This step ensures a silky texture and that rich thickening power from the yolks.
Step 4: Combine and Cook Some More
Pour the tempered egg mixture back into the saucepan, stirring the whole time. Cook on low heat for 2 to 3 minutes until thick and luscious, then remove from heat. Stir in your vanilla extract for that fragrant, comforting touch.
Step 5: Cool Slightly
Let the pudding cool for about 10 minutes to make layering easier and to keep bananas and wafers from getting soggy immediately after assembly.
Step 6: Layer the Pudding
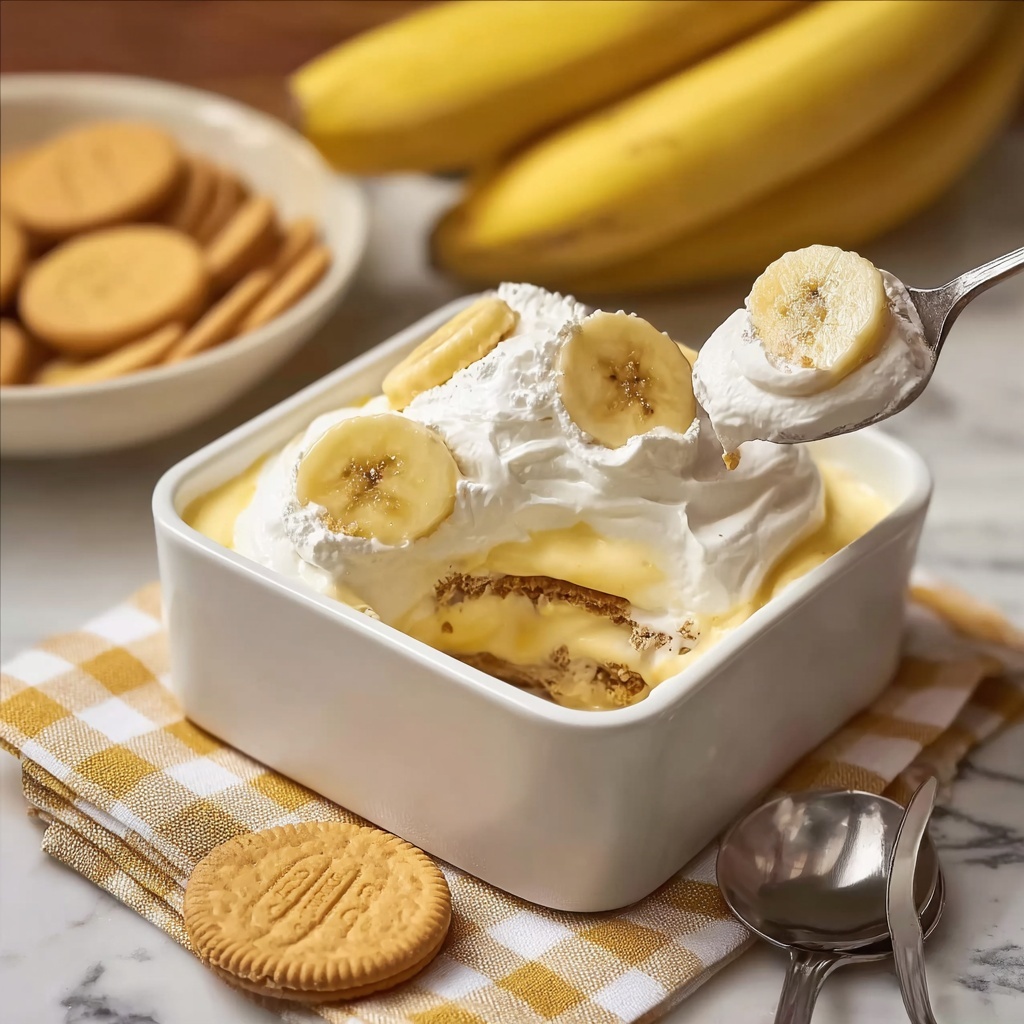
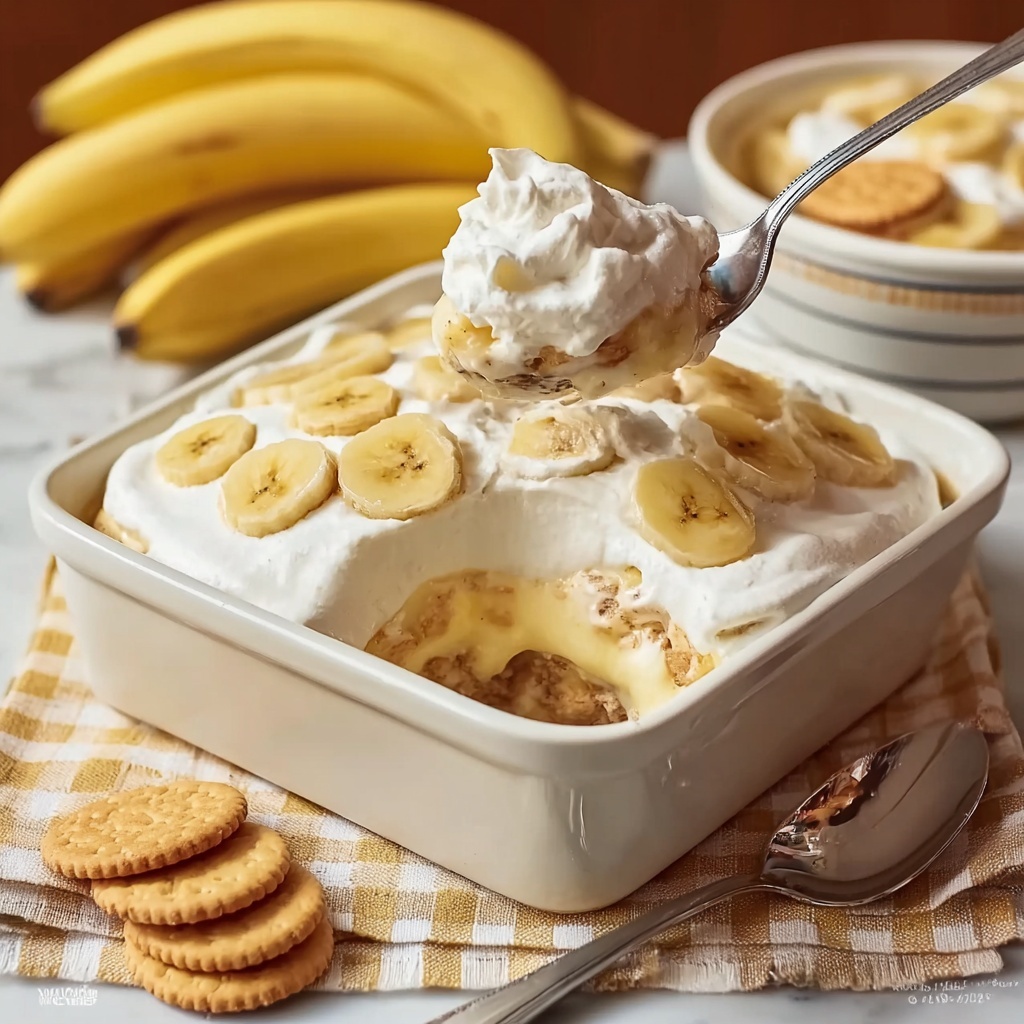
Now comes the fun part: layering! In your chosen serving dish or in individual glasses, start with a layer of vanilla wafers, add some ripe sliced bananas, and spoon over a generous amount of pudding. Repeat these layers until you use all your ingredients, finishing on a smooth pudding layer.
Step 7: Chill Thoroughly
Cover your creation tightly with plastic wrap, pressing it right onto the pudding surface to prevent a skin. Refrigerate for at least three hours so all those delicious flavors meld perfectly.
Step 8: Top and Serve
When you’re ready to enjoy, dollop whipped cream on top, add extra banana slices, or crumble some wafers over for a final touch of texture and sweetness.
How to Serve Creamy Banana Pudding with Vanilla Wafers Recipe
Garnishes
Whipped cream is a classic garnish that amps up the creaminess, but don’t stop there! Fresh banana slices provide a fruity zing, while crumbled vanilla wafers add a delightful crunch. Toasted pecans or a sprinkle of cinnamon can even turn up the flavor to a whole new level.
Side Dishes
The beauty of this dish is that it’s often a standalone star, but pairing it with a light cup of coffee or a refreshing herbal tea perfectly balances its sweetness. If you want to build a Southern-inspired meal, pair it with crispy fried chicken or a fresh garden salad for contrast.
Creative Ways to Present
For a fun twist, try serving your pudding in individual mason jars or pretty glass parfait cups to showcase the layers. You could also turn it into parfaits by adding granola or nuts for even more texture, or make miniature banana pudding shooters for parties and gatherings. Each way turns this classic into a charming conversation starter.
Make Ahead and Storage
Storing Leftovers
Leftover pudding keeps wonderfully in an airtight container in the fridge for up to 3 days. Because of the fresh bananas, it’s best enjoyed within that timeframe to enjoy optimal texture and flavor.
Freezing
While you technically can freeze this pudding, the bananas may become mushy, and the texture might change. If you want to freeze it, consider preparing just the pudding base without bananas and layering fresh bananas after thawing for the best results.
Reheating
This pudding is best served cold or at room temperature. If you must reheat, do so gently in short bursts in the microwave, stirring often to keep the texture smooth. Avoid overheating as it could curdle the eggs or melt the wafers unpredictably.
FAQs
Can I use low-fat or non-dairy milk?
Yes, you can substitute whole milk with low-fat or non-dairy options like almond or oat milk, but keep in mind the pudding may be less rich and creamy. You might want to add a bit more cornstarch to thicken the pudding accordingly.
How ripe should the bananas be?
For the best flavor and sweetness, use ripe bananas that have yellow skins with a few brown spots. They are soft and sweet but not overripe or mushy, which helps maintain texture in the layers.
Can I prepare this dessert in advance?
Absolutely! The Creamy Banana Pudding with Vanilla Wafers Recipe tastes even better after chilling for several hours or overnight, as the flavors meld and the wafers soften to just the right bite.
Is it possible to make this recipe vegan?
You can make adaptations by using plant-based milk, a cornstarch-thickened vegan custard base, and egg replacers. Just swap the vanilla wafers for vegan versions as well. The texture and flavor will vary but it can be deliciously creamy.
What’s the best way to avoid soggy wafers?
Layer your vanilla wafers just before serving rather than too far in advance, and place the plastic wrap directly on the pudding surface to reduce moisture. Also, chopping some wafers and using them as a topping at mealtime adds delightful crunch.
Final Thoughts
There’s something truly magical about the Creamy Banana Pudding with Vanilla Wafers Recipe—it’s comfort, sweetness, and tradition all rolled into one irresistible dessert. Whether you’re treating yourself after a long day or sharing with loved ones at a gathering, this recipe never fails to bring smiles. Give it a try and let the creamy layers and nostalgic flavors charm their way into your heart and kitchen!
Print
Creamy Banana Pudding with Vanilla Wafers Recipe
- Prep Time: 20 minutes
- Cook Time: 10 minutes
- Total Time: 3 hours 30 minutes
- Yield: 6 servings
- Category: Dessert
- Method: Stovetop
- Cuisine: Southern American
Description
This classic Banana Pudding recipe features a creamy, homemade vanilla pudding layered with ripe bananas and crunchy vanilla wafers. It’s a comforting Southern dessert perfect for gatherings or a sweet treat any time. The pudding is cooked on the stovetop and chilled until set, then topped with whipped cream for an extra indulgent touch.
Ingredients
Pudding
- 3 cups whole milk
- 3/4 cup granulated sugar
- 1/4 cup cornstarch
- 1/4 teaspoon salt
- 3 large egg yolks
- 2 teaspoons pure vanilla extract
Layers
- 3 ripe bananas, sliced
- 1 box vanilla wafers (about 50 wafers)
- Whipped cream for topping (optional)
Instructions
- Mix dry ingredients and milk: In a medium saucepan, whisk together sugar, cornstarch, and salt. Gradually whisk in the whole milk until the mixture is smooth and lump-free.
- Cook pudding base: Place the saucepan over medium heat and cook, stirring constantly, for about 6-8 minutes or until the mixture thickens and reaches a gentle boil, ensuring it doesn’t burn on the bottom.
- Temper egg yolks: Remove the saucepan from heat. In a small bowl, whisk the egg yolks. Gradually whisk in about 1/2 cup of the hot milk mixture to slowly raise the temperature of the eggs without scrambling them.
- Combine and thicken pudding: Pour the tempered egg yolk mixture back into the saucepan while whisking constantly. Return to medium-low heat and cook for another 2-3 minutes until the pudding thickens further. Remove from heat and stir in the pure vanilla extract for flavor.
- Cool pudding slightly: Let the pudding cool for about 10 minutes to slightly thicken further and prevent melting the wafers during assembly.
- Assemble dessert layers: In a serving dish or individual glasses, layer vanilla wafers, followed by sliced bananas, then a layer of pudding. Repeat layering until all ingredients are used, finishing with a final layer of pudding.
- Chill: Cover the assembled pudding with plastic wrap pressed directly onto the surface to prevent a skin from forming. Refrigerate for at least 3 hours to let flavors meld and pudding set.
- Serve: Before serving, optionally top with whipped cream, additional banana slices, or crumbled vanilla wafers for extra texture and presentation.
Notes
- Use ripe but firm bananas to avoid mushy layers.
- For best texture, press plastic wrap directly onto the pudding surface before chilling to prevent a skin from forming.
- Vanilla wafers can be substituted with other similar cookies or biscuits if desired.
- This pudding is best enjoyed within 2 days of assembling.
- To speed cooling, place pudding in a shallow dish and stir occasionally before assembling.
