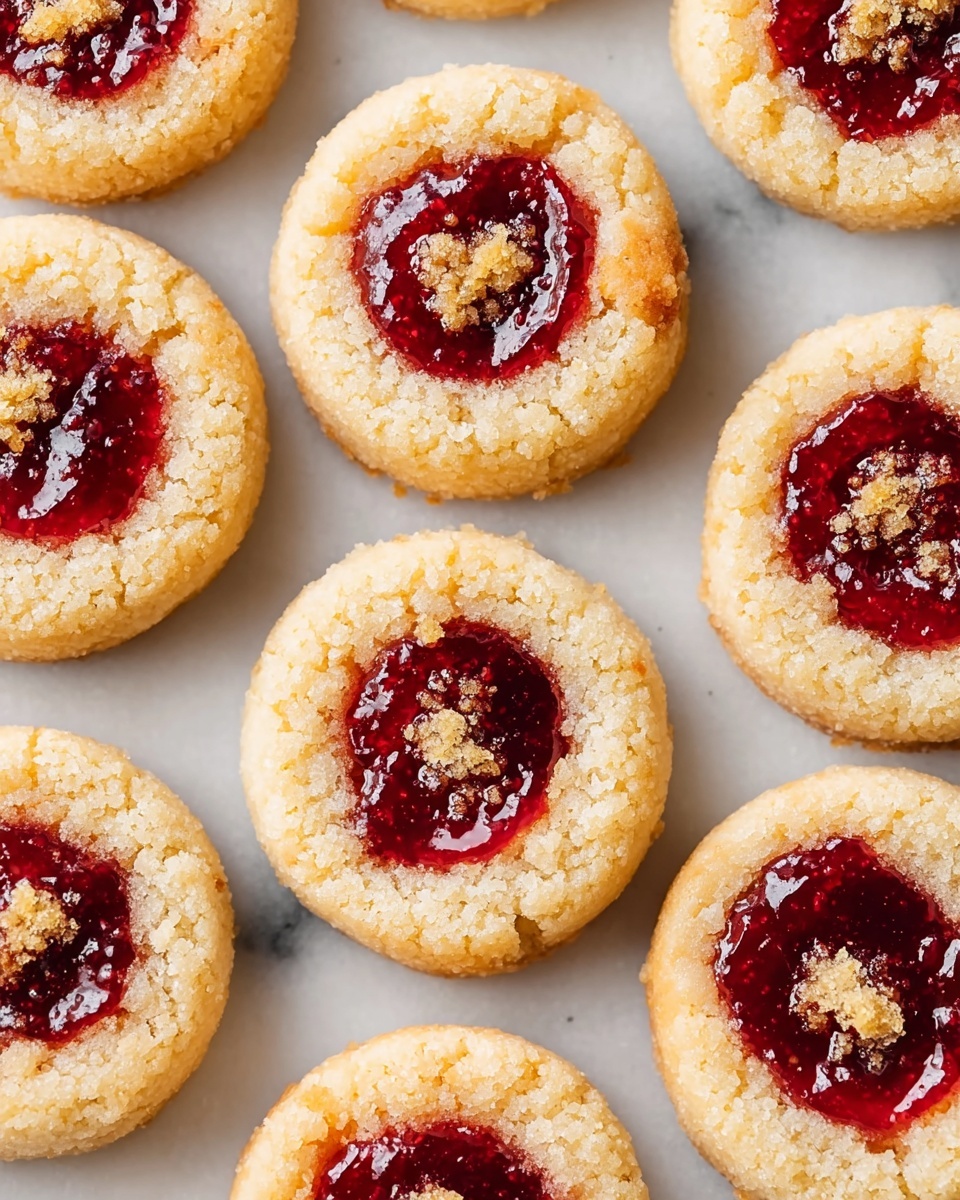
If you have a soft spot for cookies that perfectly balance buttery richness with a sweet, fruity center then you are going to fall in love with this Classic Thumbprint Cookies Recipe. These charming little cookies feel like a warm hug, combining a tender, melt-in-your-mouth base with bursting pockets of your favorite jam. Whether you are baking for a festive occasion or a cozy afternoon treat, these cookies never fail to bring joy with every bite. Let me walk you through how to make these delightful gems in a way that’s simple, fun, and incredibly rewarding.
Ingredients You’ll Need
The beauty of the Classic Thumbprint Cookies Recipe is in its straightforward ingredients, each playing a vital role to create that perfect cookie experience. From the soft structure given by flour to the sweet burst from the jam, these basics combine effortlessly to deliver unforgettable flavor and texture.
- 2 cups All-purpose flour: Provides structure and a soft crumb for the cookies.
- 1 cup Unsalted butter: Should be at room temperature for easy mixing and rich flavor.
- 3/4 cup Granulated sugar: Adds sweetness and contributes to the cookie’s crispness.
- 1 large Egg yolk: Brings moisture and acts as a binder for the dough.
- 1 teaspoon Vanilla extract: Enhances the overall flavor with a lovely aroma.
- 1/2 cup Jam or preserves: Choose your favorite flavor to personalize the filling.
- 1/4 teaspoon Salt: Balances sweetness and amplifies the cookie’s flavors.
How to Make Classic Thumbprint Cookies Recipe
Step 1: Preheat and Prepare
Start by preheating your oven to 350°F (175°C). This ensures that when you’re ready to bake, the oven is perfectly hot to create that tender cookie texture with lightly golden edges. Line your baking sheet with parchment paper or a silicone mat for easy cleanup and to prevent sticking.
Step 2: Cream the Butter and Sugar
In a large bowl, cream together the softened butter and granulated sugar until the mixture becomes light and fluffy. This step takes a few minutes but is crucial because it incorporates air into the dough, giving your thumbprint cookies a tender, melt-in-your-mouth quality.
Step 3: Add Egg Yolk and Vanilla
Next, mix in the egg yolk and vanilla extract until the dough is smooth and evenly combined. The egg yolk adds richness and helps hold everything together, while vanilla adds that classic, comforting scent that makes these cookies so irresistible.
Step 4: Incorporate Dry Ingredients
Gradually add the all-purpose flour and salt into the wet mixture, mixing on low speed to avoid overworking the dough. This step helps keep the cookie tender rather than tough, so be gentle and patient as the dough comes together.
Step 5: Shape the Dough Balls
Once the dough is ready, roll it into 1-inch balls and place them onto your prepared baking sheet, spaced well apart. These little dough balls are going to turn into your charming thumbprint cookies, so keep them uniform for even baking.
Step 6: Create Thumbprint Wells
Using your thumb or the back of a teaspoon, press down gently in the center of each dough ball to create a small well. This indentation is what holds the luscious jam, so be careful not to press all the way through the dough.
Step 7: Fill with Jam
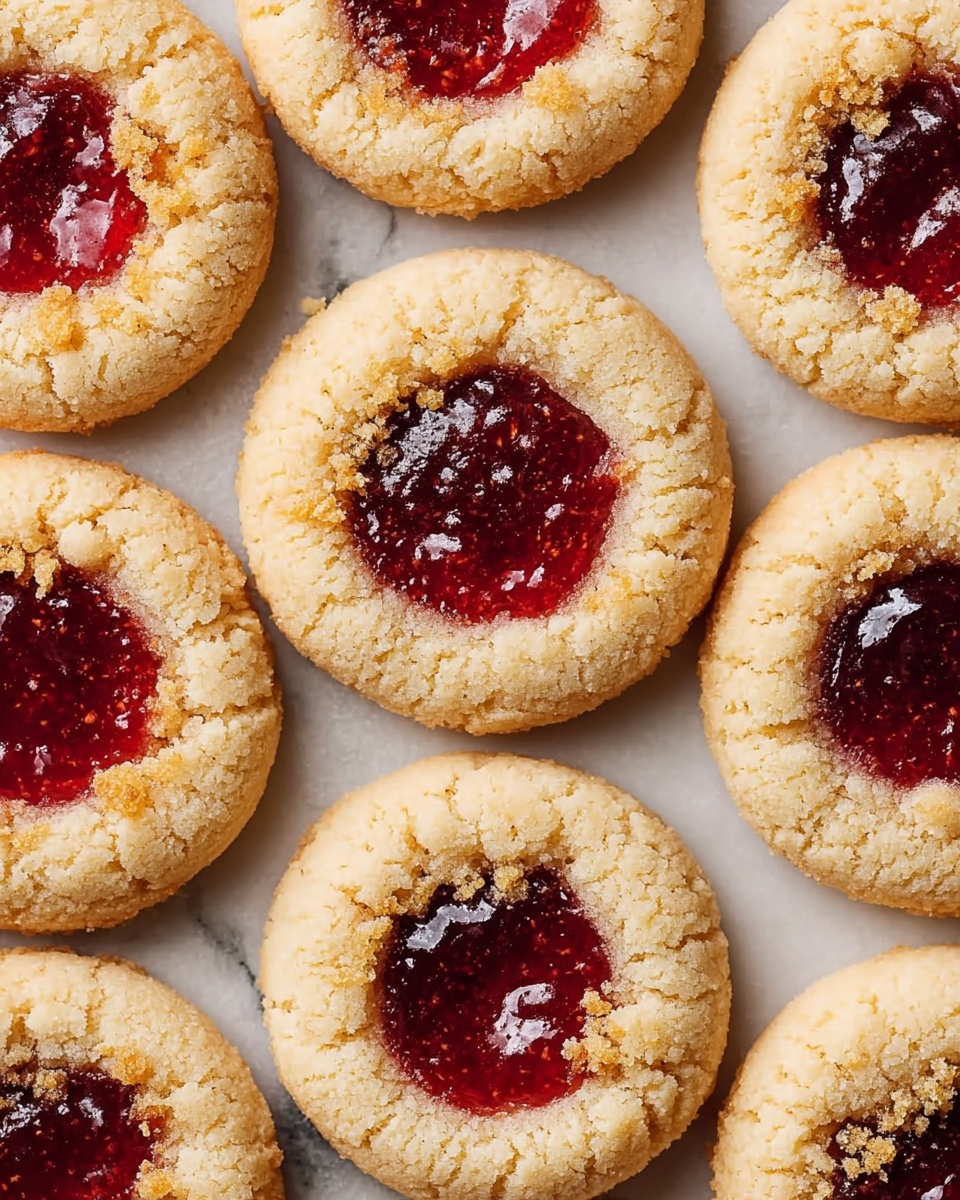
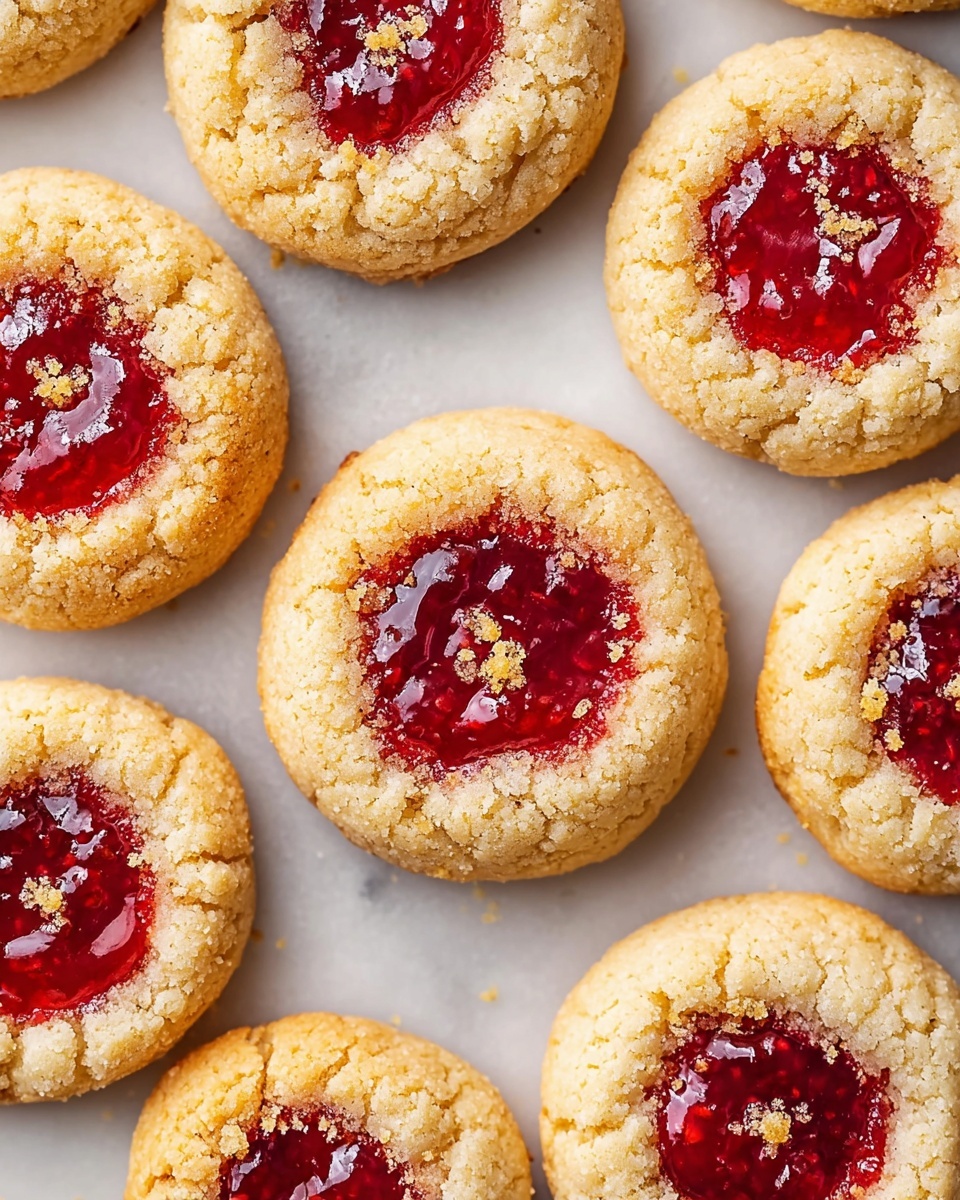
Fill each thumbprint with about 1/2 teaspoon of your chosen jam or preserves. Feel free to mix it up with raspberry, apricot, or strawberry to suit your mood. The fruity burst inside each cookie is what makes this Classic Thumbprint Cookies Recipe truly special.
Step 8: Bake to Perfection
Bake the cookies for 12 to 15 minutes until the edges just turn a soft golden brown. Keep an eye on them—this is the sweet spot when the cookies are tender yet slightly crisp, and the jam is bubbling with mouth-watering aroma.
Step 9: Cool Before Enjoying
Allow the cookies to cool on the baking sheet for about 5 minutes so they firm up slightly before moving them to a wire rack. This step prevents breakage and helps the jam set, making every bite delightful.
Step 10: Serve and Enjoy!
Your charming thumbprint cookies are ready to bring smiles all around. Serve them with a warm beverage or as a sweet note after a meal, and watch how quickly they disappear!
How to Serve Classic Thumbprint Cookies Recipe
Garnishes
Add a dusting of powdered sugar or a light drizzle of melted chocolate over your cookies to elevate their presentation and taste. Fresh mint leaves or a few edible flowers placed alongside can add a splash of color if you’re serving them at a party.
Side Dishes
Classic Thumbprint Cookies pair wonderfully with teas like Earl Grey or herbal blends, or a rich espresso if you prefer coffee. They also complement fresh fruit platters and soft cheeses, balancing sweet and savory for an indulgent snack time.
Creative Ways to Present
Consider arranging your cookies in a beautiful tin lined with wax paper for gifting, or stacked in a clear glass jar for a charming kitchen display. You can also create a cookie platter with a variety of jams and spreads so guests can customize their own thumbprint experience.
Make Ahead and Storage
Storing Leftovers
If you have any leftover cookies (not likely!), keep them in an airtight container at room temperature for up to a week. This helps them maintain their tender texture and the jam stays fresh and luscious.
Freezing
These cookies freeze beautifully. Place them in a single layer on a tray to freeze, then transfer to a sealed freezer-safe bag or container. When ready to enjoy, thaw at room temperature for a few hours. You can also freeze the dough balls before baking to save time later.
Reheating
To enjoy your cookies warm, pop them in a preheated oven at 300°F (150°C) for 5 minutes. This revives the buttery softness and makes the jam melty and irresistible again, as if freshly baked.
FAQs
Can I use different types of jam in this Classic Thumbprint Cookies Recipe?
Absolutely! One of the best parts of this recipe is its versatility. Feel free to experiment with any jam or preserves you love, such as raspberry, apricot, or even fig, to tailor the flavor to your liking.
What if I don’t have unsalted butter?
If you only have salted butter, you can still use it but reduce the added salt in the recipe to prevent the cookies from tasting too salty. The balance of sweetness and saltiness is key in this cookie.
Can I make these cookies gluten-free?
Yes, you can substitute the all-purpose flour with a gluten-free flour blend. Just make sure the blend is suitable for baking and includes a binding agent to keep the texture tender and not crumbly.
How do I prevent the jam from leaking while baking?
Press your thumb firmly but gently to create a well that’s deep enough without breaking the dough. Also, avoid overfilling with jam. Using thicker preserves can help minimize leaking compared to very runny jams.
Can I make these cookies vegan?
With a few adjustments, yes! Substitute butter with a vegan butter alternative and replace the egg yolk with a flax egg or other vegan binder. The texture might be slightly different, but the cookie will still be delicious.
Final Thoughts
Making this Classic Thumbprint Cookies Recipe is like creating little bites of happiness that bring a smile to everyone’s face. The blend of buttery dough and sweet jam is timeless and comforting. I promise once you’ve made these, you’ll find yourself reaching for this recipe again and again, whether for everyday treats or special celebrations. So, gather your ingredients and get baking—you’re about to create some very happy cookie moments.
Print
Classic Thumbprint Cookies Recipe
- Prep Time: 15 minutes
- Cook Time: 15 minutes
- Total Time: 30 minutes
- Yield: 24 cookies
- Category: Dessert
- Method: Baking
- Cuisine: American
- Diet: Vegetarian
Description
Classic Thumbprint Cookies are buttery, soft, and lightly sweetened cookies with a delightful jam center. Perfect for tea time or holiday treats, these cookies offer a tender crumb with a burst of fruity flavor in every bite.
Ingredients
Dry Ingredients
- 2 cups All-purpose flour
- 1/4 teaspoon Salt
Wet Ingredients
- 1 cup Unsalted butter, room temperature
- 3/4 cup Granulated sugar
- 1 large Egg yolk
- 1 teaspoon Vanilla extract
Filling
- 1/2 cup Jam or preserves (choose your favorite flavor)
Instructions
- Preheat Oven. Preheat your oven to 350°F (175°C) to ensure it reaches the right temperature before baking.
- Cream Butter and Sugar. In a large mixing bowl, beat the softened butter and granulated sugar together until the mixture is light, fluffy, and well combined.
- Add Egg Yolk and Vanilla. Mix in the egg yolk and vanilla extract thoroughly to incorporate moisture and enhance flavor.
- Combine Dry Ingredients. Gradually add the all-purpose flour and salt to the wet ingredients, mixing on low speed just until the dough forms and no dry flour remains.
- Shape Dough Balls. Roll the dough into 1-inch balls and place them spaced out on a baking sheet lined with parchment paper or a non-stick liner.
- Create Thumbprints. Press your thumb or the back of a spoon gently into the center of each dough ball to create a small well.
- Fill with Jam. Spoon about 1/2 teaspoon of your chosen jam or preserves into each thumbprint indentation.
- Bake. Bake the cookies in the preheated oven for 12-15 minutes, or until the cookie edges are lightly golden but the centers remain soft.
- Cool Cookies. Allow the cookies to cool on the baking sheet for about 5 minutes to firm up before transferring them to a wire rack to cool completely.
- Serve. Enjoy your classic thumbprint cookies with tea or coffee, or as a delightful snack any time of day.
Notes
- Use room temperature butter for easier creaming and better texture.
- Jam flavors like raspberry, apricot, or strawberry work particularly well.
- Do not overfill the thumbprints to prevent jam from spilling over while baking.
- For firmer cookies, chill the dough before baking.
- Store cookies in an airtight container at room temperature for up to 5 days.


