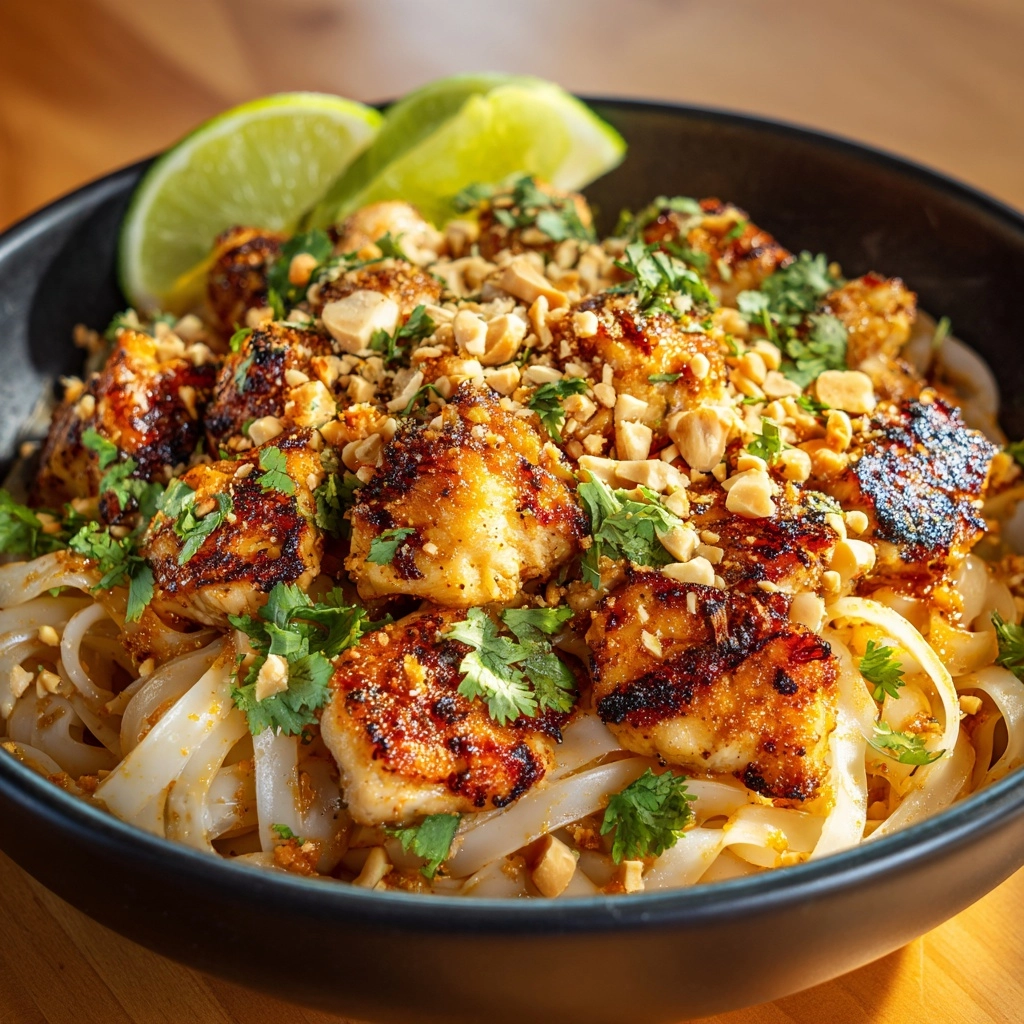
If you’re craving a dish that bursts with vibrant flavors, textures, and aromas, look no further than this Chicken Pad Thai Recipe. It’s a beloved Thai street food classic that combines tender chicken, chewy rice noodles, crunchy bean sprouts, and a tangy-sweet sauce to create a perfectly balanced meal. This recipe is not only approachable for home cooks but also delivers the authentic taste that will transport your taste buds straight to the bustling markets of Thailand.
Ingredients You’ll Need
The magic of this Chicken Pad Thai Recipe lies in its simple yet essential ingredients. Each component adds a unique touch, from the silky noodles to the crunchy peanuts, making this dish a symphony of flavor, color, and texture.
- 8 ounces flat rice noodles: Provides the chewy base that soaks up all the delicious sauce.
- 2 tablespoons vegetable oil: Perfect for sautéing and ensuring everything cooks evenly without sticking.
- 1 pound boneless skinless chicken breasts (thinly sliced): Tender protein that cooks quickly and absorbs flavors beautifully.
- 3 cloves garlic (minced): Adds a fragrant, savory punch that’s essential in Thai cuisine.
- 2 large eggs (lightly beaten): Brings a soft, silky texture and richness to the dish.
- 1 cup bean sprouts: Offers a fresh, crisp contrast to the warm noodles.
- 3 green onions (sliced into 1-inch pieces): Provides mild onion flavor and a lovely pop of green color.
- 1/4 cup roasted unsalted peanuts (chopped): Adds crunch and a delightful nuttiness that’s iconic in Pad Thai.
- 1 lime (cut into wedges): For bright, zesty bursts of citrus right before serving.
- Sauce ingredients: 3 tablespoons fish sauce, 2 tablespoons tamarind paste, 2 tablespoons brown sugar, 1 tablespoon soy sauce, 1 tablespoon rice vinegar, 1/2 teaspoon crushed red pepper flakes, each bringing that signature balance of salty, tangy, sweet, and spicy.
How to Make Chicken Pad Thai Recipe
Step 1: Prepare the noodles
Start by cooking your flat rice noodles according to the package instructions until they’re just tender but not mushy. Then drain and set them aside. This step is crucial because overcooked noodles can become soggy and lose their wonderful chewy texture.
Step 2: Whisk up the sauce
Mix the fish sauce, tamarind paste, brown sugar, soy sauce, rice vinegar, and crushed red pepper flakes in a small bowl. This flavorful blend forms the heart of the Chicken Pad Thai Recipe, bringing together a harmonious mix of salty, tangy, sweet, and spicy notes that are absolutely irresistible.
Step 3: Cook the chicken
Heat 1 tablespoon of vegetable oil in a large skillet or wok over medium-high heat. Add the thinly sliced chicken breasts and cook until they’re no longer pink and just lightly browned, about 5 to 6 minutes. Removing the chicken at this stage retains tenderness for the final toss.
Step 4: Sauté the garlic and scramble eggs
Add the remaining tablespoon of oil to the pan and quickly sauté the minced garlic for around 30 seconds, just until it becomes fragrant. Push the garlic to the side and pour in the beaten eggs, scrambling gently until they’re just set and soft. This layering of flavors is a key secret to getting the authentic Chicken Pad Thai Recipe taste.
Step 5: Combine and toss everything
Return the cooked chicken to the pan, then add in the drained noodles along with the sauce mixture. Toss everything together thoroughly, ensuring every noodle and piece of chicken is coated with that luscious sauce. Heat the mixture just long enough to warm through.
Step 6: Add fresh crunch
Finally, stir in the fresh bean sprouts and green onions right before removing the pan from heat. This keeps their texture vibrant and crisp, giving the dish that perfect fresh finish.
How to Serve Chicken Pad Thai Recipe

Garnishes
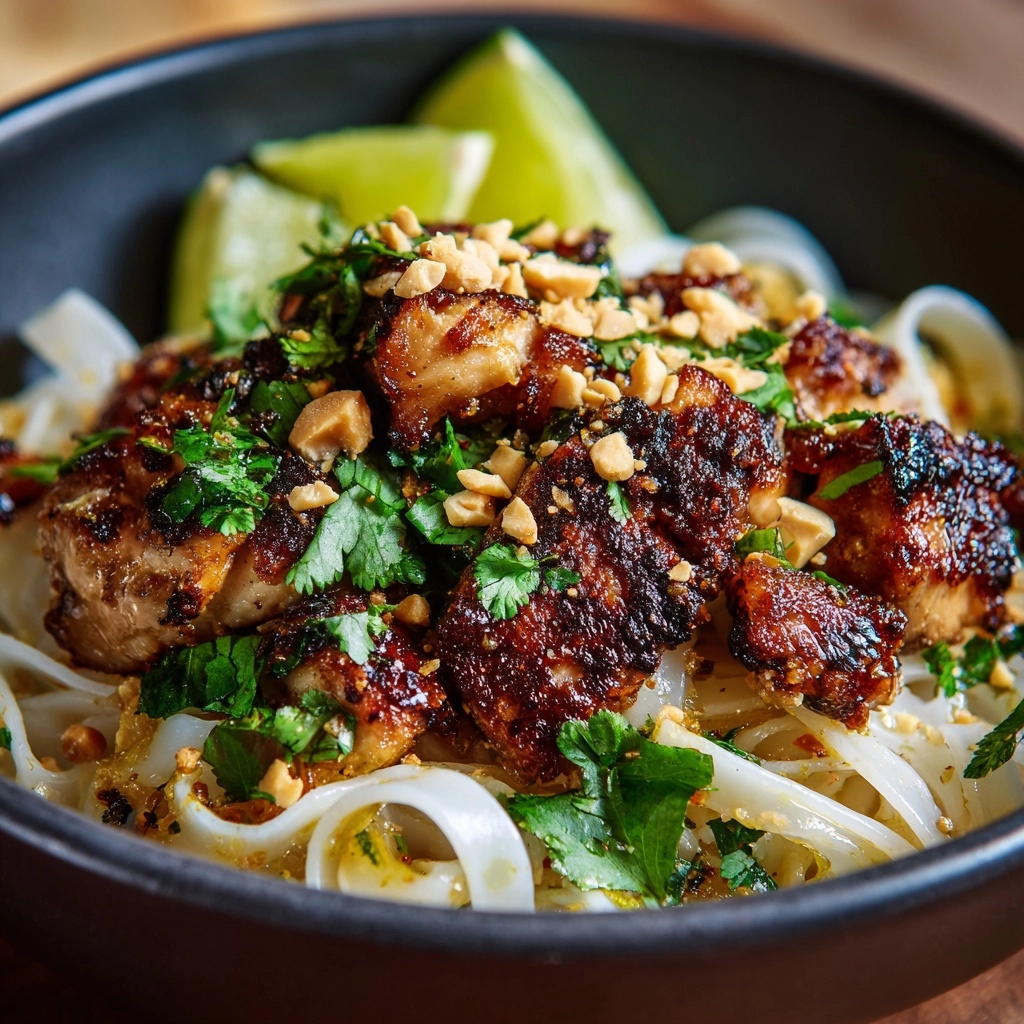
Garnishing your Chicken Pad Thai Recipe makes all the difference! Sprinkle chopped roasted peanuts over the top for crunch and nuttiness, then serve with lime wedges so everyone can add a spritz of citrus brightness just before eating. For those who love a little extra heat, a sprinkle of chili flakes or a drizzle of sriracha sauce takes the flavor up a notch.
Side Dishes
This dish shines on its own, but pairing it with light sides like a simple cucumber salad or a mild Thai-style soup can enhance your meal. Fresh herbs, such as cilantro or Thai basil, served on the side can also complement the flavors wonderfully.
Creative Ways to Present
For a festive touch, try serving your Chicken Pad Thai Recipe in individual banana leaf bowls or colorful ceramic dishes. You can also pile it on a bed of fresh lettuce leaves for a fun, deconstructed lettuce wrap experience that adds crunch and freshness with every bite.
Make Ahead and Storage
Storing Leftovers
Leftover Chicken Pad Thai Recipe keeps well in an airtight container in the refrigerator for up to 3 days. To maintain the noodles’ texture and the dish’s flavors, it’s best to cool it quickly and reheat gently.
Freezing
Freezing isn’t ideal for this dish since rice noodles can become overly soft and mushy upon thawing. However, if needed, freeze in a shallow container without the bean sprouts and fresh garnish, then thaw overnight in the fridge before reheating.
Reheating
Reheat leftovers gently in a skillet over medium heat, adding a splash of water or broth to loosen the noodles and keep them from drying out. Avoid microwaving for the best texture and flavor retention.
FAQs
Can I substitute tofu for chicken in this Chicken Pad Thai Recipe?
Absolutely! Firm tofu works wonderfully in this recipe. Press it to remove excess moisture, then cube and pan-fry before adding it to the noodles and sauce. It’s a great vegetarian alternative.
What if I can’t find tamarind paste?
If tamarind paste is hard to come by, use extra lime juice mixed with a bit of brown sugar as a substitute. It won’t be exactly the same but will still offer that tangy-sweet balance that tamarind provides.
Is this Chicken Pad Thai Recipe gluten-free?
Yes! Just make sure to use gluten-free soy sauce to keep the dish fully gluten-free. Rice noodles, fish sauce, and other ingredients are naturally gluten-free.
How spicy is this dish?
The recipe includes crushed red pepper flakes for a mild kick, but you can easily adjust the spice level up or down by adding more or less chili flakes or sriracha to suit your taste.
Can I prepare parts of this recipe ahead of time?
Definitely. You can prep the sauce, slice the chicken, and soak the noodles ahead of time. This makes the actual cooking process super quick and stress-free, perfect for busy weeknights.
Final Thoughts
This Chicken Pad Thai Recipe is a true gem that’s certain to become a favorite in your home. It’s full of bold, balanced flavors that are both satisfying and comforting. Whether you’re cooking for family, friends, or just treating yourself, this recipe offers a wonderful taste of Thai cuisine in a simple stovetop dish that’s fun to make and even better to eat. Give it a try—you’ll be amazed at how easy greatness can be!
Print
Chicken Pad Thai Recipe
- Prep Time: 15 minutes
- Cook Time: 15 minutes
- Total Time: 30 minutes
- Yield: 4 servings
- Category: Main Course
- Method: Stovetop
- Cuisine: Thai
- Diet: Gluten Free
Description
This Chicken Pad Thai recipe is a delicious and authentic Thai dish featuring tender chicken, flat rice noodles, and a tangy, slightly sweet tamarind sauce. Perfect for a quick weeknight dinner, it combines savory, sour, and spicy flavors balanced with fresh bean sprouts, green onions, and crunchy peanuts.
Ingredients
Main Ingredients
- 8 ounces flat rice noodles
- 2 tablespoons vegetable oil
- 1 pound boneless skinless chicken breasts, thinly sliced
- 3 cloves garlic, minced
- 2 large eggs, lightly beaten
- 1 cup bean sprouts
- 3 green onions, sliced into 1-inch pieces
- 1/4 cup roasted unsalted peanuts, chopped
- 1 lime, cut into wedges
For the Sauce
- 3 tablespoons fish sauce
- 2 tablespoons tamarind paste
- 2 tablespoons brown sugar
- 1 tablespoon soy sauce
- 1 tablespoon rice vinegar
- 1/2 teaspoon crushed red pepper flakes
Instructions
- Cook the Noodles: Cook the rice noodles according to package instructions until just tender, then drain and set aside to prevent overcooking.
- Prepare the Sauce: In a small bowl, whisk together fish sauce, tamarind paste, brown sugar, soy sauce, rice vinegar, and crushed red pepper flakes until well combined to create the signature Pad Thai sauce.
- Cook the Chicken: Heat 1 tablespoon vegetable oil in a large skillet or wok over medium-high heat. Add the thinly sliced chicken and cook for about 5–6 minutes until it is fully cooked through and lightly browned. Remove the chicken from the pan and set aside.
- Sauté Garlic and Scramble Eggs: Add the remaining vegetable oil to the pan. Sauté the minced garlic for 30 seconds until fragrant. Push the garlic to the side, pour in the beaten eggs, and scramble until just set, creating a soft texture.
- Combine Ingredients: Add the cooked noodles, chicken, and pre-mixed sauce to the skillet. Toss everything together thoroughly, ensuring the noodles and chicken are well coated and heated through evenly.
- Add Fresh Ingredients: Stir in the bean sprouts and green onions just before serving to maintain their crispness and fresh flavor.
- Garnish and Serve: Plate the Pad Thai and garnish with chopped roasted peanuts and lime wedges for squeezing over the dish to add a fresh burst of citrus.
Notes
- For extra flavor, add a sprinkle of chili flakes or a drizzle of sriracha.
- You can substitute shrimp or tofu for the chicken if desired.
- If tamarind paste is unavailable, use additional lime juice with a touch of brown sugar as a substitute.
- Use gluten-free soy sauce to keep the dish gluten-free.

