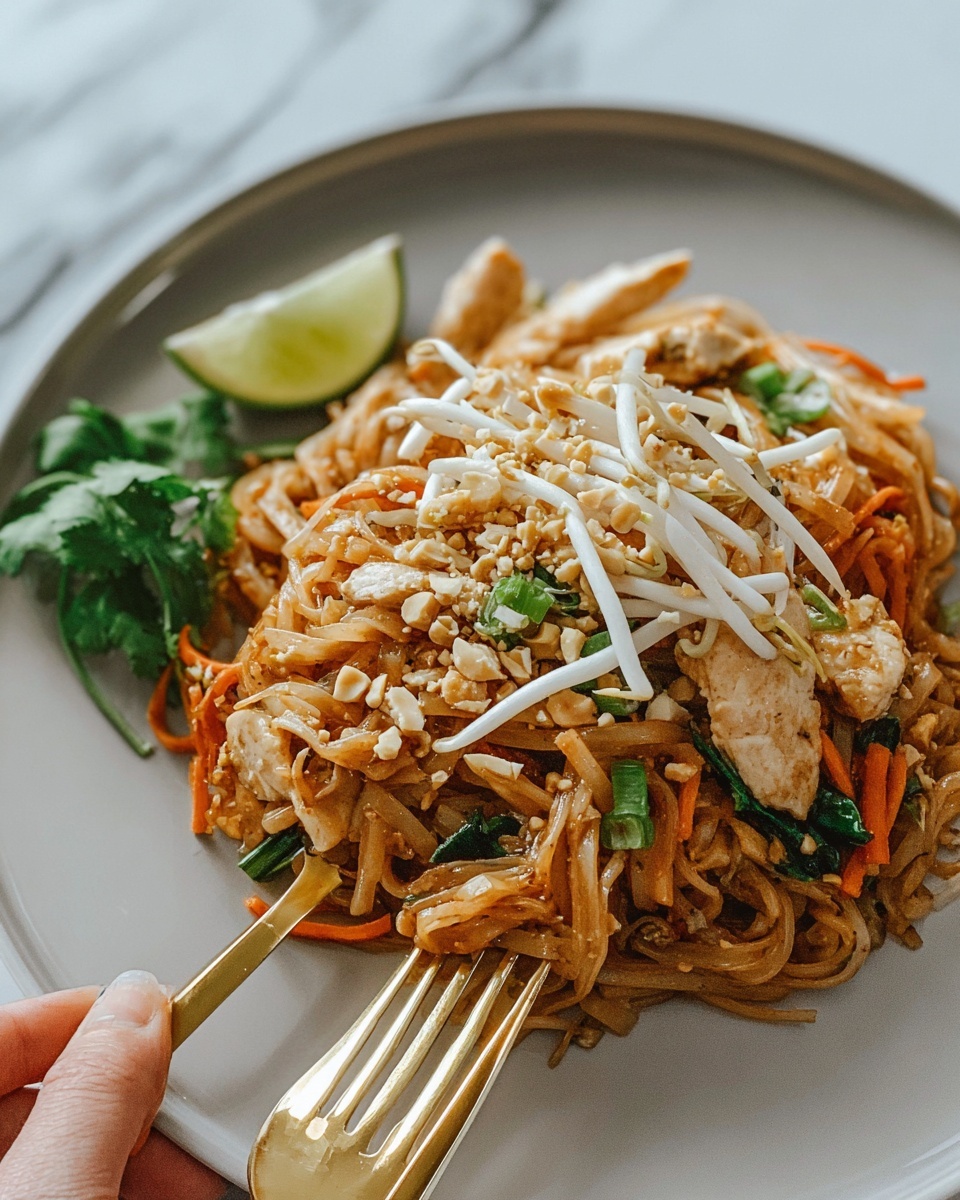
There is something irresistibly comforting and vibrant about a well-made Chicken Pad Thai Recipe that just lights up any dinner table. This classic Thai street food captures a perfect balance of sweet, tangy, salty, and spicy flavors combined with fun textures from crunchy peanuts and fresh bean sprouts. Whether you’re craving a flavorful weeknight meal or want to impress guests with a colorful, authentic dish, this recipe walks you through creating that perfect harmony right in your own kitchen. Trust me, once you master this Chicken Pad Thai Recipe, it might just become a new favorite you’ll turn to again and again.
Ingredients You’ll Need
While this Chicken Pad Thai Recipe might seem like it requires an impressive pantry, the truth is that the ingredients are wonderfully straightforward. Each one plays a crucial role—from the sauce that provides the signature tang and sweetness, to the fresh herbs and crunchy toppings that bring texture and brightness to every bite.
- 1 cup palm sugar: Offers a rich, caramel-like sweetness essential for the authentic Pad Thai flavor.
- 1/3 cup fish sauce: A salty and umami-packed ingredient that forms the savory backbone of the dish.
- 3 tablespoons tamarind paste: Adds a bright, tangy depth that balances the dish beautifully.
- 2 tablespoons lime juice, freshly squeezed: Gives a fresh citrus zing that lifts all the flavors.
- 1 tablespoon low-sodium soy sauce: Enhances umami and ensures the sauce isn’t overwhelmingly salty.
- 1/4 teaspoon red pepper flakes: Delivers just the right hint of heat to keep things exciting.
- 14 ounces vermicelli rice noodles: These tender, slightly chewy noodles soak up the sauce perfectly.
- 2 tablespoons vegetable oil: Ideal for stir-frying without overpowering the delicate flavors.
- 1 pound chicken breast, thinly sliced: The star protein that soaks up the sauce beautifully.
- 4 cloves garlic, minced: Infuses the dish with warm, aromatic notes.
- 4 large eggs, well beaten: Adds a silky texture and extra protein.
- 4 scallions, green part only, cut into 1-inch pieces: Bring a mild onion freshness and crunch.
- 2 cups fresh bean sprouts, divided: For that classic crunchy bite and freshness.
- Fresh chopped parsley, for garnish: Adds a pop of green color and a fresh herbal aroma.
- Finely chopped peanuts, for garnish: Provide crunch and a nutty contrast.
- Lime wedges, for garnish: Allow each person to add extra zing as desired.
How to Make Chicken Pad Thai Recipe
Step 1: Prepare the Magical Sauce
Begin by combining the palm sugar, fish sauce, tamarind paste, freshly squeezed lime juice, low-sodium soy sauce, and red pepper flakes in a jar with a lid. Shake it well until everything is fully blended. This sauce is the heart of your Chicken Pad Thai Recipe, delivering the perfect harmony of sweet, salty, tangy, and spicy flavors.
Step 2: Cook and Prep the Noodles
Following the package instructions, cook the vermicelli rice noodles until tender yet slightly chewy, which is exactly how they should be. Drain and rinse them with cold water to stop the cooking process and prevent sticking. Having noodles at the right texture is crucial because they soak up the sauce without turning mushy.
Step 3: Sear the Chicken
Heat 1 tablespoon of vegetable oil over medium-high heat in a wok or large skillet. Sauté the thinly sliced chicken breast for about 6 to 8 minutes until it is just cooked through and nicely browned. Removing the chicken at this stage keeps it tender and ensures it won’t overcook later when mingling with the sauce and noodles.
Step 4: Scramble the Eggs with Garlic
After removing the chicken, wipe out the wok to keep flavors clean, then add the remaining oil. Toss in the minced garlic and cook until you can smell its irresistible aroma. Immediately pour in the beaten eggs and gently stir them until they’re just cooked but still soft. This step adds richness and a lovely silkiness that blends beautifully with the other ingredients.
Step 5: Combine Everything Together
Return the cooked chicken to the wok, then add the prepared noodles. Toss everything carefully to separate the noodles and evenly distribute the chicken and eggs. Pour in your homemade sauce and stir to coat all the components well. This step is where all the flavors start coming together, building anticipation for that first delicious bite.
Step 6: Final Touches
Cook the Pad Thai while stirring occasionally until most of the sauce is absorbed into the noodles, about 10 minutes. Add the chopped scallions and half of the bean sprouts, tossing them in to combine just before serving. These fresh ingredients add the crunch and bright contrast that brings this Chicken Pad Thai Recipe to life.
How to Serve Chicken Pad Thai Recipe
Garnishes
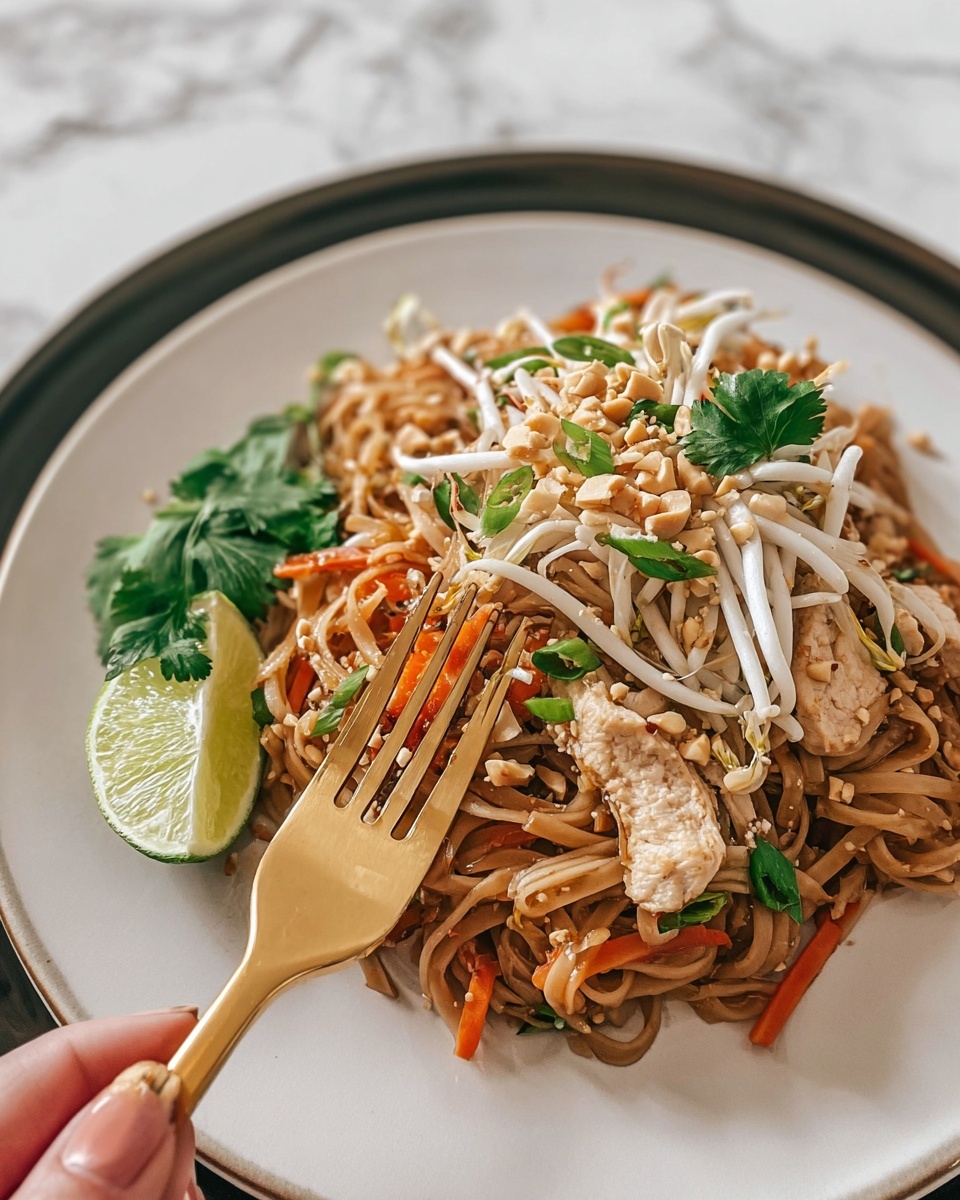
Presentation is part of the joy! Top your Chicken Pad Thai with the remaining fresh bean sprouts, a generous sprinkle of chopped parsley for freshness, finely chopped peanuts for crunchy texture, and lime wedges for an extra burst of tangy brightness. These garnishes elevate the dish both visually and in flavor.
Side Dishes
Serve your Pad Thai alongside light, refreshing sides like a crisp cucumber salad or Thai-style pickled vegetables. These sides add cooling contrasts that complement the sweet-spicy complexity of the main dish. Alternatively, a simple bowl of jasmine rice can help mellow the vibrant flavors if you’re feeding a crowd with varying spice tolerances.
Creative Ways to Present
For a fun twist, serve this Chicken Pad Thai Recipe in individual banana leaf cups or colorful bowls to bring a festive feel. Adding edible flowers or sprigs of fresh herbs on top can also enhance the aesthetic and impress your guests with your attention to detail. It’s not just dinner—it’s an experience.
Make Ahead and Storage
Storing Leftovers
Chicken Pad Thai keeps well in an airtight container in the refrigerator for up to 3 days. The noodles might absorb some sauce and appear drier, but adding a splash of water or lime juice when reheating helps revive that perfect texture and bright flavor.
Freezing
I don’t recommend freezing Chicken Pad Thai because the texture of rice noodles and fresh ingredients like bean sprouts will suffer. You’re better off enjoying leftovers within a few days to keep the dish tasting fresh and vibrant.
Reheating
When reheating, use a skillet over medium heat rather than the microwave to prevent the noodles from becoming mushy. Add a teaspoon of vegetable oil and a splash of water or lime juice to refresh the flavors. Stir gently until warmed through, and don’t forget to add fresh bean sprouts or scallions afterward for that coveted crunch.
FAQs
Can I substitute chicken with other proteins?
Absolutely! This Chicken Pad Thai Recipe is flexible. You can swap chicken for shrimp, tofu, or even beef slices. Just adjust cooking times accordingly to ensure your protein is cooked perfectly.
Where can I find tamarind paste?
Tamarind paste is usually available in the international aisle of well-stocked grocery stores or at Asian markets. It adds that unique tangy flavor, so grabbing a jar is worth it for all your future cooking adventures.
Is it possible to make this dish vegetarian or vegan?
Yes, you can easily make a vegetarian or vegan version by replacing fish sauce with soy sauce or tamari and using tofu or a plant-based protein instead of chicken. Just keep the flavor balance by adjusting the saltiness accordingly.
How spicy is this Chicken Pad Thai Recipe?
The recipe includes a subtle hint of heat from red pepper flakes, but it’s not overpowering. You can adjust the amount or add fresh chilies if you prefer a spicier kick.
What type of noodles should I use for authentic Pad Thai?
Vermicelli rice noodles, also called thin rice sticks, are the traditional choice. They have a delicate texture that perfectly soaks up the sauce without becoming heavy or gummy, which is exactly what this Chicken Pad Thai Recipe calls for.
Final Thoughts
Now that you have all the tips and know-how, it’s time to dive into making this amazing Chicken Pad Thai Recipe yourself. It’s a fantastic way to bring bright, bold flavors and a little exotic flair into your kitchen any night of the week. Have fun with it, share it with loved ones, and enjoy every flavorful bite of this true Thai classic!
Print
Chicken Pad Thai Recipe
- Prep Time: 15 minutes
- Cook Time: 30 minutes
- Total Time: 45 minutes
- Yield: 6 servings
- Category: Main Course
- Method: Stovetop
- Cuisine: Thai
Description
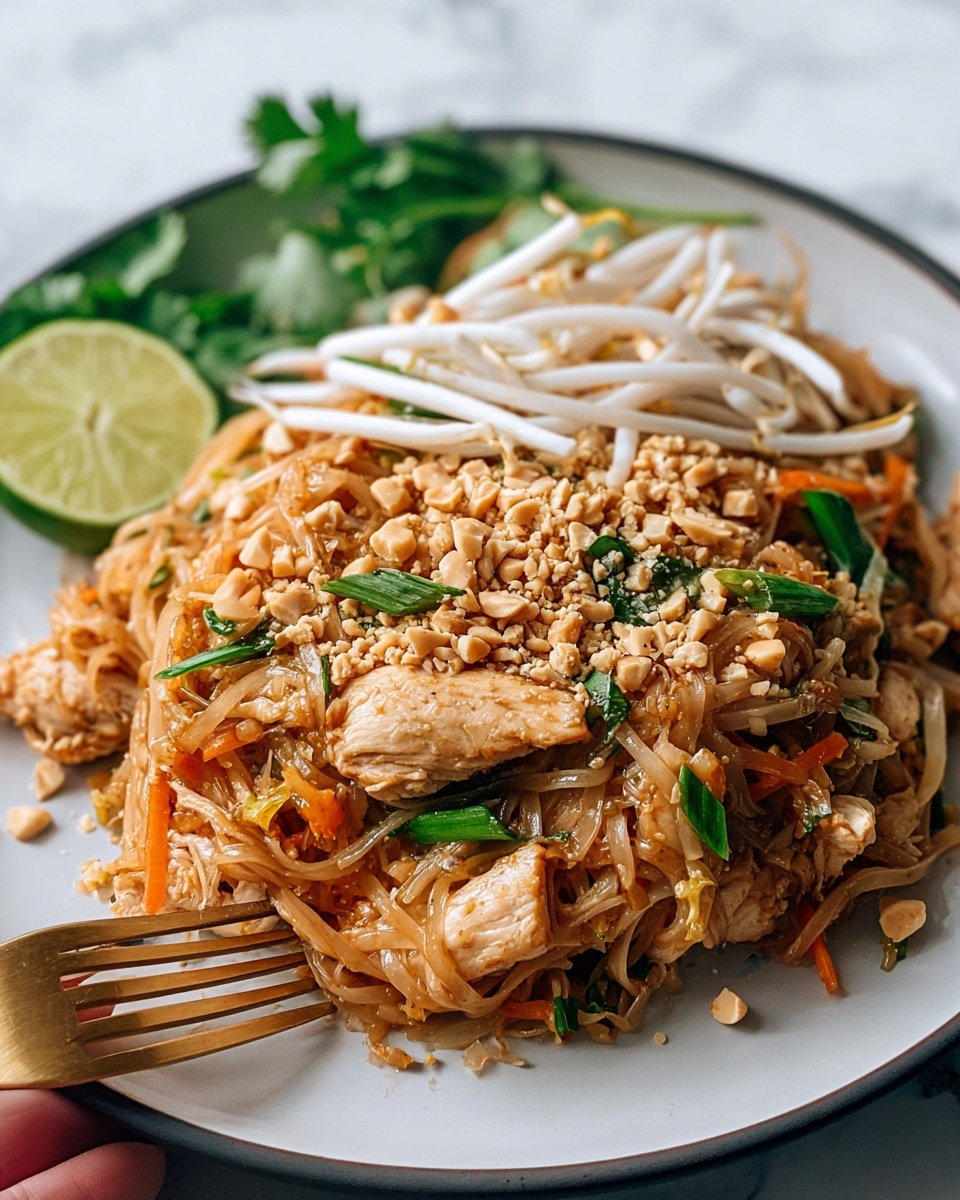
This Chicken Pad Thai is a flavorful and authentic Thai stir-fried noodle dish featuring tender chicken breast, delicate rice vermicelli noodles, and a tangy-sweet sauce made from tamarind paste, fish sauce, palm sugar, and lime juice. Garnished with fresh bean sprouts, parsley, chopped peanuts, and lime wedges, it offers a perfect balance of sweet, sour, salty, and spicy flavors. Ready in just 45 minutes, it’s an ideal weeknight dinner packed with vibrant Asian flavors.
Ingredients
Sauce
- 1 cup palm sugar (see notes)
- 1/3 cup fish sauce
- 3 tablespoons tamarind paste
- 2 tablespoons lime juice, freshly squeezed
- 1 tablespoon low-sodium soy sauce
- 1/4 teaspoon red pepper flakes
Main Ingredients
- 14 ounces vermicelli rice noodles
- 2 tablespoons vegetable oil
- 1 pound chicken breast, thinly sliced
- 4 cloves garlic, minced
- 4 large eggs, well beaten
- 4 scallions, green part only, cut into 1-inch pieces
- 2 cups fresh bean sprouts, divided
Garnish
- Fresh chopped parsley
- Finely chopped peanuts
- Lime wedges
Instructions
- Prepare the sauce: Combine palm sugar, fish sauce, tamarind paste, lime juice, soy sauce, and red pepper flakes in a jar with a lid. Shake vigorously until the sugar dissolves and ingredients are thoroughly mixed. Set aside to let flavors meld.
- Cook the noodles: Prepare the rice vermicelli noodles following the package instructions, typically soaking or boiling until tender. Drain and rinse under cold water to stop cooking and prevent sticking. Set aside.
- Cook the chicken: Heat 1 tablespoon of vegetable oil in a wok or large skillet over medium-high heat. Add the thinly sliced chicken breast and stir-fry until almost cooked through, about 6 to 8 minutes. Remove chicken from the pan and set aside to prevent overcooking.
- Cook garlic and eggs: Wipe out the wok to remove leftover juices. Add the remaining 1 tablespoon of oil and heat over medium-high heat. Add minced garlic and cook until fragrant but not browned, about 30 seconds. Pour in the beaten eggs, stirring continuously until eggs are just set and softly scrambled.
- Combine ingredients: Return the cooked chicken to the wok with eggs. Add the drained noodles and toss gently to separate and mix everything evenly. Pour the prepared sauce over the mixture and stir thoroughly to coat all ingredients.
- Finish cooking: Continue to stir-fry the noodles and chicken over medium heat for about 10 minutes, allowing most of the sauce to be absorbed and flavors to intensify. Add scallions and 1 cup of bean sprouts, tossing to combine evenly. Remove from heat.
- Serve and garnish: Plate the pad thai immediately, garnishing with the remaining fresh bean sprouts, chopped parsley, chopped peanuts, and lime wedges on the side for squeezing. Enjoy warm for the best flavor and texture.
Notes
- Use palm sugar for an authentic sweetness; brown sugar can be substituted but will slightly alter flavor.
- Soak vermicelli noodles according to package instructions carefully to avoid mushy texture.
- For spicier heat, increase red pepper flakes or add fresh chili slices.
- Chop peanuts finely just before serving to maintain crunchiness.
- Leftovers can be refrigerated for up to 2 days but are best enjoyed fresh.


