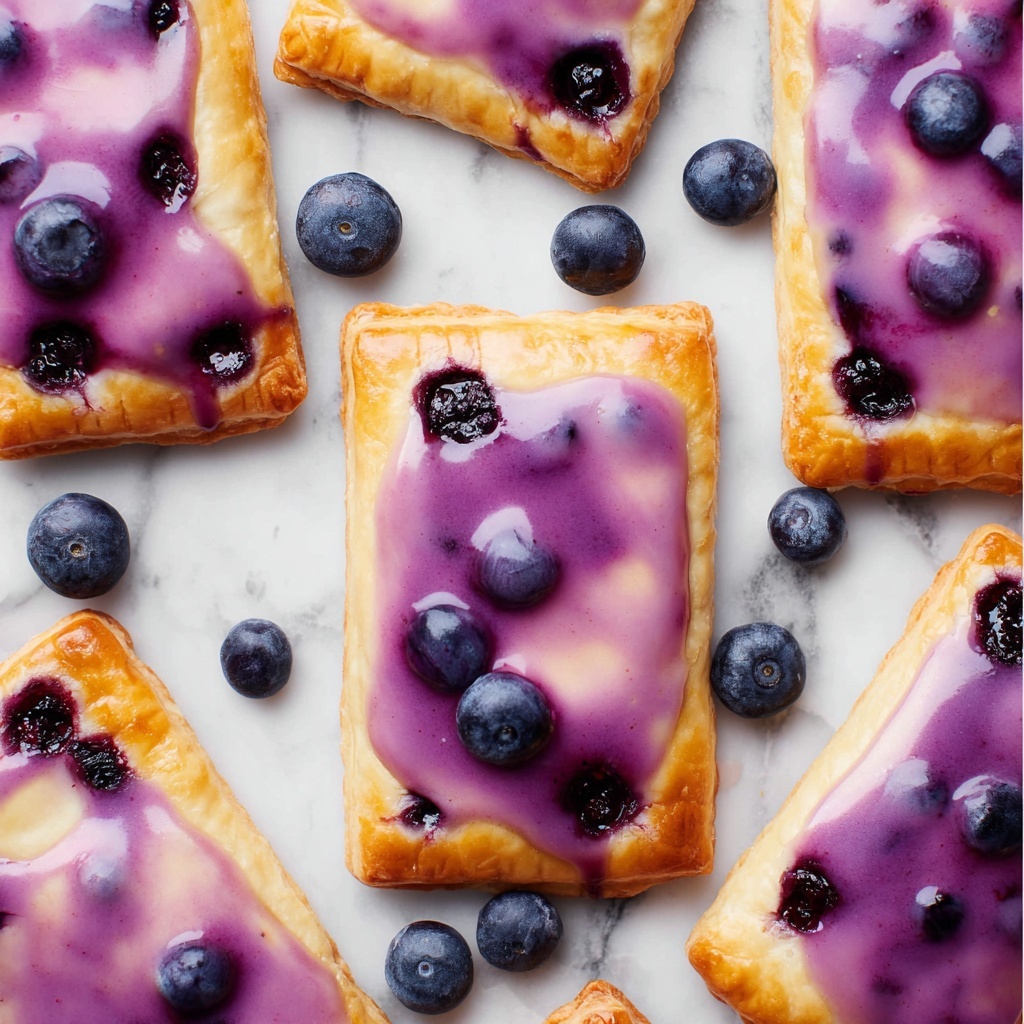
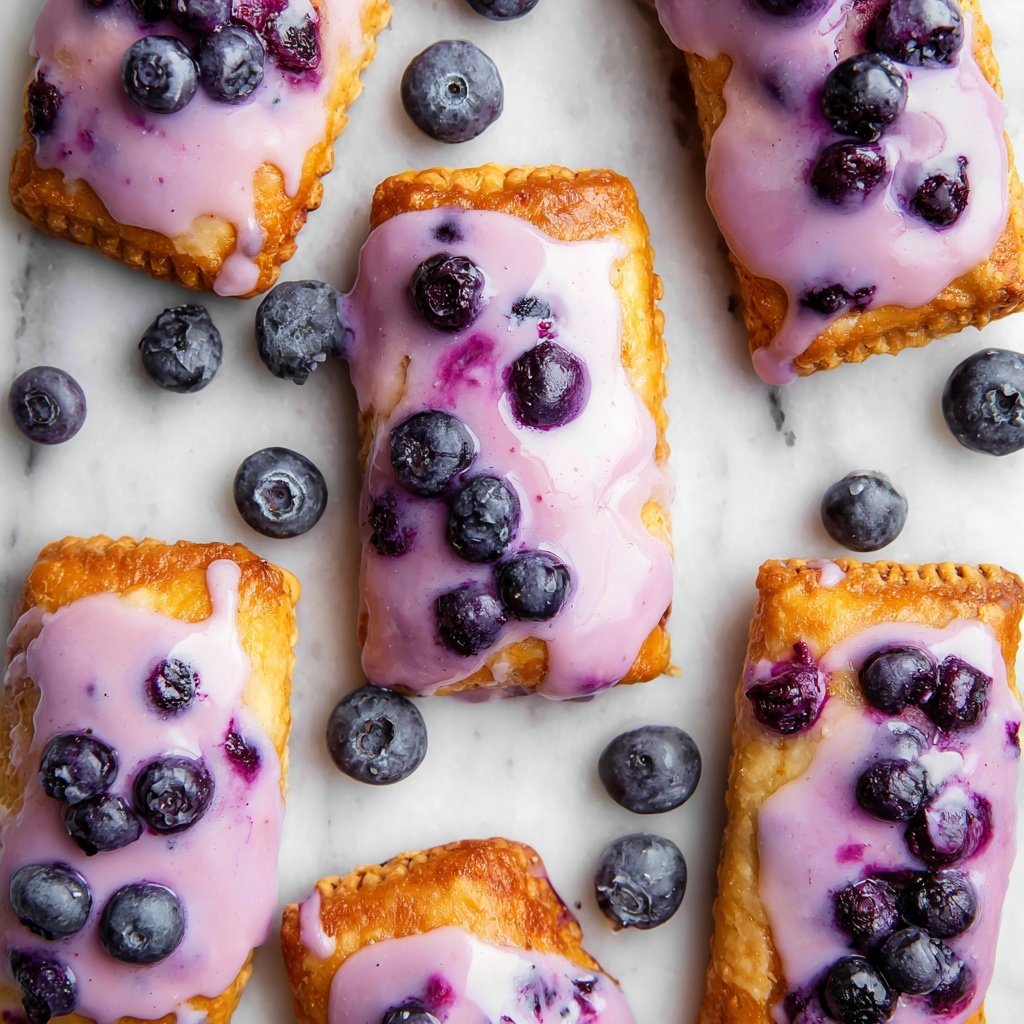
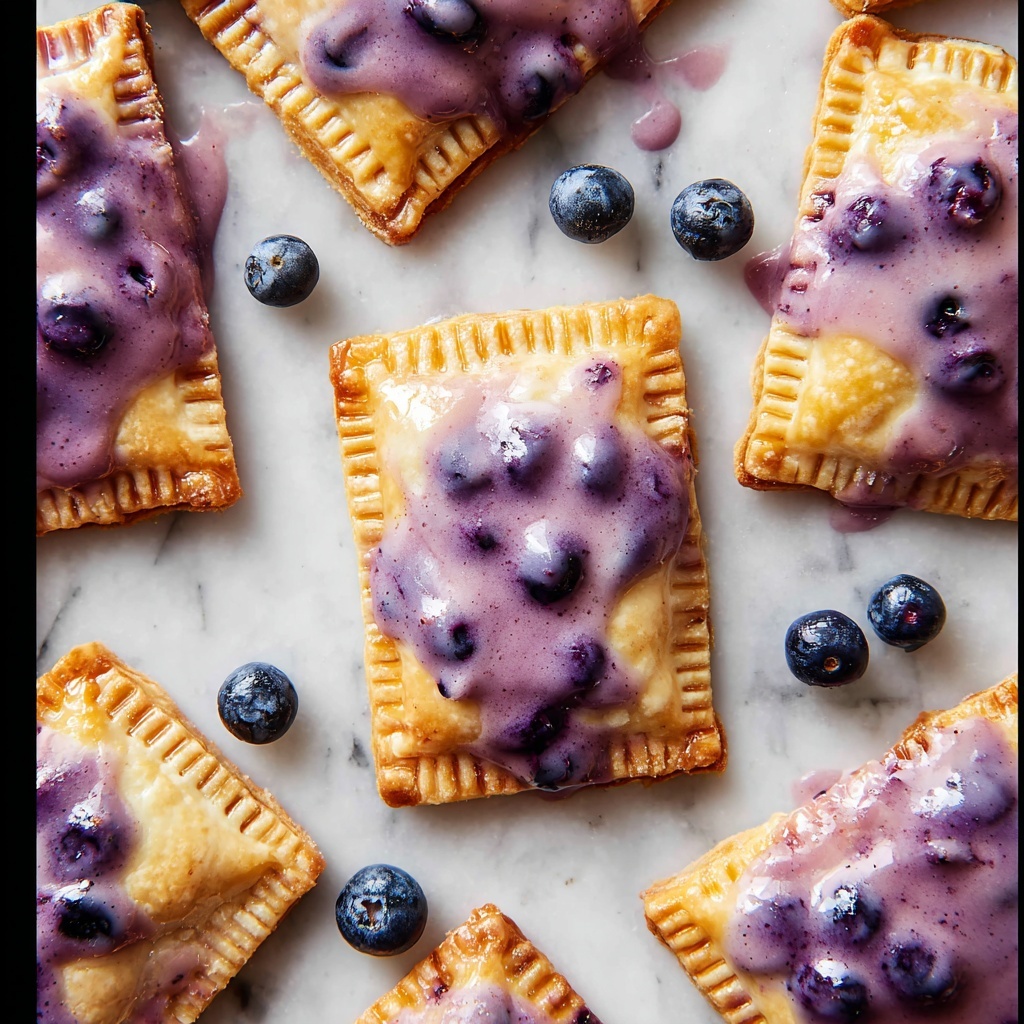
If you’ve ever dreamed of recreating a homemade breakfast treat that’s irresistibly flaky, sweet, and bursting with fruity goodness, this Blueberry Pop Tarts Recipe is your new best friend in the kitchen. Picture perfectly golden pastries filled with luscious blueberry preserves, topped with a delicate blueberry glaze that brings out every bit of vibrant flavor. These pop tarts are not only a nostalgic nod to a beloved childhood snack but also an impressive yet simple homemade delight that will have everyone asking for seconds.
Ingredients You’ll Need
The beauty of this Blueberry Pop Tarts Recipe lies in its simplicity. With just a handful of ingredients, each playing a key role, you’ll achieve that ideal balance of flaky crust, juicy filling, and sweet icing that makes these pop tarts so memorable.
- Refrigerated pie crusts (2 sheets): The buttery, flaky foundation that makes these pop tarts irresistibly tender and crispy.
- Blueberry preserves (½ cup + ¼ cup): Provides the vibrant, fruity filling and the decadent glaze topping.
- Cornstarch (2 teaspoons): Thickens the filling so it stays perfectly juicy without running all over your baking sheet.
- Large egg (1): Acts as the glue to seal the pop tarts and gives them a lovely golden sheen when baked.
- Powdered sugar (½ cup): The base for the smooth, sweet icing drizzled on top.
- Milk (1 tablespoon): Combines with the sugar and preserves to create the perfect glaze consistency.
- Pure vanilla extract (½ teaspoon): Adds a warm, subtle depth to the icing’s sweetness.
How to Make Blueberry Pop Tarts Recipe
Step 1: Prepare Your Workspace
Start by preheating your oven to 375 degrees Fahrenheit and lining a baking sheet with parchment paper. This step ensures your pop tarts bake evenly and won’t stick, making cleanup a breeze. Get everything within arm’s reach to make the process flow smoothly.
Step 2: Shape the Dough
Take one pie crust and gently roll it out on a clean surface, just enough to smooth it. Cut off the rounded edges to create a neat large rectangle. Then divide this rectangle into six equal smaller rectangles for your pop tarts. Repeat the same process with the second crust, ensuring you have matching tops and bottoms ready to fill.
Step 3: Make the Filling
In a small bowl, mix the blueberry preserves with cornstarch. This little trick thickens the preserves so your filling isn’t runny after baking. Spoon about 2-3 tablespoons of this mixture onto the center of half of your dough rectangles—be careful not to overload or the filling will leak out during baking.
Step 4: Seal the Pop Tarts
Whisk your egg and lightly brush the edges of the dough rectangles with the beaten egg. This helps the top and bottom crust stick together beautifully. Place a second dough rectangle on top and press firmly around the edges. Use a fork to crimp the edges together, trimming any excess dough for a clean finish.
Step 5: Prepare for Baking
Place the sealed pop tarts onto your baking sheet and brush the tops with a bit more of the egg wash. Then gently prick one or two holes into each pop tart with a toothpick or fork; this venting prevents any unexpected “pop” explosions while baking.
Step 6: Bake to Perfection
Bake the pop tarts in your preheated oven for 10 to 12 minutes. Keep an eye out for that delicate golden color on top – that’s when you know they’re done! Once baked, remove them and let cool slightly before moving on to glazing.
Step 7: Create the Icing
While your pop tarts bake, mix powdered sugar, ¼ cup blueberry preserves, milk, and vanilla extract until you have a smooth, luscious icing. This blueberry glaze is the final touch that will elevate your homemade treat to something truly special.
Step 8: Ice and Enjoy
Drizzle the icing over the cooled pop tarts and let it set for about 10 minutes. This step really locks in the sweetness and gives you that professional bakery look with a fruity glaze that’s bursting with flavor.
How to Serve Blueberry Pop Tarts Recipe
Garnishes
Sprinkle a little powdered sugar over your Blueberry Pop Tarts Recipe for an extra touch of sweetness and charm. Fresh blueberries or a pinch of lemon zest can also add a lovely fresh pop to the flavor and presentation, brightening up the plate and tantalizing your taste buds.
Side Dishes
Pair your pop tarts with a dollop of whipped cream or a scoop of vanilla ice cream for an indulgent brunch or dessert. They also play wonderfully alongside a simple cup of hot tea or freshly brewed coffee, allowing the blueberry flavors to shine alongside your favorite cozy beverage.
Creative Ways to Present
Slice your Blueberry Pop Tarts Recipe into triangles to create charming bite-sized treats for parties or brunches. Or stack them on a rustic wooden board lined with parchment paper for a dazzling spread. Another fun idea is to serve them in a breakfast box layered with fresh fruit and yogurt, turning this classic into a delightful on-the-go meal.
Make Ahead and Storage
Storing Leftovers
Your Blueberry Pop Tarts Recipe keeps beautifully when stored in an airtight container at room temperature for up to two days. This is perfect if you want to savor them fresh without worrying about added refrigerator moisture affecting the flaky crust.
Freezing
To enjoy these treats later, freeze the unglazed pop tarts in a single layer on a baking sheet, then transfer them to a freezer bag for up to two months. When you’re ready, simply bake them from frozen or let thaw before icing and serving for a fresh-baked taste anytime!
Reheating
Warm your pop tarts in a toaster oven or regular oven at 350 degrees Fahrenheit for 5-7 minutes to bring back that fresh-from-the-oven crispiness. Avoid microwaving as it can make the crust soggy, and you want every layer to stay perfectly flaky.
FAQs
Can I use homemade pie crust for this Blueberry Pop Tarts Recipe?
Absolutely! Homemade pie crust adds a fantastic personal touch and can enhance the flakiness even more. Just be sure it’s chilled well before cutting and assembling to make the process easier.
What can I substitute for blueberry preserves if needed?
If you don’t have blueberry preserves, other fruit preserves like raspberry or strawberry will work well, or you can use fresh blueberries thickened with a bit of cornstarch and sugar.
How do I prevent the filling from leaking during baking?
Using cornstarch to thicken the blueberry preserves is key. Also, don’t overfill the pop tarts and make sure to seal the edges firmly with egg wash and crimping with a fork.
Can I make these pop tarts vegan?
While this recipe uses egg and dairy, you can swap in a vegan pie crust, plant-based milk, and a flax egg to make a delicious vegan-friendly version that’s just as tasty.
How long do homemade Blueberry Pop Tarts stay fresh?
When stored properly, they’ll stay fresh at room temperature for about two days, making them great to prepare the day before for a quick breakfast or snack.
Final Thoughts
Making your own Blueberry Pop Tarts Recipe is such a joyful and rewarding kitchen adventure. From that flaky crust to the sweet blueberry filling and glossy glaze, every bite feels like a little celebration. Whether you’re treating yourself or sharing with loved ones, these homemade pop tarts are guaranteed to brighten your morning and bring smiles all around. So get ready to bake, drizzle, and savor—your new favorite recipe awaits!
Print
Blueberry Pop Tarts Recipe
- Prep Time: 15 minutes
- Cook Time: 10 minutes
- Total Time: 25 minutes
- Yield: 6 pop tarts
- Category: Breakfast, Snack
- Method: Baking
- Cuisine: American
Description
Enjoy homemade Blueberry Pop Tarts with flaky pie crust and a sweet blueberry preserves filling, topped with a delicious blueberry glaze. These delightful pastries are perfect for breakfast or a sweet snack, made easy with refrigerated pie crusts and simple ingredients.
Ingredients
Dough
- 2 9-inch refrigerated pie crusts (425 grams, 1 package)
Filling
- ½ cup blueberry preserves (170 grams)
- 2 teaspoons cornstarch (6 grams)
Egg Wash
- 1 large egg (50 grams)
Icing
- ½ cup powdered sugar (57 grams)
- ¼ cup blueberry preserves (85 grams)
- 1 tablespoon milk (14 grams)
- ½ teaspoon pure vanilla extract (2 grams)
Instructions
- Preheat oven: Preheat your oven to 375°F (190°C) and line a baking sheet with parchment paper. This will prepare your workspace for baking the pop tarts.
- Prepare dough rectangles: Roll out one pie crust on a clean countertop slightly to smooth it. Trim off the rounded edges to form a large rectangle, then cut this into 6 equal smaller rectangles. Repeat with the second pie crust to get 12 rectangles total.
- Mix filling: In a small bowl, combine the blueberry preserves and cornstarch until well mixed. Spoon 2-3 tablespoons of this mixture into the center of 6 dough rectangles, being careful not to overfill to avoid leakage when sealed.
- Seal pop tarts: Whisk the large egg in a small bowl then use a pastry brush to paint the edges of the dough rectangles with the egg wash. Place another dough rectangle on top of each filled one and gently press the edges together, then use a fork to firmly seal the edges. Trim off any excess dough for clean lines. Place each sealed pop tart onto the lined baking sheet and brush the tops with egg wash.
- Prick vents: Carefully prick one or two holes on the top of each pop tart with a toothpick or fork tines to allow steam to escape during baking and prevent blowouts.
- Bake: Bake the pop tarts in the preheated oven for 10 to 12 minutes, or until they turn a light golden color on top.
- Make icing: While pop tarts bake, mix together powdered sugar, additional blueberry preserves, milk, and vanilla extract in a small bowl until smooth and creamy.
- Glaze: Once the pop tarts are cool to the touch, drizzle the blueberry icing evenly over their tops. Allow the glaze to dry for about 10 minutes before serving to set properly.
Notes
- Do not overfill the pop tarts to avoid filling leakage during baking.
- The cornstarch helps thicken the preserves so the filling does not become too runny.
- Use egg wash to create a golden-brown and shiny crust.
- Pricking holes in the pastry vents steam and prevents the pop tarts from bursting.
- Allow the pop tarts to cool slightly before glazing to prevent icing from melting off.
