
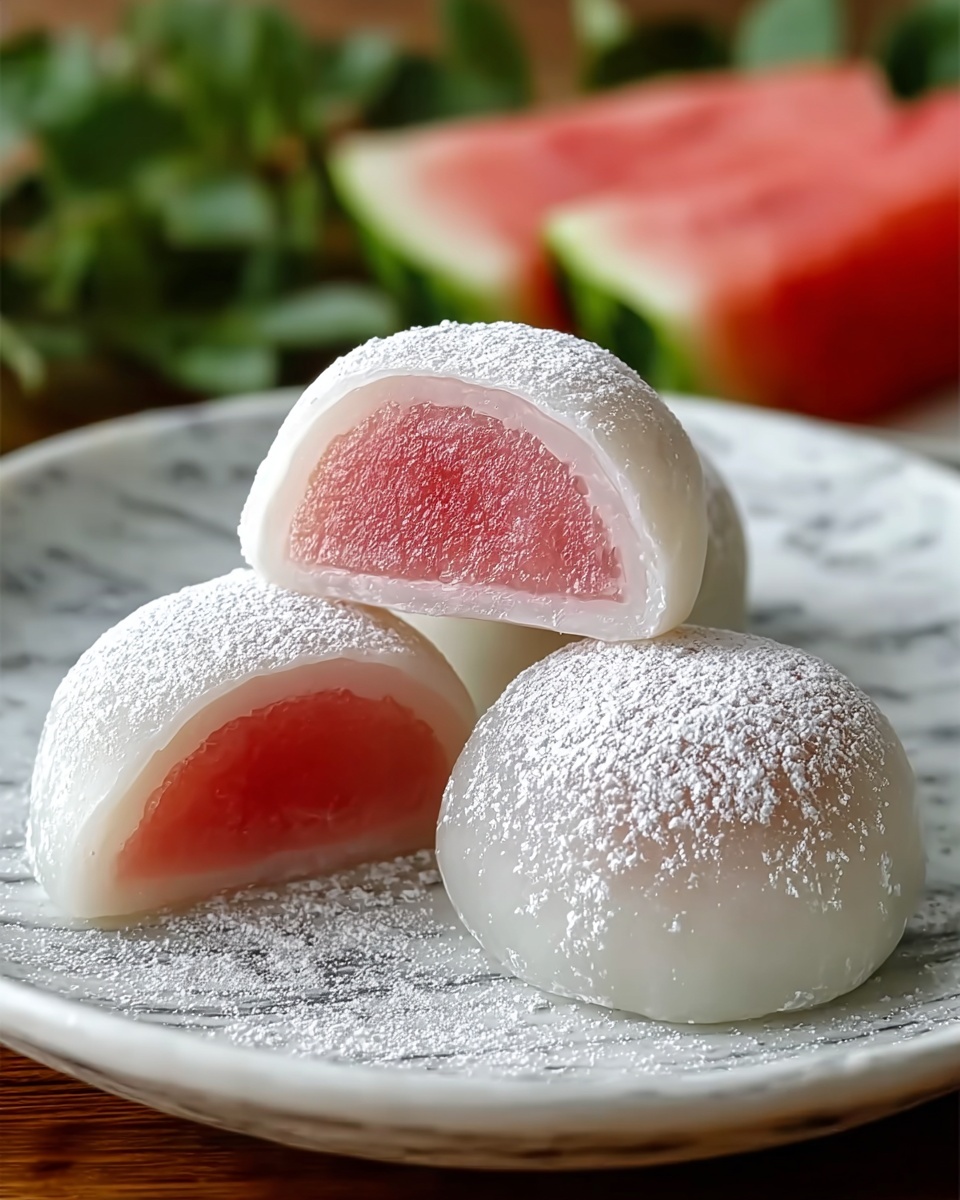
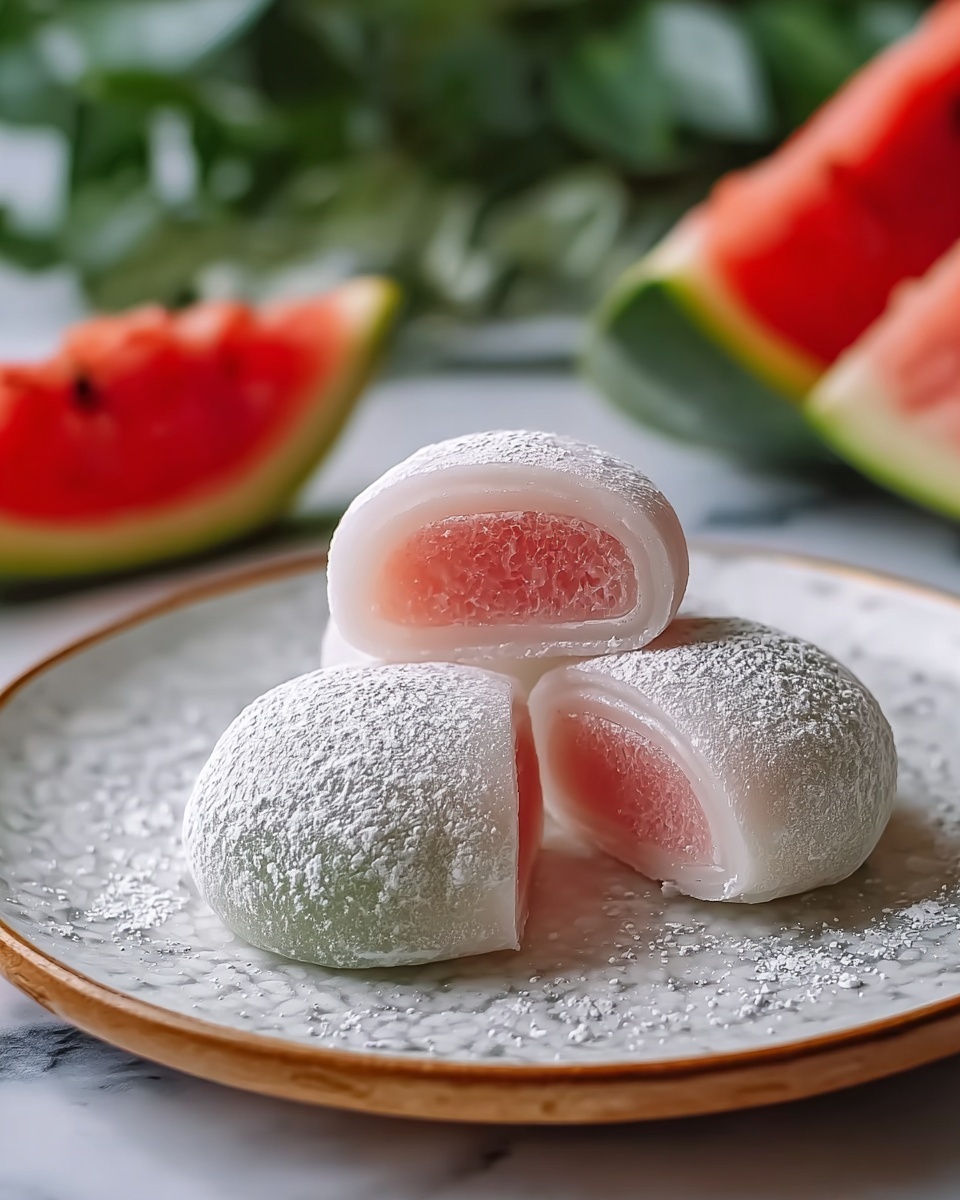
If you love discovering playful and refreshing treats, this Watermelon Mochi Recipe is about to become your new obsession. Imagine the chewy, pillowy texture of classic mochi fused beautifully with the sweet, summery flavor of fresh watermelon juice. It’s a delightful gluten-free dessert that looks as good as it tastes, with just a few simple ingredients transforming into an eye-catching and delicious snack. Whether you want a fun way to beat the heat or a charming dish to impress your guests, this recipe brings the magic of Japanese-inspired sweets right to your kitchen.
Ingredients You’ll Need
Each ingredient in this Watermelon Mochi Recipe plays a crucial role in delivering the perfect balance of flavor, texture, and vibrant color. These essentials are easy to find, and every one adds something special to your mochi experience.
- Glutinous rice flour (mochiko): The foundation of mochi’s signature chewiness, different from regular rice flour.
- Watermelon juice (strained): Freshly squeezed to bring natural sweetness and that unmistakable summery pink hue.
- Granulated sugar: Added just the right amount to enhance the sweetness without overpowering the watermelon.
- Cornstarch or potato starch: Essential for dusting and preventing your mochi from sticking during shaping.
- Optional pink and green food coloring: Beautifully intensify the watermelon look for a visually stunning dessert.
- Mini chocolate chips or black sesame seeds: Playful “seeds” that make your mochi look irresistibly like a slice of watermelon.
How to Make Watermelon Mochi Recipe
Step 1: Mix Your Mochi Batter
Start by whisking the glutinous rice flour, sugar, and freshly strained watermelon juice together in a microwave-safe bowl until smooth. If you’d like a richer pink color, add a drop of pink food coloring—it’s optional but definitely adds to the charm! This simple mixture is the heart of your mochi and sets the stage for that chewy, glossy texture.
Step 2: Microwave and Stir
Cover the bowl loosely with plastic wrap or a microwave-safe plate to keep moisture in, then microwave on high for 1 minute. Take it out and give it a good stir, then continue microwaving in 30-second bursts. Stir between each interval until your mochi becomes thick, glossy, and slightly translucent—it usually takes about 2 to 3 minutes total. This method creates that mouthwatering softness everyone loves.
Step 3: Cool and Shape the Mochi
Dust a clean surface or parchment paper generously with cornstarch to keep your mochi from sticking. Transfer the hot mochi onto the surface and allow it to cool enough to handle. Once it’s cool, dust your hands with starch and flatten the mochi into a thin layer. Cut it into fun shapes like circles or squares using a cookie cutter or knife. For that signature watermelon vibe, press mini chocolate chips or black sesame seeds into each piece as adorable seeds.
Step 4: Add the Finishing Touch
If you want to get extra creative and authentic-looking, tint a small amount of extra mochi dough green with food coloring. Wrap this green dough around the edges of your pink mochi after shaping to mimic a watermelon rind. This detail will have everyone amazed at your attention to presentation!
How to Serve Watermelon Mochi Recipe
Garnishes
A sprinkle of extra mini chocolate chips or black sesame seeds on the side adds texture and visual interest when serving your watermelon mochi recipe. Fresh watermelon wedges on the plate make a fresh, juicy accompaniment that complements the chewy mochi perfectly.
Side Dishes
Pair your mochi with a cup of jasmine or green tea for a lovely balance of flavors. For a fancier spread, fresh fruit salad or a scoop of coconut sorbet brings out the summery vibes while keeping the dessert light and refreshing.
Creative Ways to Present
Because this dessert is so vibrant and playful, try stacking the mochi pieces in a small pyramid or lining them up like watermelon slices on a wooden board. You can even present them in cute mini cupcake liners for a party-ready look. The green rind detail shines in any arrangement, making your table as fun as the treat itself.
Make Ahead and Storage
Storing Leftovers
Store any leftover watermelon mochi in an airtight container at room temperature for up to one day. Since mochi is best enjoyed fresh, aim to consume them within this timeframe to experience that perfect chewy texture.
Freezing
While freezing mochi can affect its texture, you can freeze these fresh watermelon mochi pieces individually by wrapping each in plastic wrap and placing them in a freezer-safe bag. Thaw them at room temperature before serving, though expect a slightly softer bite.
Reheating
If your mochi needs a quick refresh, gently microwave each piece for about 10-15 seconds to soften. Be careful not to overheat, as this can make them too sticky or tough.
FAQs
Can I use regular rice flour instead of glutinous rice flour?
Regular rice flour does not have the same sticky, stretchy properties needed for mochi. For the chewy texture central to this Watermelon Mochi Recipe, using glutinous rice flour (mochiko) is absolutely essential.
What if I don’t have fresh watermelon juice?
For the best flavor and color, fresh watermelon juice is recommended. However, if fresh juice isn’t available, you can use store-bought 100% watermelon juice without added sugars, though the taste might be slightly less vibrant.
Can I make this recipe without food coloring?
Yes! The natural pink of watermelon juice creates a lovely hue on its own. Food coloring is optional and purely for enhancing the visual appeal, especially if your watermelon juice is pale.
Are these mochi pieces gluten free?
Definitely! This recipe uses glutinous rice flour, which contains no gluten despite its name. It’s a great gluten-free dessert that everyone can enjoy.
How do I keep mochi from sticking to my hands?
Dust your hands with cornstarch or potato starch before handling the mochi. This simple step prevents sticking and makes shaping the mochi much easier and more enjoyable.
Final Thoughts
I truly hope you give this Watermelon Mochi Recipe a try because it brings so much sunshine and joy to your dessert table. It’s quick, fun to make, and impossible not to love—perfect for sharing with friends or savoring as your own little summer treat. Once you taste that chewy, fruity goodness, you’ll understand why this is one of my all-time favorites!
Print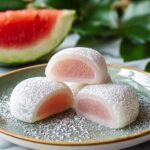
Watermelon Mochi Recipe
- Prep Time: 10 minutes
- Cook Time: 5 minutes
- Total Time: 15 minutes
- Yield: 8–10 pieces
- Category: Dessert
- Method: Microwave
- Cuisine: Japanese-inspired
- Diet: Gluten Free, Vegan
Description
Watermelon Mochi is a delightful Japanese-inspired dessert that combines the chewy texture of glutinous rice flour with the refreshing sweetness of watermelon juice. This gluten-free, vegan treat is perfect for summer and features a fun watermelon look with optional food coloring and mini chocolate chips or black sesame seeds mimicking watermelon seeds.
Ingredients
Mochi Dough
- 1 cup glutinous rice flour (mochiko)
- ¾ cup watermelon juice (strained)
- ¼ cup granulated sugar
- Cornstarch or potato starch for dusting
- Optional: pink and green food coloring for a watermelon look
- Optional: mini chocolate chips or black sesame seeds for “seeds”
Instructions
- Mix Ingredients: In a microwave-safe bowl, whisk together glutinous rice flour, sugar, and strained watermelon juice until the batter is smooth and consistent. Add a drop of pink food coloring if you desire a vibrant watermelon hue.
- Microwave Cooking: Cover the bowl loosely with plastic wrap or a microwave-safe plate and microwave on high for 1 minute. Stir the mixture thoroughly to ensure even cooking.
- Continue Cooking: Microwave the mochi batter in 30-second intervals, stirring in between each interval, until the mixture becomes thick, glossy, and slightly translucent. This should take about 2 to 3 minutes total depending on your microwave.
- Prepare Surface: Dust a clean surface or parchment paper generously with cornstarch or potato starch to prevent sticking.
- Shape Mochi: Transfer the cooked mochi onto the dusted surface and allow it to cool slightly. Once cool enough to handle, dust your hands with cornstarch and flatten the mochi into a thin layer. Cut the flattened mochi into circles or squares using a cookie cutter or knife.
- Decorate: For authentic watermelon aesthetics, optionally add mini chocolate chips or black sesame seeds to the mochi pieces to simulate watermelon seeds. Tint a small portion of extra mochi dough green and wrap it around the edges to mimic watermelon rind.
- Serve: Serve the watermelon mochi at room temperature for the best texture and flavor experience.
Notes
- Use glutinous rice flour (mochiko) specifically, not regular rice flour, to achieve the characteristic chewy texture.
- Use freshly strained watermelon juice for the best flavor and natural sweetness.
- Adjust the amount of sugar according to the sweetness of your watermelon juice.
- Store mochi in an airtight container at room temperature for up to 1 day.
- If refrigerating, bring mochi back to room temperature before serving to restore its soft texture.

