
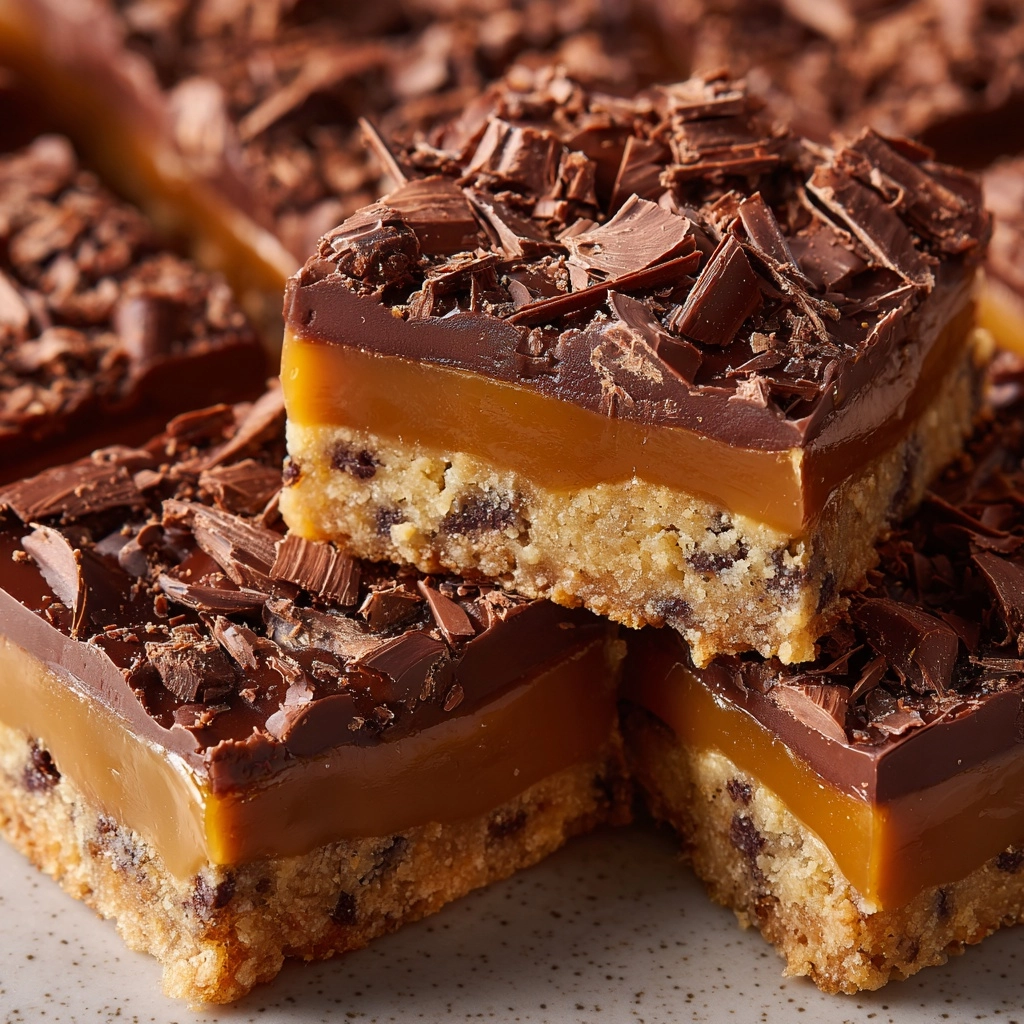
If you’ve ever dreamed of a dessert that brings together irresistible layers of gooey caramel, crumbly crust, rich chocolate, and that signature crunch of Butterfinger candy, then this Butterfinger Caramel Bars with Layers of Sweet Crunch and Chocolate Recipe is the one you need to try. It’s like a magic carpet ride for your taste buds, effortlessly combining textures and flavors into every bite, making it an instant favorite for family gatherings, potlucks, or just a sweet treat to brighten your day.
Ingredients You’ll Need
Each ingredient in this Butterfinger Caramel Bars with Layers of Sweet Crunch and Chocolate Recipe plays a vital role, whether it’s creating the perfect crust, giving gooey sweetness, or adding that beautiful chocolate layer. These simple staples come together to craft a dessert that’s far from ordinary.
- 1 cup unsalted butter (softened): Provides a rich, tender base and helps bind the crust perfectly.
- 1 cup brown sugar (packed): Adds caramel-like sweetness and moistness to the dough.
- 2 cups all-purpose flour: The sturdy foundation that holds all the layers together, lending a delightful crumbly texture.
- 1/2 teaspoon salt: Balances the sweetness and enhances all the flavors.
- 1 (14-ounce) can sweetened condensed milk: Delivers creamy sweetness that blends seamlessly with the caramel.
- 1/2 cup caramel sauce or bits (melted): Adds that luscious, sticky layer everyone craves.
- 1 teaspoon vanilla extract: Brings warmth and depth to the caramel mixture.
- 1 1/2 cups semi-sweet chocolate chips: For melty, irresistible chocolate pockets that perfectly complement the caramel.
- 1 cup chopped Butterfinger candy bars (about 4 regular bars): The star of the show, these crunchy bits add texture and unique flavor.
- Optional: flaky sea salt for topping: A sprinkle to heighten flavor contrast and elevate each bite.
How to Make Butterfinger Caramel Bars with Layers of Sweet Crunch and Chocolate Recipe
Step 1: Prepare the Crust
Preheat your oven to 350°F and line a 9×13-inch baking pan with parchment paper—this will make removing the bars a breeze. In a large bowl, cream the softened butter and brown sugar together until the mixture is light and fluffy; this aeration is key for that perfect crumbly texture. Stir in the all-purpose flour and salt until your dough becomes crumbly but cohesive. Reserve about one-third of the dough for later topping. Press the remaining dough firmly and evenly into the bottom of the prepared pan to create the crust, then bake for 12 to 15 minutes, just until the edges are lightly golden and smelling amazing.
Step 2: Mix the Caramel Layer
While the crust is baking, whisk together the sweetened condensed milk, melted caramel, and vanilla extract in a bowl until smooth. This mixture is your luscious, gooey middle that brings so much sweet satisfaction to the bars.
Step 3: Assemble the Layers
When the crust comes out of the oven, immediately pour the caramel mixture over the hot crust and spread it evenly so every bite gets some caramel goodness. Then sprinkle the semi-sweet chocolate chips generously on top, followed by crumbling the reserved dough over the chocolate layer to add that delightful crunchy topping. Pop it back into the oven for 20 to 22 minutes or until the top turns golden brown and bubbles with temptations.
Step 4: Add the Butterfinger Crunch
Right after taking the bars out of the oven, sprinkle the chopped Butterfinger pieces evenly over the warm top. Press them down gently so they stick as the bars cool completely—this step is where that extra layer of sweet crunch comes alive, giving these bars their signature magic touch.
How to Serve Butterfinger Caramel Bars with Layers of Sweet Crunch and Chocolate Recipe

Garnishes
A light dusting of flaky sea salt over the cooled bars instantly elevates the flavors, enhancing the sweet and salty dance happening in each bite. You can also drizzle a little melted chocolate or caramel sauce on top for an extra luscious finish.
Side Dishes
These bars are decadently rich on their own, but pairing them with a scoop of vanilla ice cream or a dollop of whipped cream brings a refreshing balance. A fresh berry compote also cuts through the sweetness beautifully, making it a delightful accompaniment.
Creative Ways to Present
For a party or potluck, serve the bars on a rustic wooden board surrounded by whole Butterfinger bars and some chocolate chunks to hint at what awaits. You can cut them into bite-sized squares and serve them on mini paper cups for an easy-to-grab treat. Wrapping individual bars in parchment paper tied with twine also makes for a charming homemade gift.
Make Ahead and Storage
Storing Leftovers
Once your Butterfinger Caramel Bars with Layers of Sweet Crunch and Chocolate Recipe has cooled completely, store the leftovers in an airtight container at room temperature. They’ll keep beautifully for up to 5 days, maintaining that perfect chewy-crunchy texture you love.
Freezing
Want to save some for later? Wrap individual bars tightly in plastic wrap and place them in a freezer-safe container or bag. When stored in the freezer, they’ll stay fresh for up to 3 months. Just thaw in the fridge before serving.
Reheating
To enjoy the bars warm, reheat in a microwave for 15 to 20 seconds or a few minutes in a low-temperature oven. Be careful not to overheat as the chocolate and caramel layers can melt too much, but a slight warm-up enhances all those gooey textures beautifully.
FAQs
Can I use store-bought caramel sauce or should I make my own?
Using store-bought caramel sauce is perfectly fine and saves time—it melts smoothly into the sweetened condensed milk mixture. If you enjoy homemade caramel, that works wonderfully too, but either way, the bars turn out amazing.
What if I don’t have Butterfinger candy bars? Are there any good substitutes?
If Butterfinger isn’t available, crushed toffee bits or chopped crunchy peanut butter cups are great alternatives that provide a similar sweet crunch and chocolatey contrast.
Why do the bars need to cool completely before cutting?
Allowing the bars to cool fully helps the layers set, which makes for cleaner, neater slices. Cutting too soon might cause the caramel and chocolate to smear or the crust to crumble unevenly.
Can I make these bars gluten-free?
Absolutely! Substitute the all-purpose flour with a gluten-free baking flour blend that measures cup-for-cup, and make sure your other ingredients like caramel sauce are gluten-free as well.
Is it necessary to chill the bars before slicing?
Chilling is highly recommended as it firms up the layers, reducing stickiness and making the bars much easier to cut into neat squares without the toppings sliding off.
Final Thoughts
I can’t wait for you to dive into this Butterfinger Caramel Bars with Layers of Sweet Crunch and Chocolate Recipe because it truly combines all the dessert dream elements—gooey caramel, chocolatey bliss, crumbly golden crust, and that irresistible crunch. Whether you’re treating yourself or sharing with loved ones, these bars are a guaranteed hit that will have everyone asking for seconds. Happy baking!
Print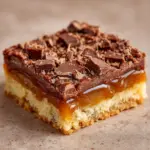
Butterfinger Caramel Bars with Layers of Sweet Crunch and Chocolate Recipe
- Prep Time: 15 minutes
- Cook Time: 35 minutes
- Total Time: 50 minutes
- Yield: 24 bars
- Category: Dessert
- Method: Baking
- Cuisine: American
- Diet: Vegetarian
Description
Butterfinger Caramel Bars with Layers of Sweet Crunch and Chocolate combine a buttery crust, gooey caramel, melty chocolate chips, and crunchy Butterfinger candy for an irresistible layered dessert that’s perfect for any occasion.
Ingredients
Crust
- 1 cup unsalted butter (softened)
- 1 cup brown sugar (packed)
- 2 cups all-purpose flour
- 1/2 teaspoon salt
Filling
- 1 (14-ounce) can sweetened condensed milk
- 1/2 cup caramel sauce or bits (melted)
- 1 teaspoon vanilla extract
Topping
- 1 1/2 cups semi-sweet chocolate chips
- 1 cup chopped Butterfinger candy bars (about 4 regular bars)
- optional: flaky sea salt for topping
Instructions
- Preheat and prepare the pan: Preheat your oven to 350°F and line a 9×13-inch baking pan with parchment paper to ensure easy removal of the bars later.
- Make the crust: In a large bowl, cream together the softened butter and brown sugar until the mixture is light and fluffy. Gradually mix in the all-purpose flour and salt until a crumbly dough forms.
- Press and bake crust: Take two-thirds of the dough mixture and press it evenly into the bottom of the prepared pan to form the crust. Bake this crust for 12 to 15 minutes or until it turns lightly golden.
- Prepare the caramel layer: While the crust bakes, combine the sweetened condensed milk, melted caramel sauce, and vanilla extract in a bowl. Stir until the mixture is smooth and well blended.
- Add caramel and toppings: Once the crust is out of the oven, pour the caramel mixture evenly over the hot crust. Sprinkle the semi-sweet chocolate chips on top of the caramel layer.
- Add remaining dough and bake: Crumble the remaining one-third of the dough mixture over the chocolate chips. Return the pan to the oven and bake for an additional 20 to 22 minutes or until the top is golden and bubbly.
- Finish with Butterfinger candy: Remove the bars from the oven and immediately sprinkle the chopped Butterfinger candy bars on top. Gently press them down so they stick to the bars.
- Cool and serve: Allow the bars to cool completely in the pan before slicing into 24 bars for clean cuts. Optionally sprinkle flaky sea salt on top before slicing for an added touch.
Notes
- For cleaner cuts, chill the bars for 1–2 hours before slicing.
- You can substitute toffee bits or crushed pretzels for added texture and flavor variations.
- Store the bars in an airtight container at room temperature for up to 5 days to keep them fresh.
