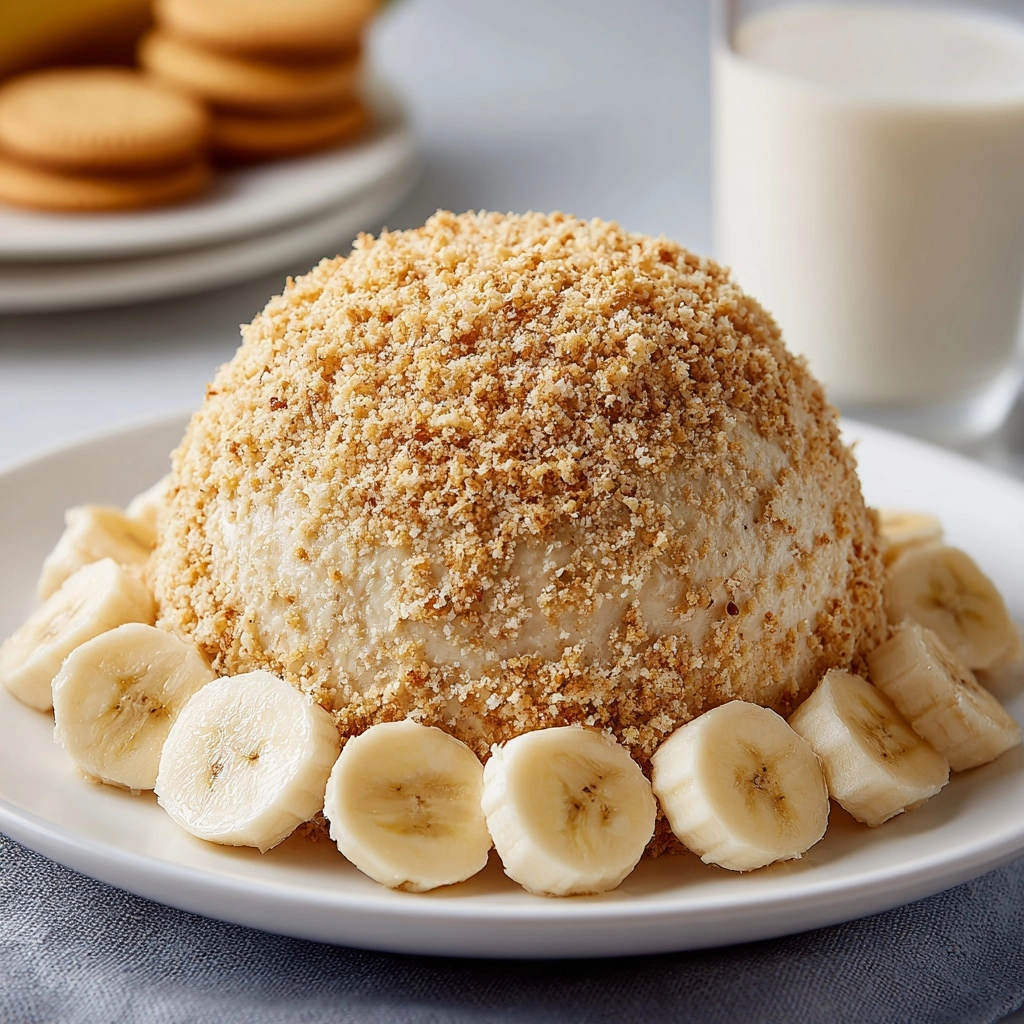
If you’re craving a no-fuss dessert that brings all the creamy, dreamy flavors of classic banana pudding into a fun and shareable form, the Banana Pudding Dessert Cheese Ball Recipe is going to be your new best friend. This delightful treat combines the smooth richness of cream cheese and butter with the sweet, nostalgic taste of banana cream pudding and vanilla wafers, resulting in a luscious, party-worthy dessert that’s as easy to make as it is to devour. Whether you’re bringing it to a potluck or simply want a unique way to enjoy banana pudding at home, this recipe has you covered with every bite bursting with flavor and texture.

Ingredients You’ll Need
Gathering your ingredients is a breeze for this recipe, and each one plays a crucial role in creating the perfect balance of creamy, sweet, and crunchy. From the smooth tang of cream cheese to the iconic crunch of vanilla wafers, these essentials come together in harmony to craft a dessert that tastes heavenly and looks irresistible.
- Cream cheese (8 oz, softened): Provides the creamy, tangy base and helps the cheese ball hold its shape.
- Unsalted butter (1/2 cup, softened): Adds richness and smoothness to the texture.
- Mashed ripe banana (1/2 cup, about 1 medium banana): Brings natural sweetness and authentic banana flavor.
- Instant banana cream pudding mix (3.4 oz, dry): Intensifies the banana taste and adds thickness to the mixture.
- Powdered sugar (1/2 cup): Sweetens evenly without graininess, keeping the texture smooth.
- Vanilla extract (1/2 tsp): Enhances the overall flavor with warm, comforting notes.
- Crushed vanilla wafer cookies (1/2 cup plus extra for coating): Provides that classic crunch and crunch coating to finish.
- Whole vanilla wafers or graham crackers: Perfect dippers to serve alongside your cheese ball.
How to Make Banana Pudding Dessert Cheese Ball Recipe
Step 1: Cream the Base Ingredients
Start by beating together the softened cream cheese and unsalted butter until the mixture is smooth and fluffy. This step is key for developing a light texture that will carry the banana pudding flavors beautifully.
Step 2: Add Banana and Pudding Mix
Next, incorporate the mashed banana, dry banana cream pudding mix, powdered sugar, and vanilla extract into your creamed base. Beat everything together until it’s completely smooth and well combined—every bite should have that luscious banana flavor shining through.
Step 3: Fold in the Crunch
Gently fold in the crushed vanilla wafer cookies. These add delightful texture contrast, giving the cheese ball a little surprise crunch that pairs perfectly with the creamy filling.
Step 4: Chill and Shape
Cover your mixture and refrigerate it for 1 to 2 hours. This chilling step firms up the mixture so it’s easier to shape without being messy. Once firm, roll the mixture into a ball with your hands.
Step 5: Coat the Cheese Ball
Finally, roll your cheese ball in additional crushed vanilla wafers to coat its exterior evenly. This step not only adds great texture but also makes it visually irresistible. Wrap it in plastic wrap and keep it refrigerated until you’re ready to serve.
How to Serve Banana Pudding Dessert Cheese Ball Recipe

Garnishes
For garnishes, think about enhancing that classic banana pudding vibe: a sprinkle of extra crushed vanilla wafers, a drizzle of caramel sauce, or even a handful of white chocolate chips can elevate the presentation and taste. Fresh banana slices nearby can also add a refreshing contrast to each bite.
Side Dishes
This Banana Pudding Dessert Cheese Ball Recipe pairs wonderfully with crispy vanilla wafers or graham crackers, which serve as the perfect vehicle for scooping up the soft, creamy cheese ball. For a healthier option, slices of fresh apples or pear complement the sweet richness nicely.
Creative Ways to Present
You can get playful at your next gathering by serving this cheese ball on a pretty platter surrounded by colorful fruits or edible flowers. Another fun idea is to portion it into mini cheese ball bites, rolled and coated individually for easy grab-and-go snacking. No matter the presentation, it’s sure to be the star of your dessert spread.
Make Ahead and Storage
Storing Leftovers
Once you’ve enjoyed your Banana Pudding Dessert Cheese Ball Recipe, you can store any leftovers in an airtight container in the refrigerator. It stays delicious and fresh for up to 4 days, so there’s no rush to finish it all at once (though it’s hard not to!).
Freezing
If you want to extend its shelf life, you can freeze the cheese ball wrapped tightly in plastic wrap and then foil for up to 1 month. Thaw it overnight in the fridge before serving to retain its creamy texture and flavor.
Reheating
No reheating needed here; this is best enjoyed chilled straight from the fridge right after thawing. Keeping it cold ensures the perfect creaminess and the right consistency for scooping and dipping.
FAQs
Can I use fresh banana instead of mashed banana?
Fresh banana is recommended, but make sure it’s ripe and mashed well to incorporate evenly in the mixture. Avoid sliced chunks to maintain the smooth texture of the cheese ball.
Is it possible to make this recipe vegan?
This recipe relies heavily on cream cheese and butter, so substitutions like vegan cream cheese and plant-based margarine would be necessary. The pudding mix might need to be checked for dairy or egg ingredients, but it’s definitely possible with some ingredient swapping.
How long should the cheese ball chill before serving?
A minimum of 1 to 2 hours of chilling is best so the mixture firms up nicely and shapes well. Chilling also allows the flavors to meld, making every bite more delicious.
Can I add nuts or chocolate chips?
Absolutely! Folding in mini white chocolate chips or chopped pecans adds wonderful texture and a pleasant flavor contrast to the Banana Pudding Dessert Cheese Ball Recipe.
What are some alternate dipping options besides vanilla wafers?
Try graham crackers, apple slices, pear slices, or even pretzel sticks to add a salty-sweet balance to the creamy dessert cheese ball experience.
Final Thoughts
If you’re ready for a dessert that’s simple to make yet full of nostalgic, creamy banana goodness, the Banana Pudding Dessert Cheese Ball Recipe will not let you down. It’s a playful twist on a beloved classic that’s perfect for sharing with friends and family. Trust me, once you try it, this no-bake wonder will be a staple in your dessert rotation and a guaranteed crowd-pleaser every time.
Print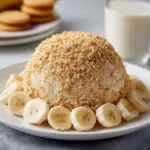
Banana Pudding Dessert Cheese Ball Recipe
- Prep Time: 15 minutes
- Cook Time: 0 minutes
- Total Time: 1 hour 15 minutes
- Yield: 10 servings
- Category: Dessert, Appetizer
- Method: No-Cook
- Cuisine: American
- Diet: Vegetarian
Description
This delightful Banana Pudding Dessert Cheese Ball combines creamy cream cheese, ripe bananas, and instant banana pudding mix to create a no-bake sweet treat perfect for parties or casual gatherings. Rolled in crushed vanilla wafers, this cheese ball offers a luscious banana cream flavor with a crunchy exterior, making it an irresistible dessert or appetizer option.
Ingredients
Base Mixture
- 1 (8 oz) package cream cheese, softened
- 1/2 cup unsalted butter, softened
- 1/2 cup mashed ripe banana (about 1 medium banana)
- 1 (3.4 oz) package instant banana cream pudding mix, dry
- 1/2 cup powdered sugar
- 1/2 tsp vanilla extract
Mix-Ins and Coating
- 1/2 cup crushed vanilla wafer cookies (plus more for coating)
To Serve
- Whole vanilla wafers or graham crackers
Instructions
- Prepare the cream cheese base: In a large mixing bowl, beat the softened cream cheese and butter together until the mixture is smooth and fluffy, ensuring a creamy base for the cheese ball.
- Add flavorings and mix-ins: Incorporate the mashed ripe banana, dry instant banana cream pudding mix, powdered sugar, and vanilla extract. Beat the mixture until fully combined and smooth to infuse the banana pudding flavor evenly.
- Fold in crushed wafers: Gently fold in the crushed vanilla wafer cookies, which add texture and subtle crunch throughout the cheese ball mixture.
- Chill the mixture: Cover the bowl and refrigerate the mixture for 1 to 2 hours, or until it firms up sufficiently to be shaped.
- Shape and coat the cheese ball: Once chilled, form the mixture into a firm ball with your hands. Roll the cheese ball in additional crushed vanilla wafers to evenly coat the exterior and add a delightful crunch.
- Store and serve: Wrap the coated cheese ball tightly in plastic wrap and chill until ready to serve. Present with whole vanilla wafers, graham crackers, or fresh fruit slices for dipping.
Notes
- For extra texture and flavor, try folding in mini white chocolate chips or chopped pecans before chilling.
- This cheese ball can be made a day ahead—keep refrigerated until serving to maintain freshness.
- Serve chilled to enjoy the best consistency and flavor.


