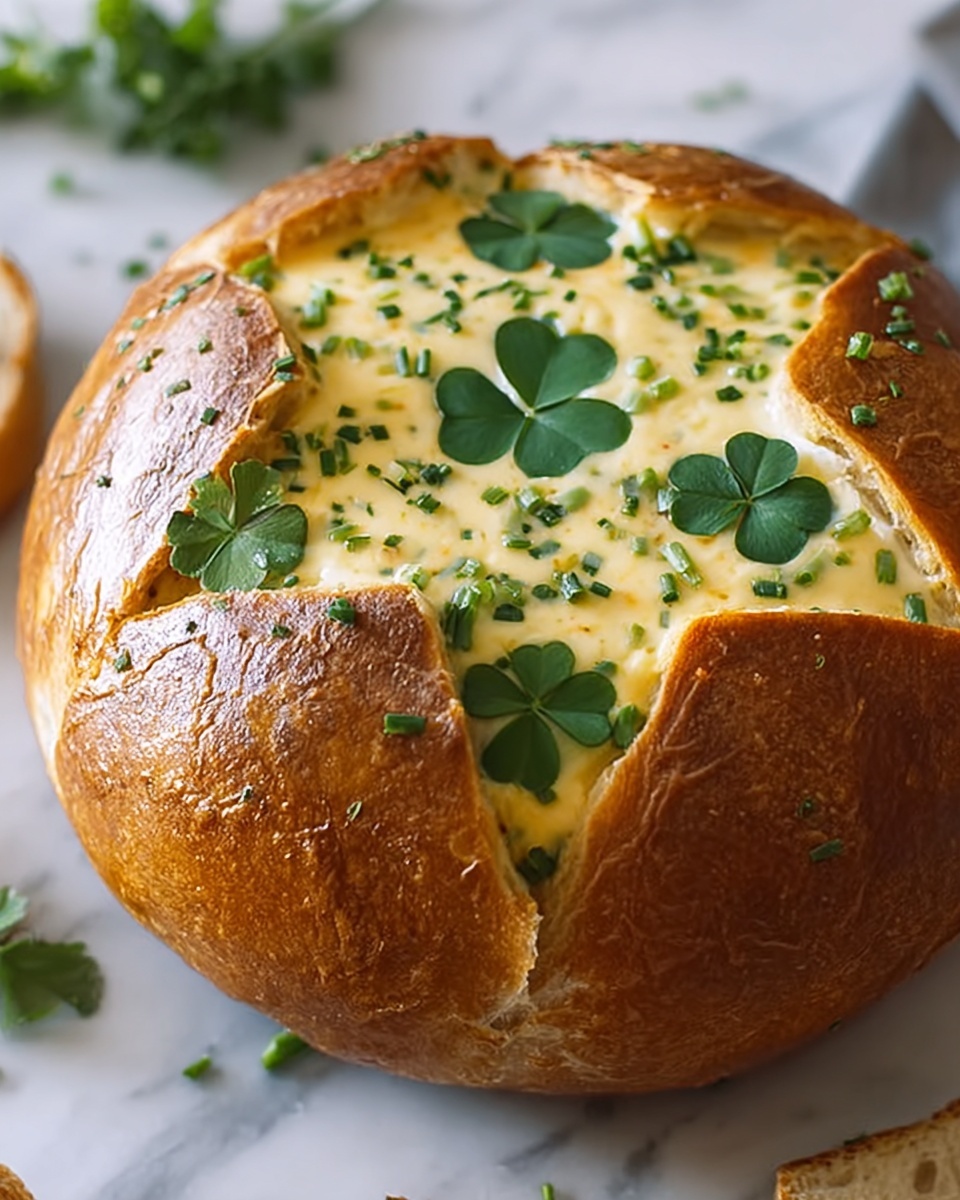
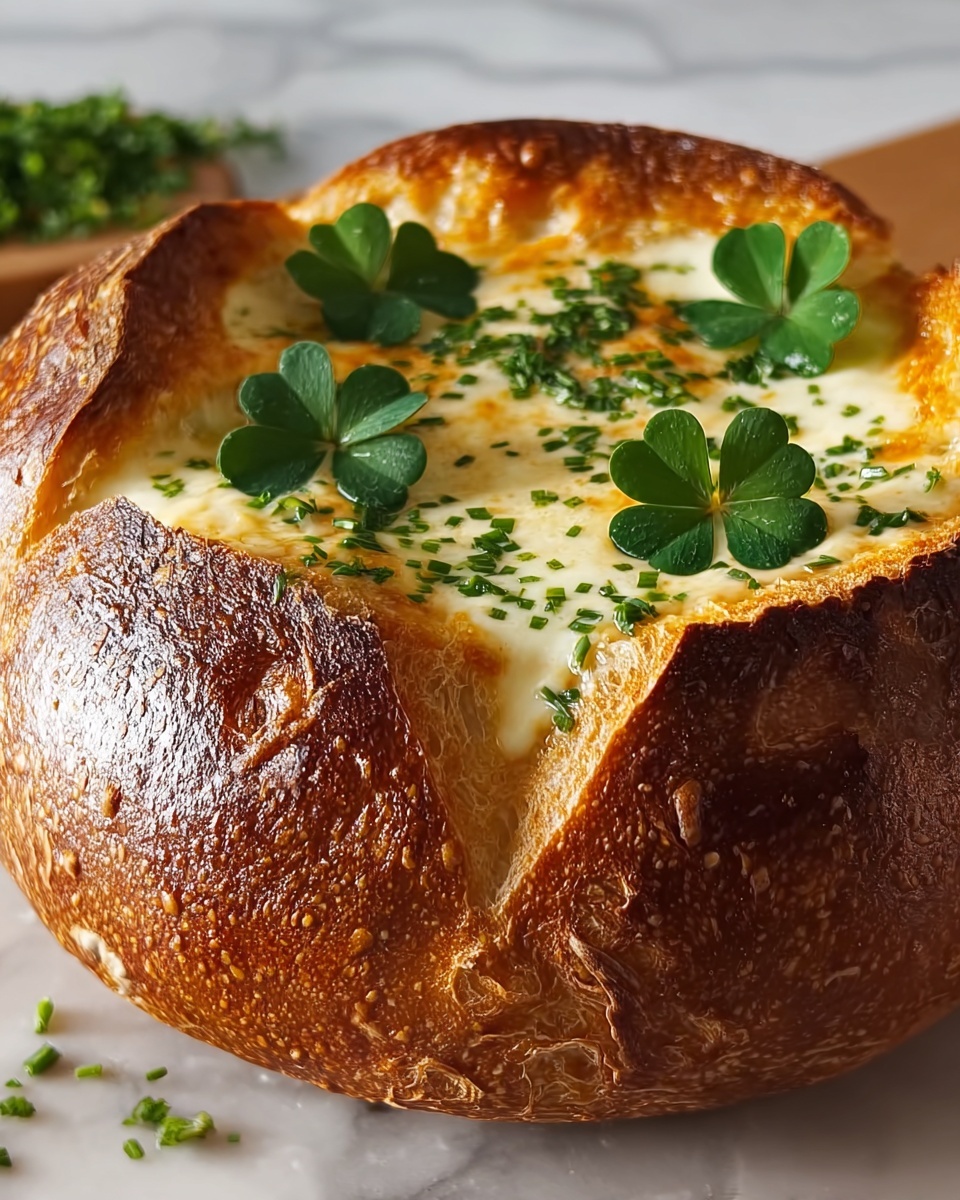
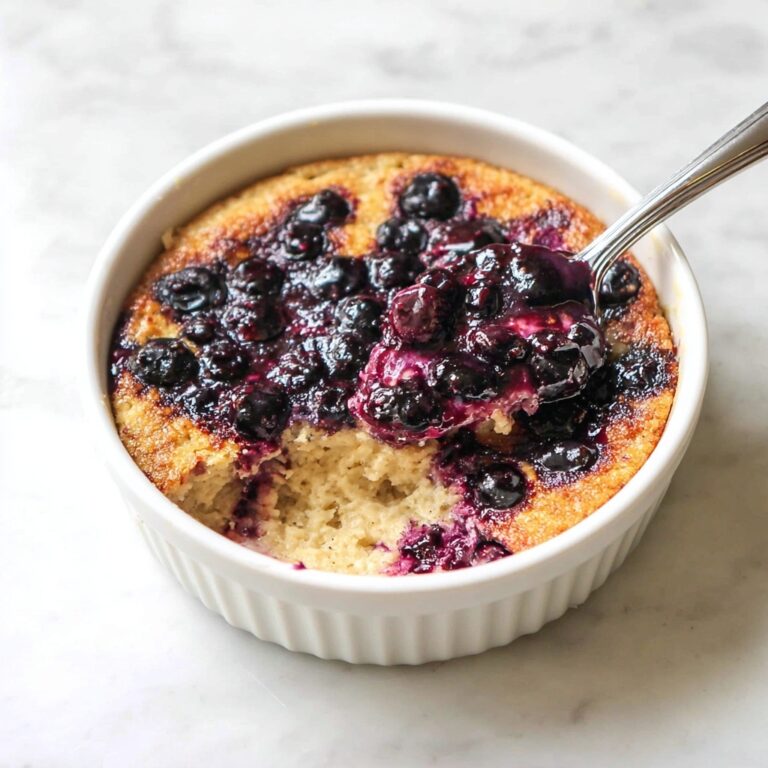
If you are ready to try something truly delightful and visually charming, this Clover-Shaped Bread Bowl Recipe is a showstopper that will win hearts at your next meal. Imagine warm, golden-brown bread with a irresistibly soft inside, shaped like a clover that adds a touch of whimsy to the table. It’s not only about the look; this bread bowl holds soups, dips, or stews perfectly, making each serving a cozy and fun experience. Whether for a festive gathering or a special family meal, this recipe transforms simple ingredients into a creative centerpiece everyone will love.
Ingredients You’ll Need
Ingredients You’ll Need
This recipe shines because it relies on straightforward ingredients that work harmoniously to create that perfect texture and flavor. Each component plays a crucial role, whether it’s the yeast bringing the dough to life or the olive oil lending subtle richness and softness to the bread.
- 2 cups warm water (110°F): Warm water activates the yeast, ensuring your dough rises beautifully without being too hot to kill it.
- 2 1/4 teaspoons active dry yeast (1 packet): The essential leavening agent that helps the bread grow light and fluffy.
- 1 tablespoon sugar: A touch of sweetness that also feeds the yeast to kickstart fermentation.
- 3 tablespoons olive oil: Adds tenderness and a subtle fruitiness to the dough, making the crumb soft and moist.
- 1 teaspoon salt: Balances flavors and strengthens the dough’s gluten structure.
- 4 cups all-purpose flour (plus extra for dusting): The body of the bread, providing structure and chewiness; dusting prevents sticking.
- 1 tablespoon melted butter (for brushing): Gives the bread a golden, shiny crust and extra flavor once baked.
How to Make Clover-Shaped Bread Bowl Recipe
Step 1: Prepare the Yeast Mixture
Start by dissolving the sugar in the warm water, then sprinkle the active dry yeast over the surface. Let it sit for about 5 to 10 minutes until it becomes foamy and bubbly. This step is critical as it confirms that your yeast is active and ready to work magic in the dough.
Step 2: Mix and Knead the Dough
In a large bowl, combine the flour and salt. Slowly add the yeast mixture and olive oil while stirring to bring the dough together. Once it forms a shaggy ball, turn it onto a floured surface and knead for about 8 to 10 minutes until smooth and elastic. Kneading develops the gluten, giving the bread its perfect chew.
Step 3: First Rise
Place the dough in a lightly oiled bowl, cover it with a kitchen towel or plastic wrap, and leave it in a warm spot to rise for about 1 to 1.5 hours, or until it has doubled in size. This first rise is when the dough develops flavor and volume.
Step 4: Shape the Clover
Once risen, punch down the dough and divide it into six equal portions. Roll each into a ball. Arrange five balls in a circular clover pattern on a parchment-lined baking sheet and place the sixth ball in the center. Gently press the edges so they stick together, forming a charming clover shape that will come to life as it bakes.
Step 5: Second Rise and Bake
Cover the shaped dough with a towel and let it rise again for 30 minutes to get puffy. Preheat your oven to 375°F (190°C). Before baking, brush the top with melted butter to ensure a golden crust. Bake for about 25 minutes until the bread is beautifully golden and sounds hollow when tapped. Let it cool slightly before serving.
How to Serve Clover-Shaped Bread Bowl Recipe
Garnishes
Brushing the bread with melted butter fresh out of the oven is an excellent start, but you can also sprinkle it lightly with sea salt or chopped herbs like rosemary or thyme for a lovely aromatic touch. These garnishes add depth and invite your guests to dig in immediately.
Side Dishes
This bread bowl is perfect for holding thick, comforting fillings like hearty chili, creamy tomato soup, or even a rich fondue. Pair it with a fresh garden salad or roasted veggies to balance the meal with vibrant textures and flavors. The bread itself acts as both a vessel and a delicious side.
Creative Ways to Present
Why stop at just a plain clover? Consider making multiple smaller clover bread bowls arranged as a centerpiece on a platter, each holding different dips or spreads. You can also fill the center ball with a cheese ball or herb butter for a delightful surprise that complements the bread wonderfully.
Make Ahead and Storage
Storing Leftovers
To keep your clover-shaped bread fresh, wrap it tightly in plastic wrap or store it in an airtight container at room temperature for up to two days. This prevents it from drying out while maintaining its softness for later enjoyment.
Freezing
If you want to enjoy this bread bowl later, freeze it after the first bake. Wrap it securely in foil and place it inside a freezer bag to prevent freezer burn. It will keep well for up to a month, making it a convenient option for planned meals or unexpected guests.
Reheating
When you’re ready to enjoy your clover-shaped bread bowl again, thaw it at room temperature and then warm it in a preheated oven at 350°F (175°C) for 10 to 15 minutes. This will refresh its crust and soften the inside, almost like it’s straight from the oven again.
FAQs
Can I make the clover-shaped bread dough without olive oil?
Olive oil adds moisture and tenderness, but if you don’t have it on hand, you can substitute with melted butter or another neutral oil like vegetable oil. The texture might be slightly different but still delicious.
How do I know if the yeast is still good?
If your yeast foams and bubbles within 10 minutes of being mixed with warm water and sugar, it’s active and good to use. No foam usually means the yeast is dead or old, so it’s best to use a fresh packet.
Can I add herbs or spices directly into the dough?
Absolutely! Adding finely chopped rosemary, garlic powder, or even a pinch of chili flakes to the dough can enhance the flavor and make your clover-shaped bread bowl even more special and personalized.
What other liquids can I use besides water?
You can replace some or all the water with milk for a richer dough. Milk will give a softer crust and slightly more tender crumb, perfect if you’re looking for a more buttery texture without adding actual butter.
How do I prevent the bread from sticking to the pan?
Using a baking sheet lined with parchment paper or a non-stick silicone mat is your best bet to prevent sticking. You can also lightly grease the pan if parchment isn’t available.
Final Thoughts
There’s something so joyful about pulling apart a warm, homemade clover-shaped bread bowl that you just can’t get from store-bought loaves. Whether you’re filling it with your favorite soup or serving it as a centerpiece, this Clover-Shaped Bread Bowl Recipe is a wonderful way to bring creativity and comfort to your table. Give it a try—you’ll be amazed at how a few simple ingredients and a bit of shaping can turn dinner into an experience.
Print
Clover-Shaped Bread Bowl Recipe
- Prep Time: 20 minutes
- Cook Time: 25 minutes
- Total Time: 1 hour 45 minutes
- Yield: 6 servings
- Category: Bread
- Method: Baking
- Cuisine: American
Description
This Clover-Shaped Bread Bowl recipe creates a delightful and visually appealing bread perfect for serving soups, dips, or as a centerpiece for any meal. Soft, fluffy, and golden-brown, this bread bowl is crafted using warm water, active dry yeast, olive oil, and all-purpose flour, shaped into a charming clover design and brushed with melted butter for a beautiful finish.
Ingredients
For the Dough
- 2 cups warm water (110°F)
- 2 1/4 teaspoons active dry yeast (1 packet)
- 1 tablespoon sugar
- 3 tablespoons olive oil
- 1 teaspoon salt
- 4 cups all-purpose flour (plus extra for dusting)
For Brushing
- 1 tablespoon melted butter
Instructions
- Activate the Yeast: In a large mixing bowl, combine the warm water (110°F), active dry yeast, and sugar. Stir gently and let it sit for about 5-10 minutes until the mixture becomes frothy, indicating the yeast is active.
- Prepare the Dough: Add the olive oil, salt, and 2 cups of the all-purpose flour to the yeast mixture. Stir to combine. Gradually add the remaining flour, 1 cup at a time, mixing until a dough forms. The dough should be slightly sticky but manageable.
- Knead the Dough: Dust a clean surface with flour and knead the dough for about 8-10 minutes until smooth and elastic. Add small amounts of flour as needed to prevent sticking, but avoid adding too much to keep the dough soft.
- First Rise: Place the dough in a lightly oiled bowl, cover it with a clean kitchen towel or plastic wrap, and let it rise in a warm, draft-free area for about 1 hour, or until it has doubled in size.
- Shape the Clover: Punch down the risen dough and divide it into six equal portions. Shape each portion into a ball. Arrange 5 balls in a circular pattern touching each other to form the petals, with one ball placed in the center as the core, creating the clover shape. Gently press them together.
- Second Rise: Cover the shaped dough with a towel and let it rise again for about 20-30 minutes, until puffy.
- Bake the Bread: Preheat the oven to 375°F (190°C). Brush the top of the dough with melted butter for a golden crust. Bake on a parchment-lined baking sheet for 20-25 minutes, or until the bread is golden brown and sounds hollow when tapped.
- Cool and Serve: Remove the bread from the oven and let it cool slightly on a wire rack. Serve warm as a bread bowl for soups or dips, or enjoy on its own.
Notes
- Use warm water (around 110°F) to properly activate the yeast without killing it.
- Be careful not to add too much flour while kneading to keep the bread soft.
- For a richer flavor, brush the bread with melted butter immediately after baking as well.
- You can customize this bread bowl by adding herbs or garlic powder to the dough.
- This bread is best enjoyed fresh on the day it’s baked but can be stored in an airtight container for up to 2 days.


